Want to capture the highlights or game skills in Minecraft for sharing online? This post shares a handy solution that can record Minecraft gameplay in high quality with no lag.
Download the recommended WonderFox HD Screen Recorder here in advance and let's see how to use it to record Minecraft gameplay efficiently.
https://www.videoconverterfactory.com/download/hd-video-converter-pro.exehttps://www.videoconverterfactory.com/download/hd-video-converter-pro.exe
Minecraft is a sandbox video game made public in 2009. In Minecraft, we can explore a virtual 3D world consisting of different blocks such as searching for objects to build new things and fight with mobs (computer-controlled foes). Unlike most video gameplays, Minecraft allows us to control the game to the utmost and create a unique new world by ourselves. It’s still popular worldwide today. We can have a lot of fun in this game and many players look for a good Minecraft screen recorder to save the wonderful gameplay moments. Based on my own experience, I’d recommend WonderFox HD Video Converter Factory Pro. It’s a brilliant solution for the task of recording gameplay on a PC. Next, I will show you how to record Minecraft gameplay with the software.
WonderFox HD Video Converter Factory Pro makes it easy than ever to record Minecraft with high video quality. It can record your gameplay at 60fps in MP4 with audio included. No lag and watermarks. Try it now!
As one of the best gameplay recording software for PC, WonderFox HD Video Converter Factory Pro offers the simplest way to record any gameplay in good quality. It features a specialized game recording mode that allows you to record games in 1080p/4K 60 fps. It also supports recording the whole screen or a selected part of the screen. Meanwhile, this software can record the sound in Minecraft and your mic voice at the same time.
Now, free downloadfree download the Minecraft screen recorder and get started with the following steps.
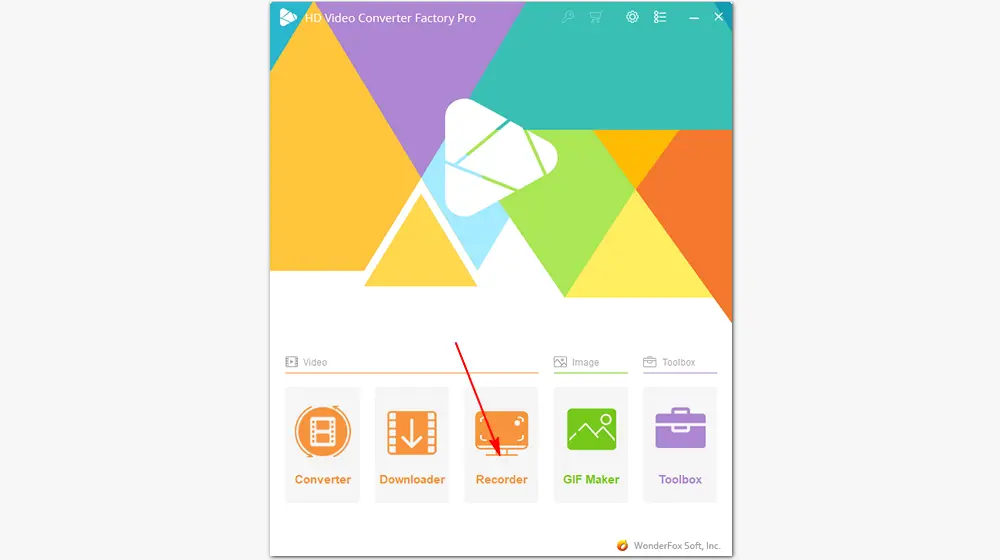
Run HD Video Converter Factory Pro after you install it on your computer. There are five function parts on the home page. Here, we select Recorder.
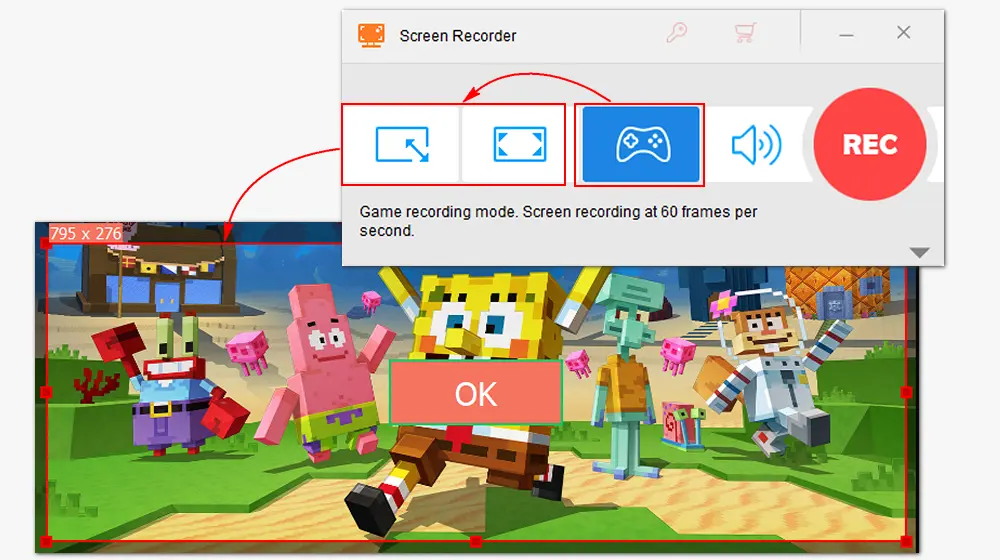
On the top side of the Screen Recorder, click the gamepad-shaped icon for recording gameplay. Then go to one of the left two parts to choose your recording area. The first one is custom mode and the second is full-screen. You can also drag the borders to adjust the region. When you’re done, press OK to confirm your settings.
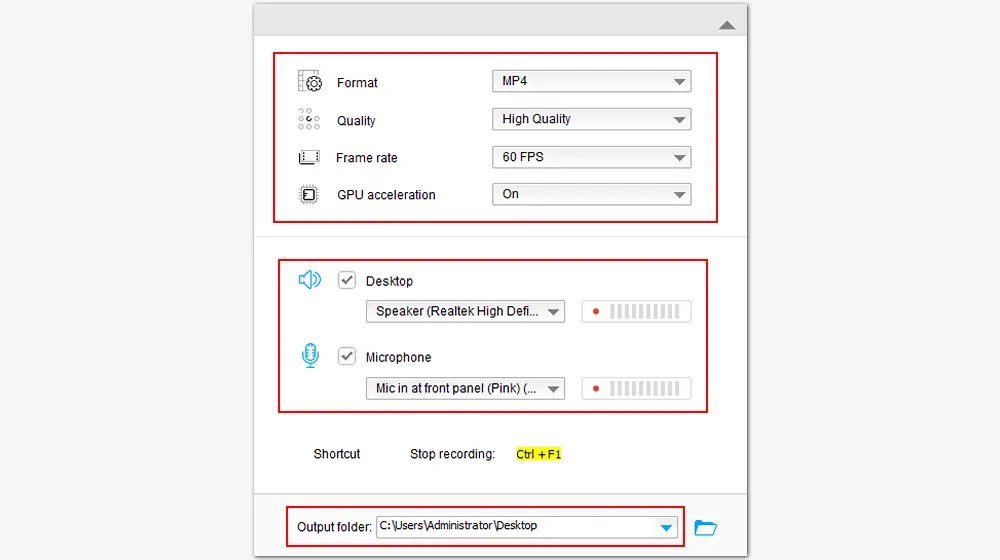
This screen recorder offers flexible settings for the recording, including format, quality, frame rate, GPU acceleration, and audio source. You can modify the settings according to your actual needs. If you want to record your Minecraft gameplay along with audio, don’t forget to check the Desktop/Microphone or both. If you don’t need audio, uncheck the two sources.
Then, specify an output path for the recorded game video by clicking the inverted triangle button at the bottom.
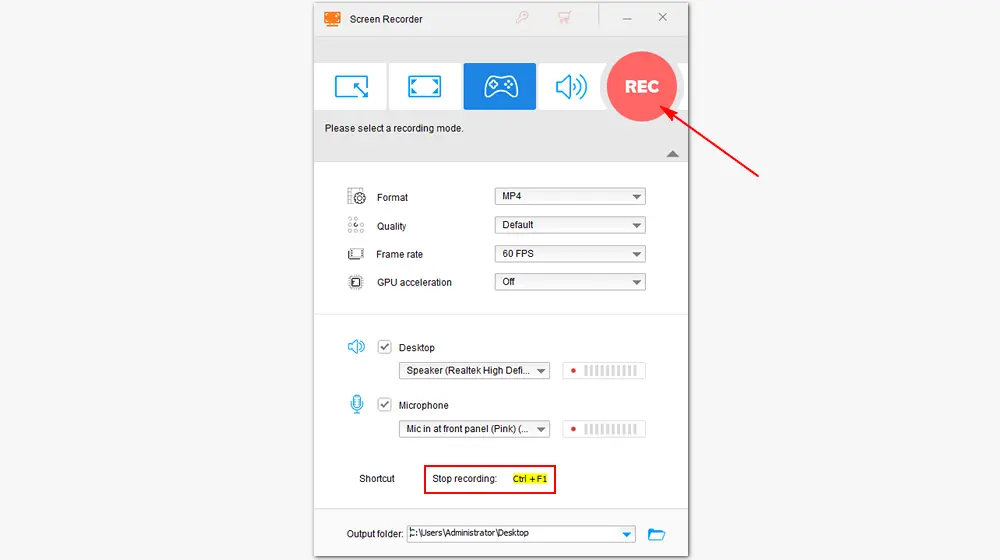
When all is prepared, click REC to start recording after a five-second countdown. The recording software will run in your bottom taskbar. When you finish, press the key Ctrl + F1 to stop recording.
That’s the whole process of how to screen record Minecraft with HD Video Converter Factory Pro. As you can see, the interface of the software is pretty clean and self-explanatory so that everyone can handle it without hassles. The process is also simple and good video quality can be promised. What’s more, as a third-party recorder on Windows, HD Video Converter Factory Pro has no time and role restrictions like the built-in recorder Xbox Game Bar. Therefore, you can use it to record Zoom meetings without host permission, save OverWatch highlights more than the last 12 seconds, and capture any screen activity on your PC freely.
More Features of the Minecraft Screen Recorder:
1. Record Audio from YouTube, Amazon Music, and other websites in high quality.
2. Convert recorded files to popular video & audio formats like MP4, MKV, MOV, MP3, WAV, AAC, and other 500+ presets.
3. Download music, audiobooks, anime, movies, and other videos online with URLs.
4. Supports audio/video editing process: trim, crop, rotate, merge, watermark, add subtitles, add audio to video, etc.
5. Compress large files, improve video quality, make GIFs, make ringtones, extract subtitles, and more.
Get this versatile and powerful video recorder & converter & downloader now: https://www.videoconverterfactory.com/download/hd-video-converter-pro.exehttps://www.videoconverterfactory.com/download/hd-video-converter-pro.exe
Generally, few online video recorders can record gameplay on your PC. Most recording services on the website only support capturing audio from the computer system. And it’s not recommended to record online for the sake of privacy. But if you want to have a try, veed.io may be helpful.
Go to https://www.veed.io/tools/webcam-recorder, choose the Minecraft window or the entire screen of your PC, select the audio recording device, then start recording. Stop recording when you’re done. You can preview the recorded video on this site. To save the video to your local folder, right-click the video > Save as > specify a destination > Save. Then the game video recorded on veed.io will be saved as a WebM video file on your computer.
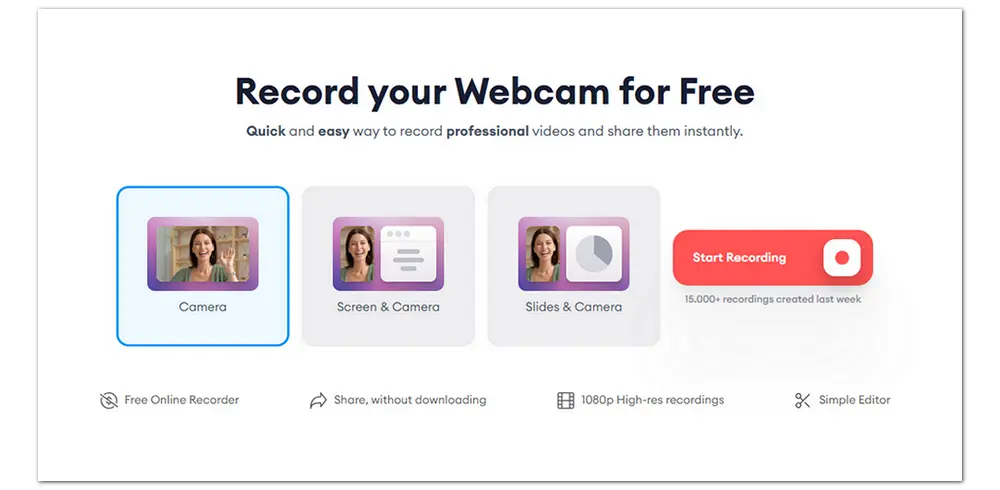
Tips: veed.io only records gameplay or other videos at around 30fps with a resolution of 1920*1080. If you want higher video quality, you can use WonderFox HD Video Converter Factory Pro to upscale 1080P to 4K or use it to record directly at 60fps.
You can use WonderFox HD Video Converter Factory Pro to record Minecraft gameplay on Windows 11 with the same operations above. It’s a handy yet powerful screen recorder for not only Windows 11 but Windows 10, 8, 7, and even earlier versions.
Related Post: How to Screen Record on Windows 11 (with Mic and Internal Audio)
Step 1: Launch OBS Studio. Go to “Settings” to pick a format, quality, bitrate, encoder, resolution, and output path.
Step 2: Click “Screen” and hit the “+” icon to add “Game Capture and Audio Output Capture”.
Step 3: Open your Minecraft and go back to OBS. Click “Game Capture” > “Capture Specific Window” > “Minecraft.exe”. Click “Audio Output Capture” to select the sound recording device.
Step 4: Click the button to start recording.
If you haven’t installed OBS Studio, you can download it from its official site: https://obsproject.com/. It’s worth mentioning that OBS Studio is not suitable for beginners.
Hot Search: How to Fix OBS Not Recording Full Screen Issue?
Use mods. The most popular method and mod for third-person timelapse is the Replay Mod. It can be used in single-player and multiplayer worlds but it’s a bit difficult to understand and might not be compatible with your device.

WonderFox DVD Ripper Pro
1. Rip MP4, MKV, MP3, WAV, and other files from DVD.
2. Remove/bypass advanced DVD copy protection.
3. 1:1 copy DVD to ISO image and Video_TS folder.
4. Convert DVD to MPG (MPEG-2) in 5 minutes.
5. Edit DVD video clips, customize output settings, etc.
* Do Not use the software to rip any copy-protected DVD for commercial use.
Privacy Policy | Copyright © 2009-2025 WonderFox Soft, Inc.All Rights Reserved