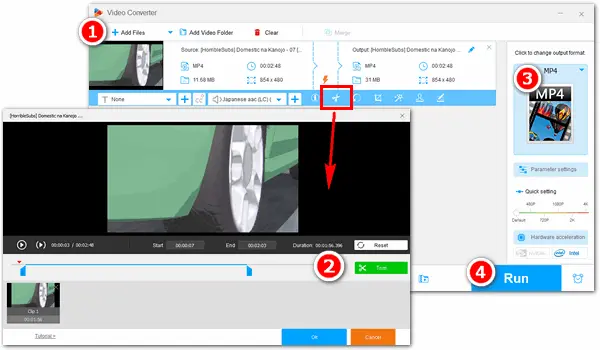
We always need to trim videos for different reasons, such as removing the intro or outro of a movie and cutting unwanted footages from a screen recording. No matter which situation you are in, a functional video trimmer is necessary for the trimming task. So this article introduces four free programs that can do this job easily. Details of how to trim video are provided below. Just keep reading.
WonderFox Free HD Video Converter Factory is the best free video trimmer for Windows 10/11. It offers a straightforward and effective way to trim videos on Windows computers. With several clicks, you can save your wanted segments from the original video. If the source video quality is low, this converter can also help you improve it by upscaling video resolution or bitrate in one click. There are no incomprehensible terms and complex buttons in the software; even beginners can handle it without any hassles. Free downloadFree download the software to have a try on your PC.
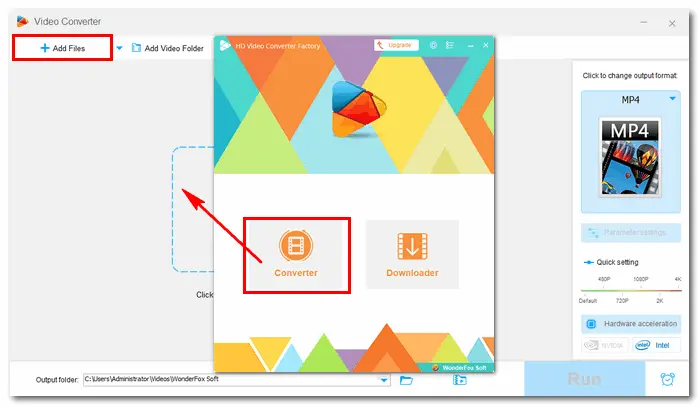
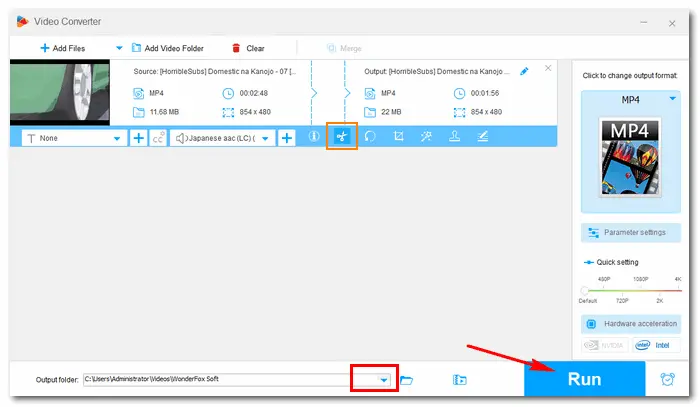
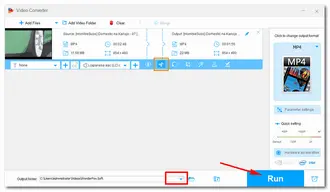
Launch the free video trimming software. Click Converter on the startup interface. Add the video you want to trim by clicking the Add Files button in the upper left corner. You can also drag and drop the file into the software directly.
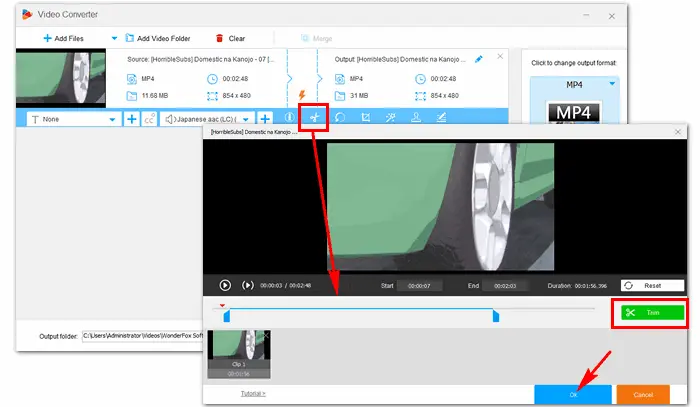
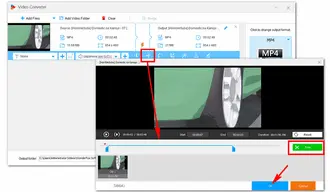
Click the scissors icon below the video, and the new Trim window will pop up. Drag the sliders on the timeline to the point you want to trim the video. Then press the Trim button, and you’ll get Clip 1. You can create more video clips with the same step. (Or you can type a specific time in the Start and End box to trim your video more accurately.)
When you’re done, press OK to save your changes.
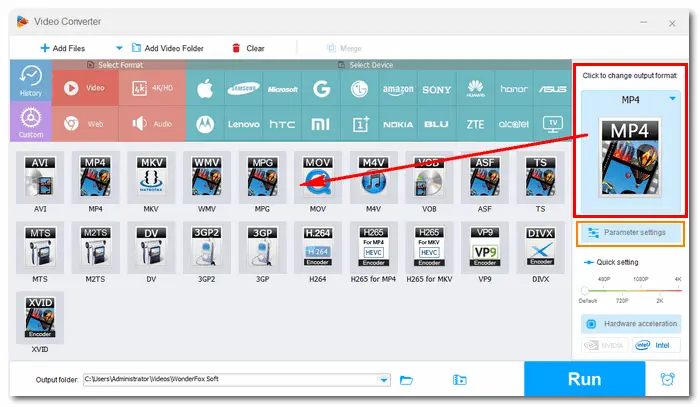
Back to the main interface, click the output format on the right side. This free video trimmer provides more than 300 a/v formats, codecs, and devices for conversion. Just choose a format under the Video tab according to your preference.
You’re also able to modify the output video bitrate, resolution, frame rate, volume, and other settings in Parameter settings.
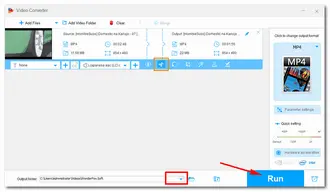
Hit the inverted triangle button to set an output folder or leave it as default. Now, everything is prepared. And the last step of the process is to click the Run button to export the clips to your folder. Once the process is done, a new pop-up window will prompt you to check the new files.
VLC is an open-source and free media player for Windows and other operating systems. This software is very popular for its multiple and powerful functions. Besides playing media files, VLC is also able to convert video/audio, rip DVDs, add subtitles, effects, and filters, etc. And this time, we will use it to trim a video. If you haven’t installed VLC media player on your PC, download it from the official site:
https://www.videolan.org/vlc/download-windows.html
How to trim video in VLC?
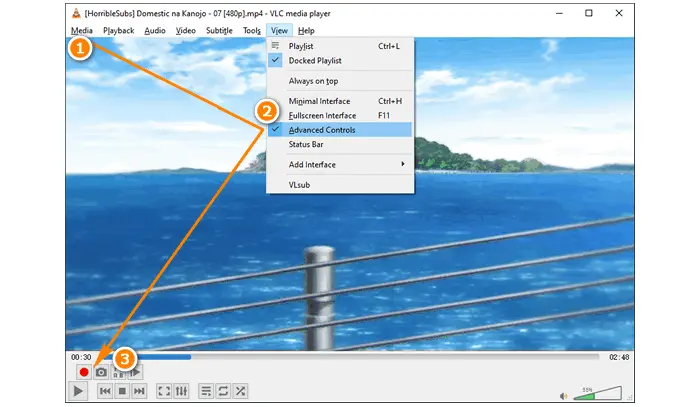
Step 1: Run VLC. Go to Media > Open File.
Step 2: Click on the View tab and tick Advanced Controls.
Step 3: Play the video or drag the playhead to the start point where you want to trim. Then click on the rec Record button in the bottom left corner.
Step 4: Play the video until it reaches the ending point where you want to stop. Click the Record button again.
Step 5: Now you get the first video clip and it will be saved in My Videos folder automatically. Repeat the recording steps to make more clips.
Update: Video Editor is no longer avaliable in the Photos app. You can use Clipchamp, instead.
See How to Use Microsoft Clipchamp >>
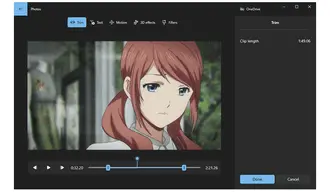
If you don’t want to install any software or plugin, then you can use the built-in video editing software in Windows – Photos. It offers some practical editing features like trim, split, motion, playback speed, etc. The steps are also simple to operate. Follow the guide on how to trim a video on Windows with Photos below.
Step 1: Right-click the video and go to Open with > Photos.
Step 2: Click the three-dot icon at the top and select Edit more > Create a video with Text > Name your video.
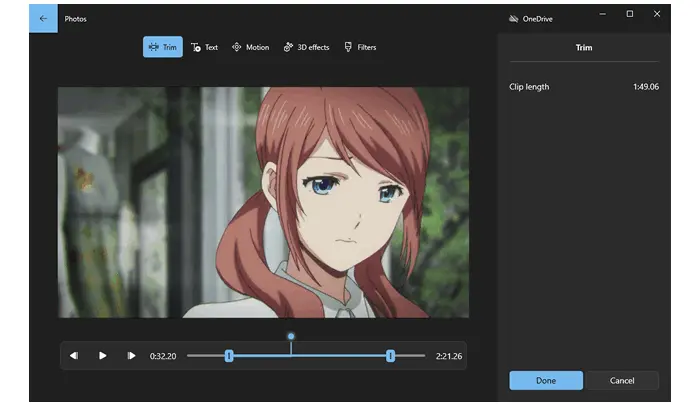
Step 3: Click the Trim option. Drag the sliders on the timeline to define the part you want to save and press Done.
Step 4: Go to Finish video at the upper right and Export the trimmed video to your PC.
Another way to trim a video without app installation is using online video editors. They can complete the whole process directly on your browser. What you need to notice is that the source video can’t be large and your internet connection should be stable. In other words, if you only need to edit a small video occasionally, online services could be a good choice.
Here are some useful video trimmers online & free:
https://online-video-cutter.com/
https://clideo.com/cut-video
https://ezgif.com/cut-video
https://www.kapwing.com/tools/trim
How to trim with a free video trimmer online?
Step 1: Open Ezgif by visiting its website.
Step 2: Click Choose File to add a video (Max file size: 100MB) and Upload it.
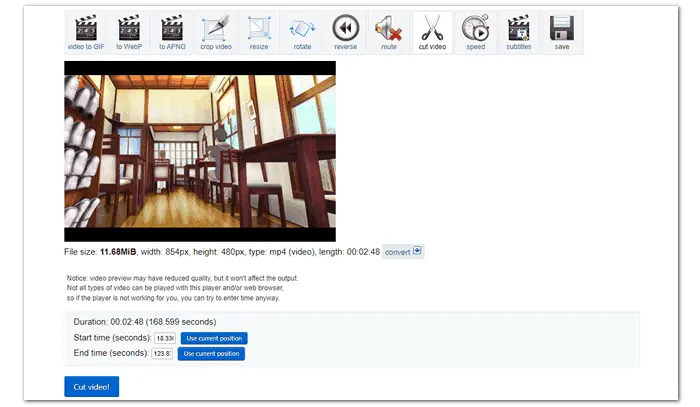
Step 3: In the cut video part, play the video or drag the playback indicator to choose a duration through the Use current position option.
Step 4: Click Cut video and wait for the process.
Step 5: The trimmed video will display in the below box. Click save to download it to your local folder.

Additional tips for trimming a video:
• How to Trim & Cut Video in Adobe Premiere Pro
• [Novice Guide] How to Cut Clips in After Effects?
• HandBrake Trim Video – How to Trim/Cut/Crop Videos with HandBrake
• How to Cut Video in Windows Media Player and Also Achieve Other Editing Tasks
• How to Trim a Video in PowerPoint and Save to Your Computer?
That’s all about how to trim video on Windows easily and free. The four video trimmers introduced above provide an effective method to trim video and also do more editing tasks. Just choose one of them to start your job! Thanks for reading!
Terms and Conditions | Privacy Policy | License Agreement | Copyright © 2009-2025 WonderFox Soft, Inc.All Rights Reserved