![]() by Kevincy
by Kevincy
Updated on Feb 5, 2024
Google Slides is with no doubt one of the best free tools to quickly create exquisite slideshow presentations without software installation required as long as you have a Google account. However, what if sometimes you might want to turn your Google Slides presentation into a video and share it on the social media? That's fine! Here's the solution!
If needed, try the novice-oriented all-in-one app for video recording, downloading, editing, and converting: https://www.videoconverterfactory.com/download/hd-video-converter-pro.exehttps://www.videoconverterfactory.com/download/hd-video-converter-pro.exe
Well, as you know, Google Slides is a free web-based application that was originally developed to let users create and edit presentations online for accessing presentations anywhere, anytime. Although Google Slides now supports offline mode, unfortunately, it cannot natively turn presentations into video files just like Microsoft PowerPoint does. Good news is, however, you can still make it possible with the help of 3 roundabout approaches.
You are able to download Google Slides presentation as a .pptx file on your local drive. If you have Microsoft PowerPoint 2010 or higher version installed on your computer, you're entitled to turn Google Slides into video with ease.
Step 1. Visit Google Slides and open your presentation. Click on "File" button on top menu bar, head over to "Download" in the drop-down list, then select "Microsoft PowerPoint (.pptx)" to save this presentation.

Step 2. Open this .pptx with Microsoft PowerPoint. Press "File" option on top menu bar, then go to "Export" > "Create a Video". Here you can select presentation quality and customize the seconds spent on each slide. Eventually, hit "Create Video" button to assign an output folder and convert your downloaded Google Slides presentation to video in PowerPoint.
Also Read: Convert PowerPoint to Video | Embedded Video in PowerPoint | Put a YouTube Video in PowerPoint | Burn PowerPoint to DVD
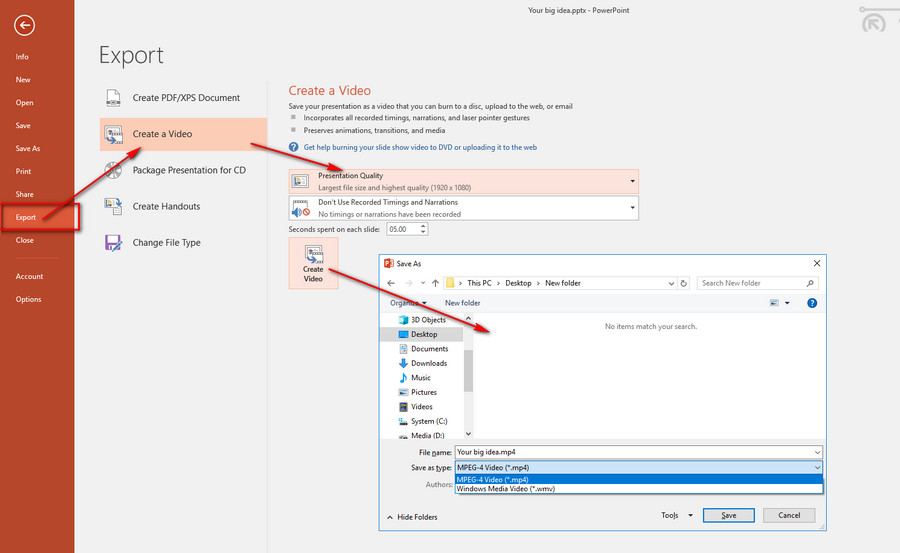
Note: If you're used to PowerPoint 2007 interface and operation or haven't purchased Microsoft Office yet, the following two methods will satisfy your need.
When it comes to video recording, some complicated and pricy video recorders will come across your mind. Actually, there are plenty of handy video capture software that can help you record the whole screen when you present your presentation, free of charge. I'll take Free Cam as an example for demonstration below.
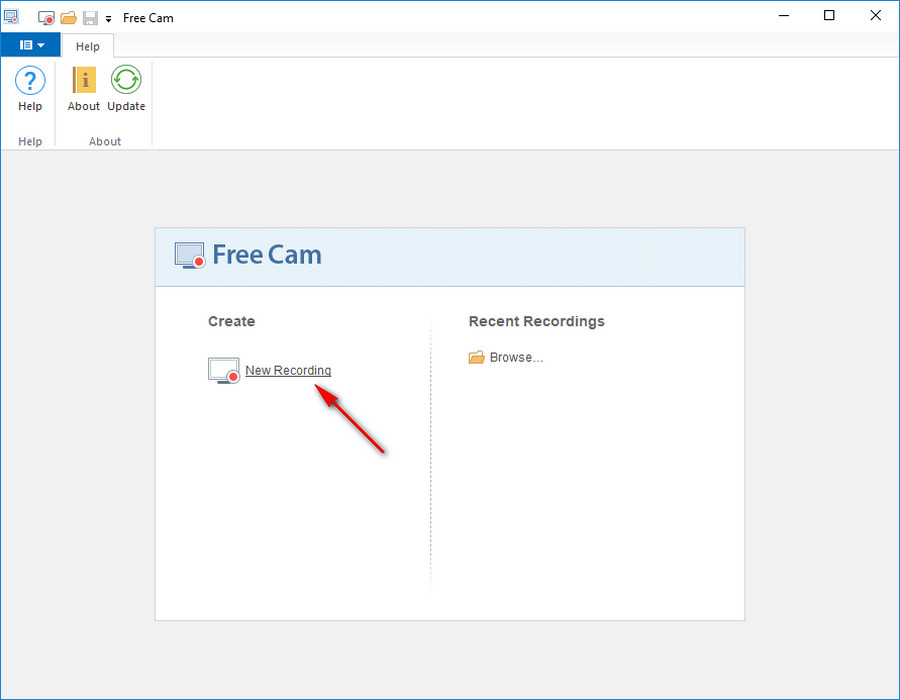
Step 1. Download and install Free Cam via official website https://www.freescreenrecording.com/. Launch this freeware and create a new recording. You'll see a black-and-white recording area and a toolbar displaying right away.
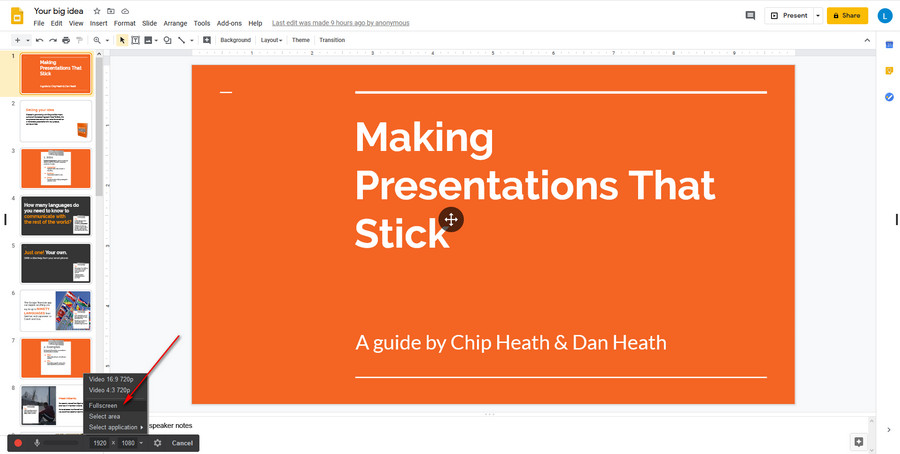
Step 2. Click on "Capture Size" option on the toolbar and select Fullscreen. Open your Google Slides presentation and start the slideshow. Meanwhile, hit the red "Record" button to capture the whole screen. Additionally, it supports recording system sounds, voiceover or narration.
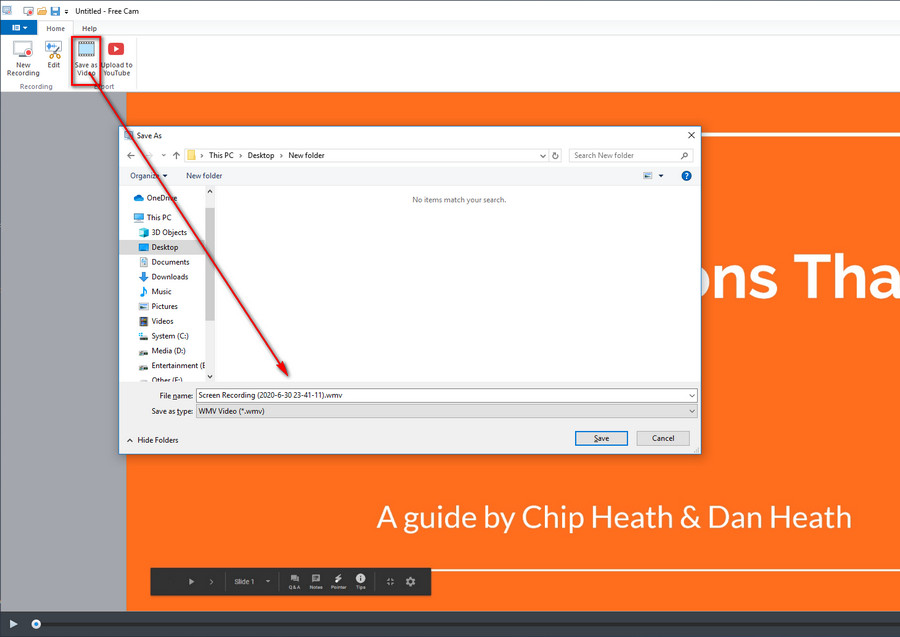
Step 3. Press F9 to pause or resume the recording, and press ESC to end it. After done, it will be imported to a brief editor so that you can preview and edit the recording, save as a WMV video or upload to YouTube.
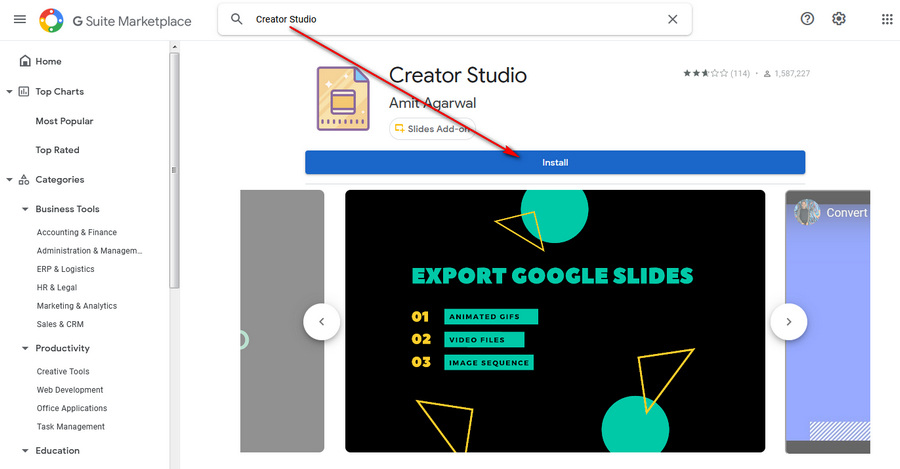
If you are not satisfied with the recording quality, a relatively new Google Slides add-on - Creator Studio is worth a shot. Thanks to the developer Amit Agarwal, after you install the add-on, your Google Slides will possess the extra capability to export presentation to MP4 video, animated GIF or image sequences. The operation steps are as follows.
Step 1. Visit https://gsuite.google.com/u/0/marketplace and submit a search query "Creator Studio", or simply go to https://creatorstudio.dev/ to install Creator Studio add-on. It requires permission to access and read your presentation for conversion.
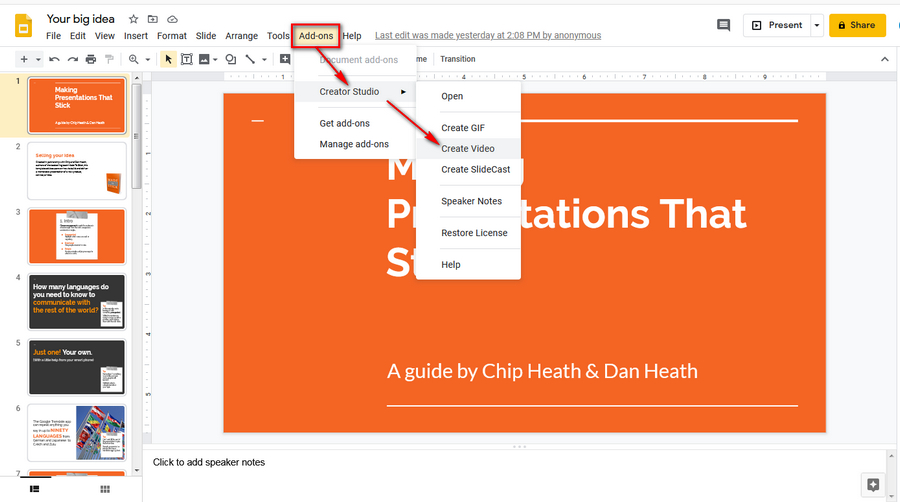
Step 2. Once the add-on is installed, open or refresh your Google Slides presentation. Navigate to "Add-ons" on top menu bar. Hover your mouse over "Creator Studio", then select "Create Video" option.
Step 3. After a short while, the Creator Studio sidebar will appear on the right. Type in the width of the converted video (no more than 1600 pixels for basic version), the video height will be automatically adjusted to match the aspect ratio of your presentation. Specify the time interval in seconds between slides (no more than 4 seconds). Then select "Video File (MP4)" option for export format. Lastly, hit "GO" button to render the video. When the process is complete, the MP4 file will be saved in your Google Drive, meanwhile, you'll see a download icon at the end of "Video File (MP4)" option. Hit the icon to download it to your local drive.

Note: As a casual user like me, the basic version is enough. If you're pleased with the performance of this add-on, switching to Creator Studio Premium will unlock more features, such as customize high-resolution, time interval, add background music, voice or narration, slide transitions support, etc. Check out more info in the video tutorial below.
Wrap up...
That's it! When the straight road is a dead end, as long as you can achieve your goal, not bad for some detours. This post is primarily aimed at people who have little or no operation experience. You can follow the steps and adopt the suitable method based on your preference. If the guide does work and deserves your thumbs-up, don't forget to share it with your friends in need. See you next time!