Need to Convert Images to GIFs?
Try WonderFox HD Video Converter Factory Pro! You can convert a sequence of PNG, JPEG, JPG, etc., to animated GIF files with high quality and desired width, height, and delay time. Easy and fast!
Before discussing how to convert images to GIFs, it’s important to note that GIF is an image format that supports both static and animated image files. Whether you want to convert pictures to image GIFs or animated GIFs, you’re sure to find a suitable tool in this article.
Without further ado, let’s get started!
Now, we’ll walk you through the key features, pros, cons, and tutorials of these 9 Images to GIF converters.
WonderFox HD Video Converter Factory Pro includes a dedicated GIF Maker that not only helps convert images to animated GIFs, but also creates GIFs from video files. Using it, you can upload a sequence of JPG, PNG, BMP, TIFF, or GIF images and then easily convert them to GIF. Before exporting, you can customize the output width and height, quality, and time delay of each frame.
Pros:
Cons:
How to convert a sequence of images to an animated GIF with it:
Step 1. Download and install Download and install WonderFox HD Video Converter Factory Pro on your Windows device.
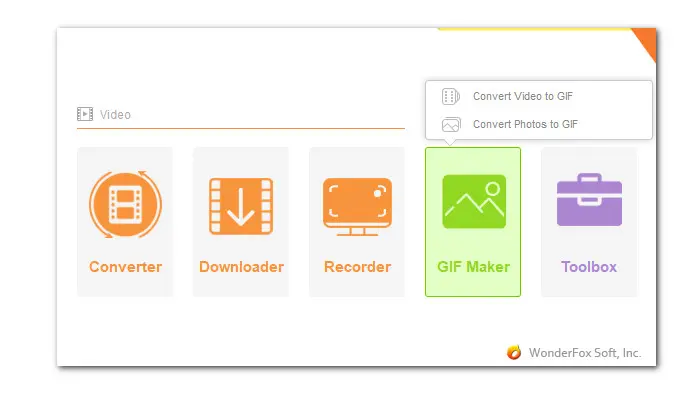
Step 2. Launch the program. On its startup interface, click GIF Maker and select Photos to GIF.
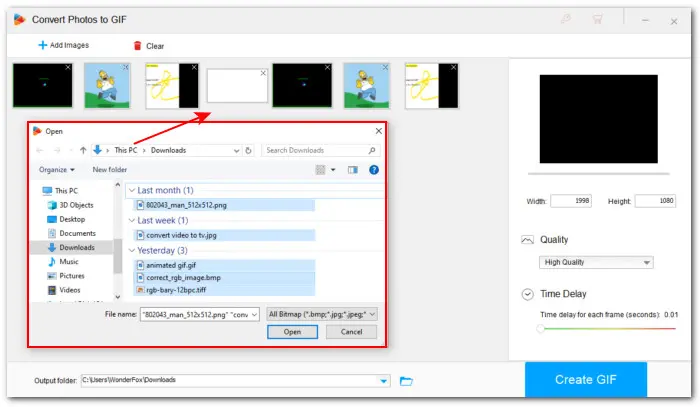
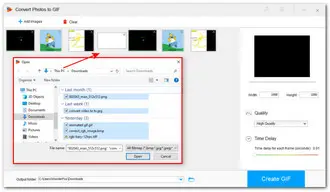
Step 3. Then click Add Images or straightly drag and drop all your images into the software sequentially.
Step 4. On the right side of the program, tweak the Width & Height of the GIF image, choose an output quality, and set the time delay for each frame. Preview the animated GIF before exporting.
Step 5. When you’re done, set an output path by clicking the inverted triangle button. Finally, press Create GIF to convert images to GIF at once.
Paint 3D is a Microsoft application that comes pre-installed with Windows 10 Version 1703 and later. It contains a set of editing features. You can add stickers, texts, effects, etc., to your image and then export it to an image GIF. Also, you can add some in-built 2D and 3D elements and turn your picture into an animation GIF file. It has a simple interface and all features are easy to use.
Pros:
Cons:
How to Convert Images to GIFs on Windows using Paint 3D:
Step 1. Open Paint 3D from your Start menu on Windows 10. Windows 11 users can get this app from Microsoft Store for free.
Step 2. Then on its Welcome screen, click Open > Browse files to import the image you want to transform into GIF format.
Step 3. Now, you can take advantage of these editing features to improve your image. After that, click the upper-left Menu button and choose Save as.
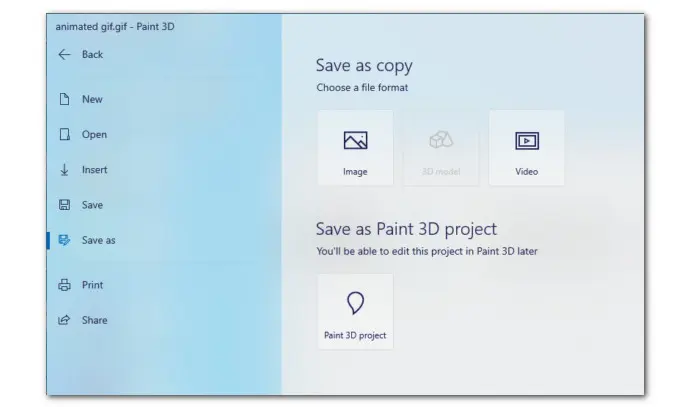
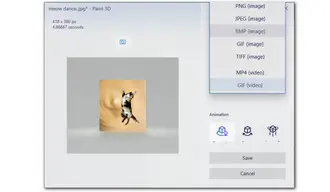
Step 4. Next, choose Video and you’ll see a preview window.
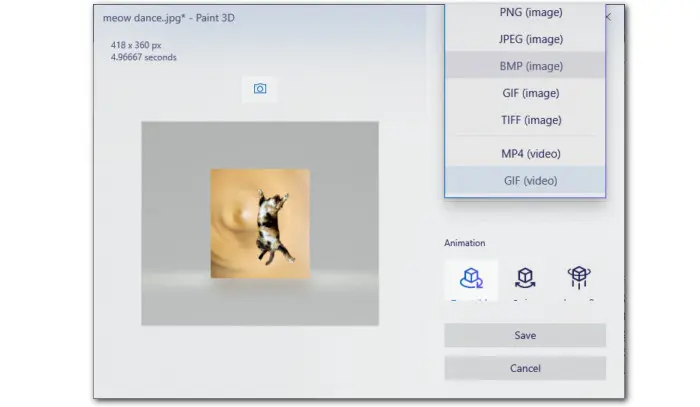
Step 5. Unfold the Save as type options and choose the GIF type you need: GIF (image) or GIF (video).
Step 6. Click the bottom Save button. Then choose a file destination, give a new filename, and click Save.
Snip & Sketch is also a default Microsoft application for Windows 10. It is a screenshot tool that enables you to capture your screen in different modes. After taking a screenshot, you can use the built-in annotation tools like pens, highlights, and texts to add markups. Then save it as a GIF file. However, Microsoft has replaced Snip & Sketch on Windows 11 with a new app called Snipping Tool.
Pros:
Cons:
How to convert images to a GIF with Snip & Sketch on Windows:
Step 1. Launch Snip & Sketch first.
Step 2. You can take a new screenshot using it or import your ready-made image to start the conversion. Click the top-right three dots and select Open file.
Step 3. Browse in your folder to locate the image you want to convert and click Open.
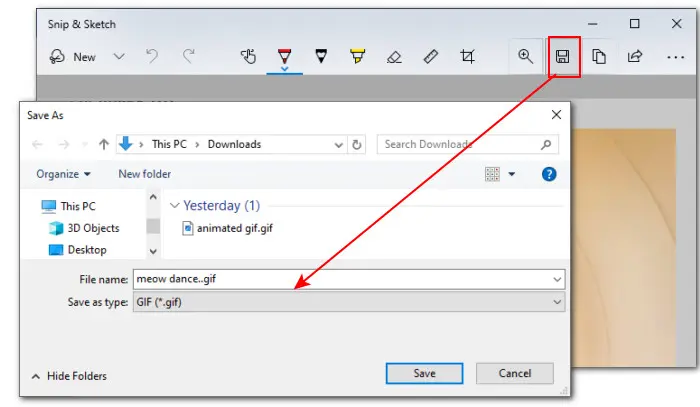
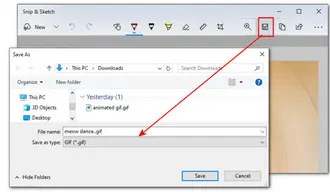
Step 4. You can draw some lines or add text to make it more interesting if needed. Once done, click on the upper Save as icon.
Step 5. Then change the file name. From the Save as type dropdown options, choose GIF (*.gif) and click Save to output it.
Photoshop is a professional image editor that has gained a reputation among designers and photographers alike. You can also use it to make GIFs from a sequence of images. It includes sets of basic and advanced editing features and deliver high-quality GIFs. Moreover, the recent updates add AI support. However, beginners may go through some learning curve before getting started.
Pros:
Cons:
How to use this pro-level Images to GIF converter:
Step 1. Install Photoshop from here: https://www.adobe.com/products/photoshop.html
Step 2. Before starting, host all the images you intend to use in a separate folder. Then launch Photoshop.
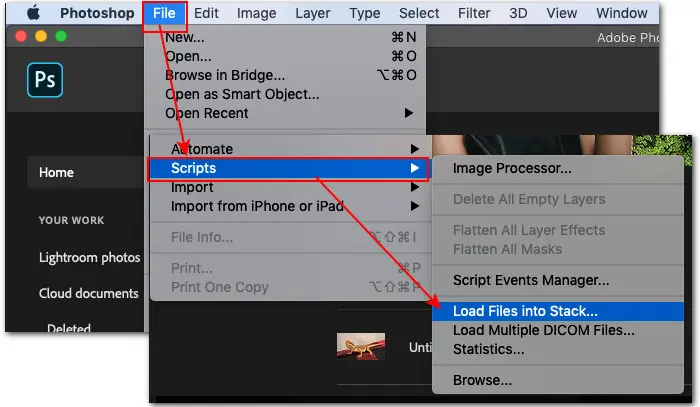
Step 3. Navigate to File > Scripts > Load Files into Stack.
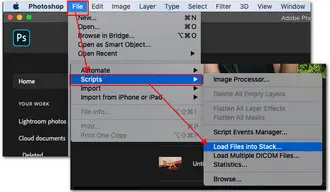
Step 4. Then locate the prepared images and click Open followed by OK to import them into the photo editor.
Step 5. Click Window on the menu bar and Timeline to bring up the Timeline panel.
Step 6. In the Timeline window, click the arrow and select Create Frame Animation.
Step 7. Then head to the Timeline panel’s menu and choose Make Frames From Layers. This will turn each created layer into a frame.
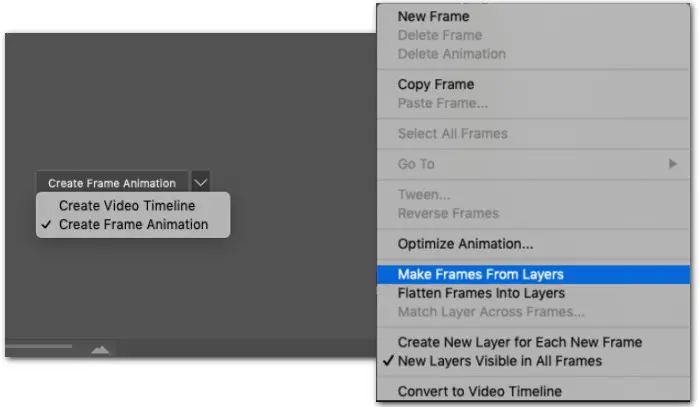
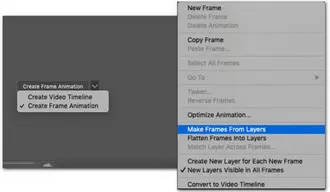
Step 8. Now, you can click on the time below each frame to change the delay time, drag images to rearrange the order, and set the loop option to “Forever” or “Once”.
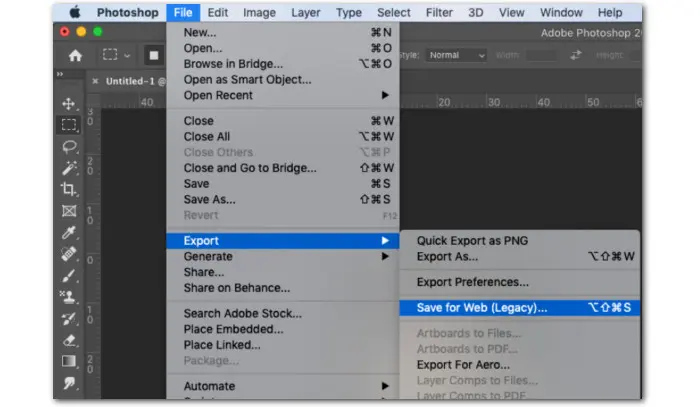
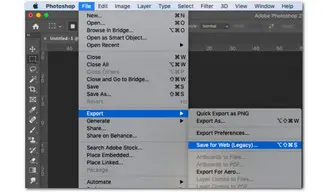
Step 9. Click the bottom Play icon to preview the animation file. Once done, click File > Export > Save for Web (Legacy).
Step 10. Then in the pop-up window, select a GIF type from the Preset drop-down options, for instance, GIF 128 Dithered. The number refers to the number of colors used in the GIF image’s color palette. You can also adjust other settings based on the file’s purpose.
Step 11. Click on the bottom-right Save... button and select a file destination for the finished GIF file.
Step 12. Finally, click Save again. And Voilà! You get an animated GIF now!
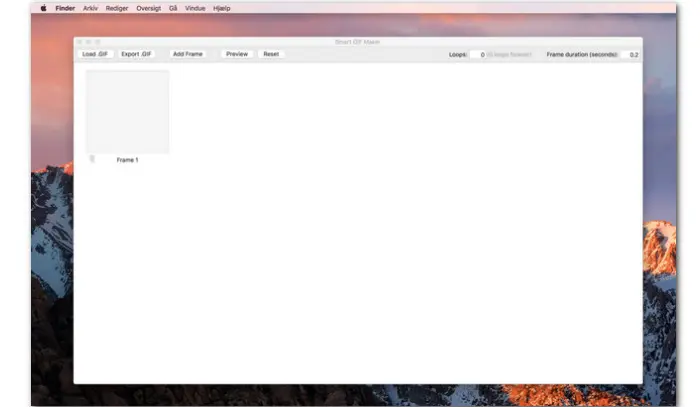
Smart GIF Maker offers a beginner-friendly solution for converting images to GIFs on Mac. It has a straightforward interface and supports the drag-and-drop method for quick file import. It accepts .png, .jpg, .bmp, .tiff, and .gif images. Best of all, it is available for free with an in-app purchase to remove the watermarks.
Pros:
Cons:
How to convert image files to GIFs with Smart GIF Maker:
Step 1. Install this application from the Apple App Store.
Step 2. Open it up and click Import to load the image files you want to convert. Also, you can add the images from Finder.
Step 3. Then you can drag them to change the order, draw on frames, and set the frame duration and loop type.
Step 4. When you finish the editing, you can hit the top Preview button and then directly export it to your Mac.
In addition to desktop tools, there are many web-based GIF creator available for images. These online tools are more convenient and suitable for occasional needs.
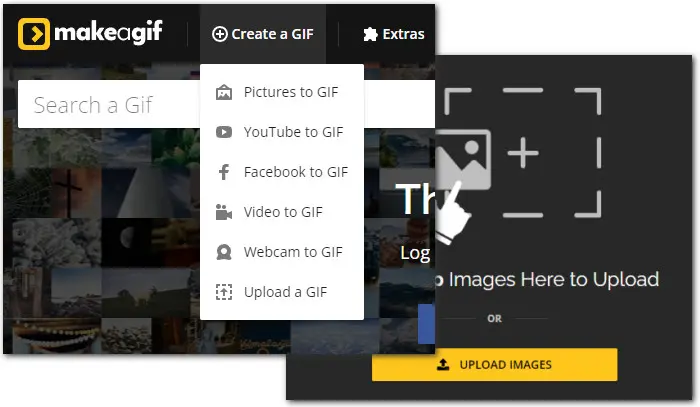
Makeagif is one of the most popular online GIF platforms. With it, you can create a GIF from pictures, video, YouTube, Facebook, or webcam, and then directly share it on this platform, Reddit, X, Facebook, and so on. You can also search and download interesting GIFs here.
Pros:
Cons:
How to convert pics to GIFs with Makeagif:
Step 1. Visit https://makeagif.com/
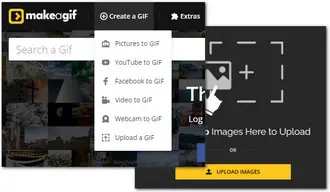
Step 2. Click the top Create a GIF tab and select Pictures to GIF.
Step 3. Drag & drop your images and click UPLOAD IMAGES to upload them into this online tool. To create an animation GIF, you have to add at least two images.
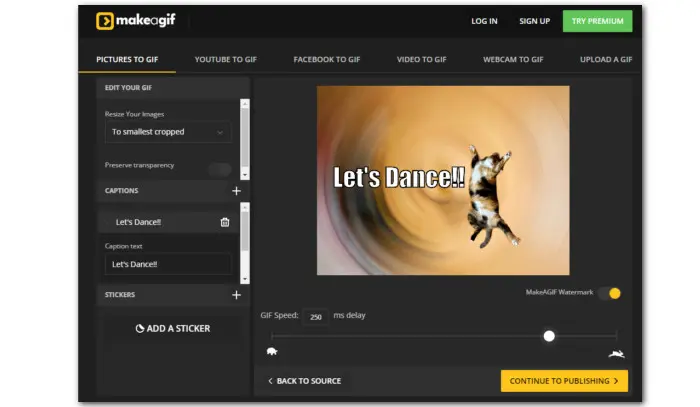
Step 4. Click the bottom CONTINUE TO EDITING and you can see an editing page.
Step 5. Here you can resize your imported images, add funny captions and stickers, and set a preferred time delay.
Step 6. When you’re satisfied with the result, click CONTINUE TO PUBLISHING.
Step 7. Then give your GIF an interesting name and select a category. Want to get more views? Add relevant tags to increase its visibility.
Step 8. At last, hit CREATE YOUR GIF to publish the GIF you just created. You can also choose to save it to your computer.

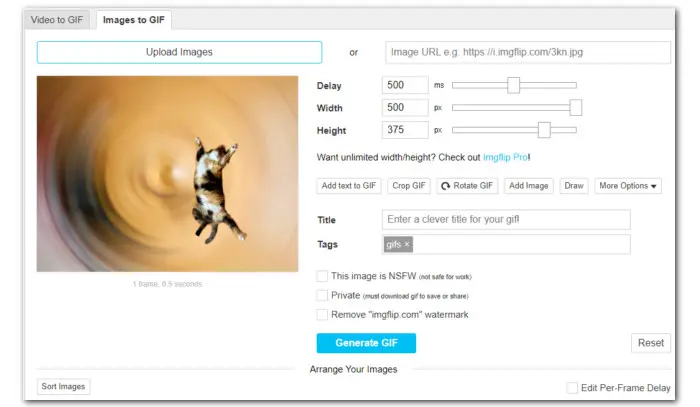
Another popular online photo-to-GIF converter is Imgflip. It has a simple interface and provides the easiest way to make a GIF from video files, YouTube videos, or image sequences. You can add text, edit time delay, width, and height, change the background color, and more. Besides GIF creation, Imgflip can also help you create memes, charts, and demotivational posters.
Pros:
Cons:
How to convert images to GIFs via Imgflip:
Step 1. Open https://imgflip.com/gif-maker in your browser.
Step 2. Select Make a GIF and switch to Images to GIF.
Step 3. Then click Upload Images or paste the image link.
Step 4. You can upload multiple pictures and then reorder them in the Arrange Your Images section.
Step 5. Now, edit the files with text, crop, rotate, image, drawings, and so forth. Click the Hide Options to unfold more settings to polish your GIF.
Step 6. Once done, click Generate GIF to directly publish it on Imgflip. Or, you can click the Download .gif button to save it to your device. Note, if you want to delete the GIF image you just post, you need to create an account and log in.
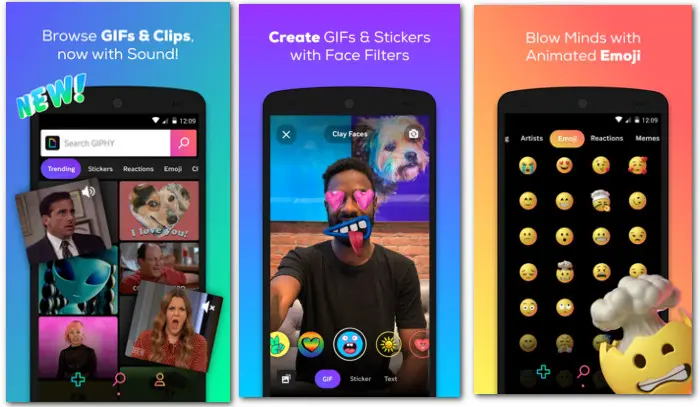
For mobile users, whether you’re using an iPhone or Android, don’t miss out on Giphy. It offers a vast library of GIFs, clips, and stickers for downloading and sharing. You can also use it to create your own GIFs from videos and photos, and then easily share them with friends on social media platforms like Facebook Messenger, Instagram, Snapchat, and more!
Pros:
Cons:
How to use Giphy to convert existing images to animated GIFs:
Step 1. Download and install Giphy from the Google Play Store.
Step 2. Tap the icon to open it. Then create a Giphy account.
Step 3. Tap the bottom + icon to open the GIF Maker.
Step 4. Import your target images from the photo album. You can also tap the shutter icon to take a photo and then edit it to a GIF.
Step 5. Anyway, move on to begin the editing. You can decorate your image with captions, stickers, and effects. Then tap Next to proceed.
Step 6. To increase the visibility, you can add some tags to your GIFs and set the publish status as Public. Then tap Upload to GIPHY.

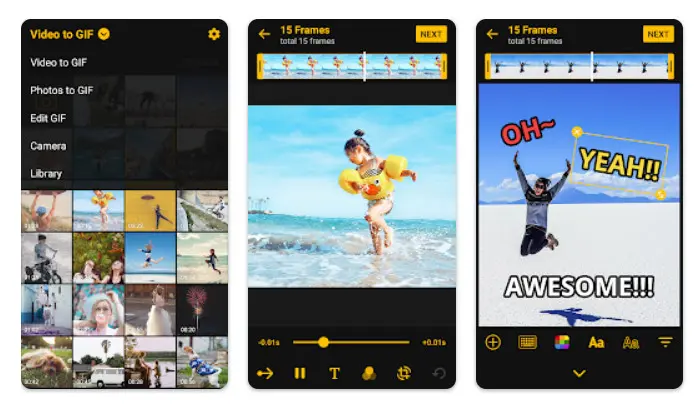
ImgPlay is an easy GIF maker application designed for everyone to create GIFs using photos and videos. It also enables you to shoot a video with camera and instantly turn it into a GIF. To make your GIF funnier, you can apply filters, remove unwanted frames, change speed and playback direction, and add captions.
Pros:
Cons:
How to convert images to GIFs on phone with ImgPlay:
Step 1. Install ImgPlay from the Google Play Store on your mobile device.
Step 2. Tap the icon to start it. Make sure you grant it permission to access your photo album and camera.
Step 3. Then on the home screen, choose Photos to GIF and select the image from your photo album.
Step 4. Add stickers, texts, or effects to your GIF. You can also rotate and crop it. Tap NEXT to proceed.
Step 5. Once you’re happy with the finished GIF, you can share it across Instagram, Facebook, Line, WhatsApp or simply save it locally.
Well, that’s all about how to convert images to GIFs on your computer, phone, or online. Whether you’re looking for user-friendly interfaces, advanced editing features, or seamless integration with social platforms, these 7 best Images to GIF Converter apps offer a variety of choices to suit your needs. Just follow our instructions, find the tool you like best, and start unleashing your creativity and taking your GIF-making skills to the next level.
BTW, if you have existing videos or movies that you want to turn into GIFs, we’ve also reviewed the best Video-to-GIF converters for your reference. Please check out this article: Top 10 Best Video to GIF Converters in 2024
And we constantly update the content to provide people with more practical multimedia solutions. Follow our official YouTube channel now!
All you need is a handy picture to GIF converter. We discuss 7 ways to help you convert pictures to GIF format in the above article. Go through their features, pros, cons, and tutorials, and then pick one to start!
To make a sequence of images to an animated GIF, you can use:
In this article, we introduced Giphy and ImgPlay - GIF Maker. Both can work well on iPhone and Android. Aside from them, you can also use GIF Maker, Gifstory, GIF Toaster - GIF Maker, and more.
Making your own GIF image is easy with so many GIF maker options available. Simply prepare the tool and then create GIFs from films, videos, photos, and screenshots.
Terms and Conditions | Privacy Policy | License Agreement | Copyright © 2009-2025 WonderFox Soft, Inc. All Rights Reserved.