Updated on Oct 21, 2024
WonderFox DVD Ripper is a professional and powerful DVD ripper software program for Windows. It could rip the content of DVDs to all popular video formats such as MP4, MKV, MOV, AVI, MPG, H264, H265, MPEG-4, etc. What’s more, it can directly convert DVDs to popular devices such as iPad, iPhone, Apple TV, Android mobile phones and tablets, game consoles (PS5, PS4, Xbox, Wii, etc.), and various TVs. It can also rip DVDs to various web formats such as MP4 for YouTube, WEBM for YouTube, MP4 for Facebook.
*Note: This guide applies to WonderFox DVD Ripper Pro and WonderFox DVD Ripper Speedy. However,
1) In WonderFox DVD Ripper Speedy, the only available format is MPG.
2) In the unregistered version of WonderFox DVD Ripper Pro, you can rip only 15 minutes of a DVD.

Step 1. Launch WonderFox DVD ripper. Select your DVD source by clicking “DVD Disc” “ISO Image” or “DVD Folder”. Then WonderFox DVD Ripper will start loading the source and display all content.
Note: only video DVDs can be imported. Data DVDs are not supported. It does not support Blu-ray either.
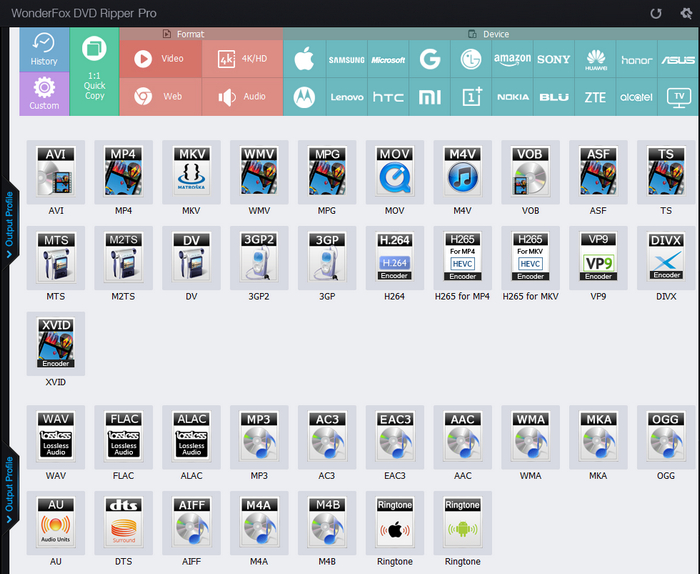
Step 2. Select an output format as you need. You can select a video format, an audio format, or a device.
Select ISO or DVD folder under the 1:1 copy tab to make an exact copy of the DVD.
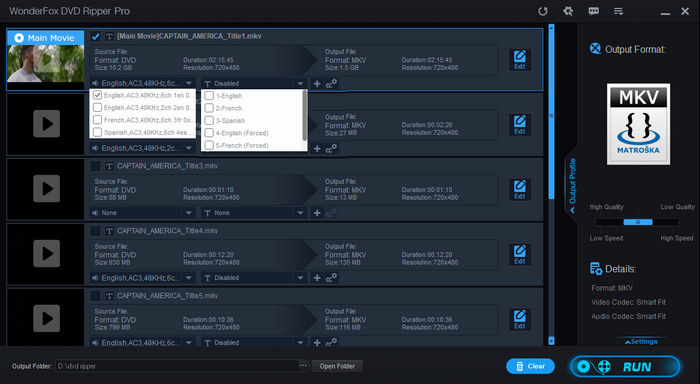
Step 3. Select the audio and subtitle track as you need. (Optional)
*Select the output format as MKV, MP4 or MOV to keep all audio tracks.
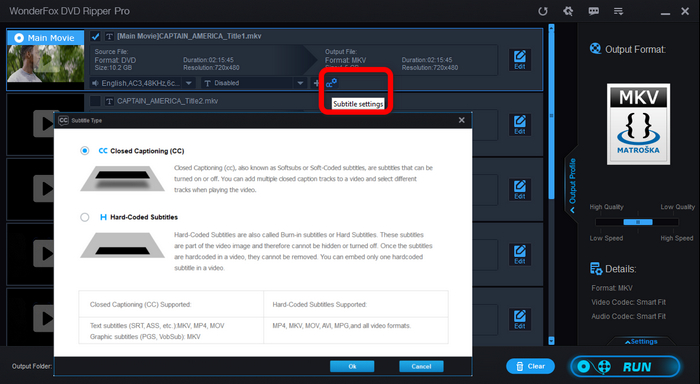
*Change the subtitle type. The default subtitle type is Closed captions, which is only available for MKV when subtitles available are image-based subtitles. Closed captions are subtitles that can be turned on or off at will. Hard subtitles will become a part of the video image and take longer to render but can be applied to any video format.
*You can add multiple external subtitles (.ass or .srt) when ripping a DVD to MKV, MP4 and MOV.
*Forced subtitles are a type of subtitles that appear only when a foreign language is spoken. To add Forced-only subtitles, please select a track that’s marked forced. If the DVD has no Forced-only subtitles, please download them from the internet.
Here are some websites to download subtitles for free.
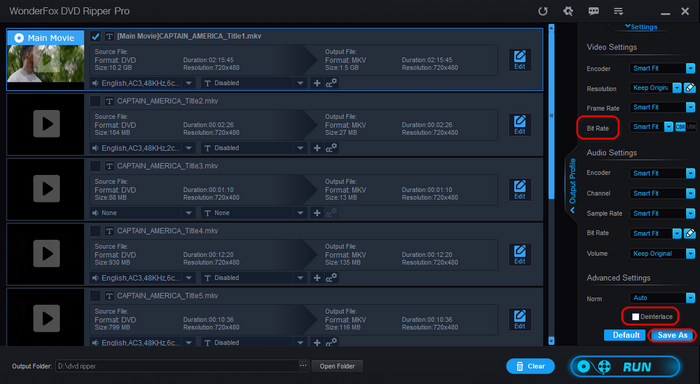
Step 4. Modify the settings for your output file.
You can leave all settings at default if you don’t know about them. The program will apply the optimal settings based on the format you chose. However, it’s recommended to keep the original resolution and increase the video bitrate to improve video quality. Please check the deinterlace option if your DVD is interlaced (horizontal lines on the video). Click Save As so you don’t need to change the settings every time.
Step 5. Start ripping your DVD.
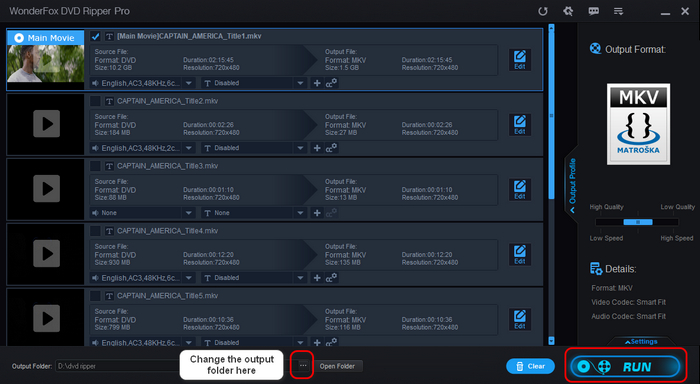
Specify a folder for your output via the … button at the bottom and click RUN to start ripping the DVD.
It's recommended to specify the D/E or other drives as the location to save the output files. The C drive usually is the primary system drive for installing the operating system and system files. Saving the output file to the C drive can cause file permission problems, or even slowdowns, performance issues, system instability, crashes, etc.
How to Rip My First DVD
- Aikawa, Japan
"WonderFox DVD Ripper does leave a good impression to me. What I appreciate most is the fast ripping speed, it helps me rip DVD in a short time."- Johnson, USA
Get the two software immediately and enjoy our best service or get your money back.