
WonderFox HD Video Converter Factory Pro
The easiest screen recorder helps you record videos without hassle.
Pro-tips: After recording, you can convert, edit, and compress the recorded files. Other notable features like downloading and screen splitting are also available.
In the following part, we’ll talk about how to screen record on Dell laptop using the built-in tool in Windows as well as another three third-party screen recording applications.
Firstly, let’s started with the built-in tool Xbox Game Bar.
Before diving into the tutorial, we’ll take a closer look at its main features as well as the pros and cons, so that you can make a considered and well-informed choice.
Built into Windows 10 and 11, Xbox Game Bar is designed to record games and works with most PC games. It gives you instant access to widgets for screen recording and sharing, lets you send and receive game invites, chat with Xbox friends, and monitor your PC performance in real-time. Besides recording gameplay, it can also easily capture other screen activities from other applications.
Now, let’s see how to screen record on Dell laptop with Windows Xbox Game Bar.
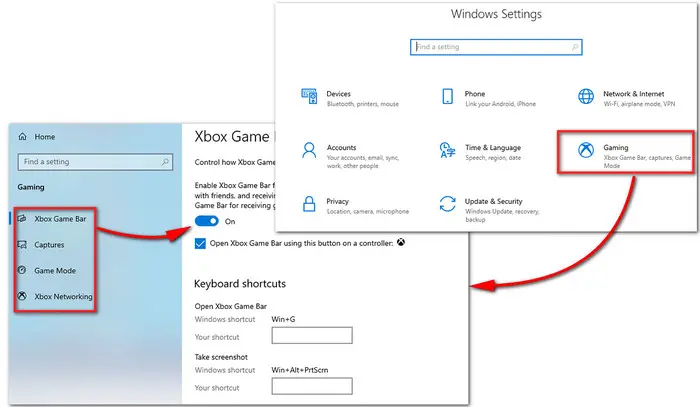
Step 1. To enable Game Bar, use the hotkey “Windows + I” to enter the Windows Settings menu and go to Gaming > Xbox Game Bar. Then toggle it on.
Step 2. Below the Xbox Game bar option, you can hit Captures and continue to set shortcuts, recording length, audio quality, and more.
Step 3. Use “Windows + G” to launch Xbox Game Bar. Check the message box “Yes, this is a game.”
Step 4. Click on the start recording button or press “Windows + Alt + R” to start screen recording on Dell laptop. Then press “Windows + Alt + R” again to stop the recording


Wonder how to record gameplay with Xbox Game Bar, like CSGO, LOL, or Flash games, you can read this post: How to Record CSGO Gameplay on Windows PC?
Packed with screen recording features and built-in editing tools, WonderFox HD Video Converter Factory Pro is one of the best watermark-free screen recorders for Dell laptops.
It features multiple screen recording modes. You can capture the entire screen or just a portion of it. You can also easily record videos with your voice and sounds from the computer. Recordings can be saved as MP4, MKV, AVI, or MOV video files.
Besides screen recording, it can function as a practical sound recorder used for capturing live music, podcasts, online calls, and the like. Both screen recording and audio capturing have no time limit.
There are many other notable features included. It has a set of editing tools and comes with 500+ configured presets for format conversion. Additionally, you can use it to download videos from YouTube, Vimeo, TikTok, and 1,000 more video-sharing websites.
Next, let’s follow the tutorial below to start screen recording with audio on Dell laptop.
Step 1. Free downloadFree download and install the recommended screen recorder to your Dell PC first.
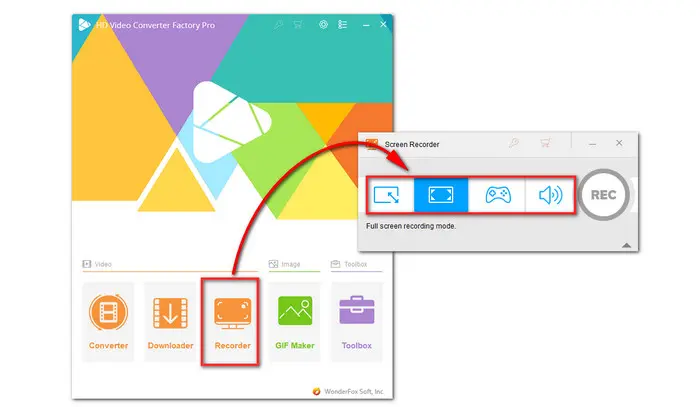
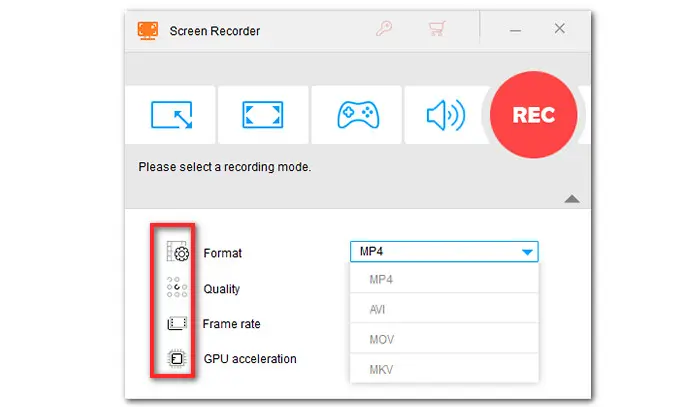
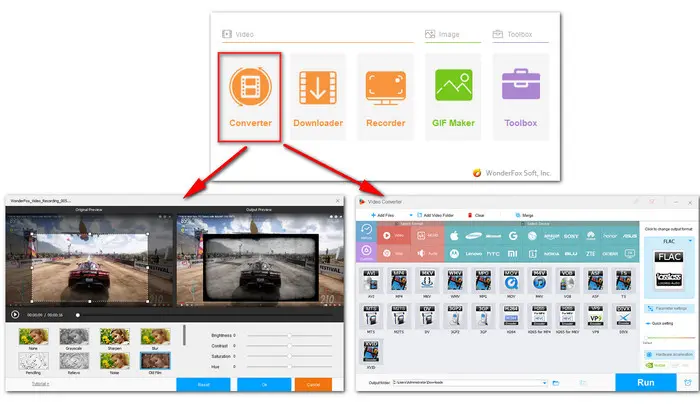
Step 2. Launch it and open the Recorder. Next, select a recording mode from the four options– Custom, Full Screen, Game, and Audio-only (from left to right).
Step 3. Then choose the recording format, quality, frame rate, and GPU acceleration.
For non-tech-savvy users, please read this post: How to make screen recording quality better?

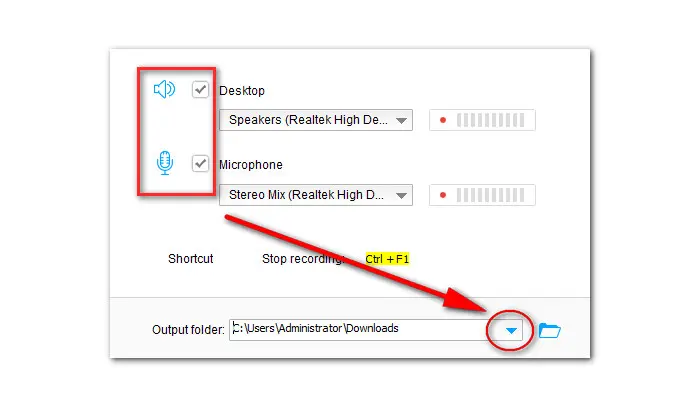
Step 4. Go ahead and tick both the Desktop and Microphone if you want to record the screen with external and internal sounds together.
At the bottom of the interface, specify an output folder or leave it as default.
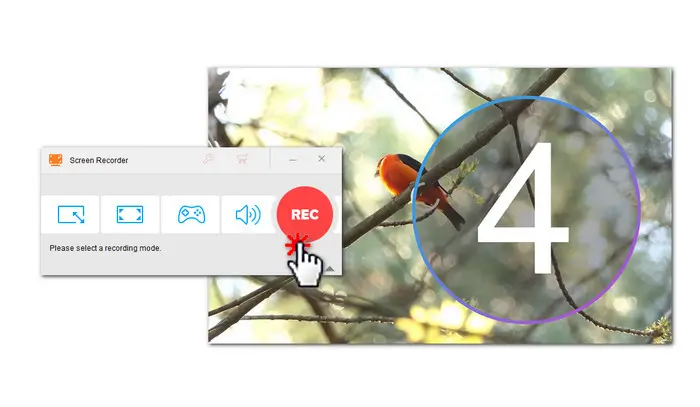
Step 5. When all settings are ready, click REC to start the recording after a five-second countdown. When the recording is end, press hotkeys “Ctrl + F1” to stop the recording.

Optional. You can view the recordings within the Converter module. Editing and converting features are also accessible here.

OBS, also named Open Broadcaster Software, is a free and open-source screen recorder for Dell laptops. It can be used for screen recording and live streaming.
With it, you can capture the screen and webcam along with multiple audio sources. It is capable of holding unlimited scenes and has the ability to smoothly switch between scenes.
Being open-source software, OBS allows users to extend the functionality by adding plugins.
Here is how to screen record on Dell laptop with OBS.
Step 1. You can get this free recording tool here.
Step 2. Launch the recorder. To screen record on Dell laptop with audio, you need to add your sources for video.
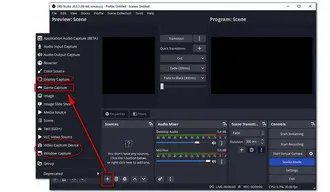
At the bottom of the workplace, hit the + icon in the Sources box. Here you can pick the source you want. For example, you can select Game Capture (Windows only) if you’re capturing a game.
Display Capture is used to record everything visible on a monitor.
Window Capture is for non-game applications.
Video Capture Device is for a webcam or capture card.

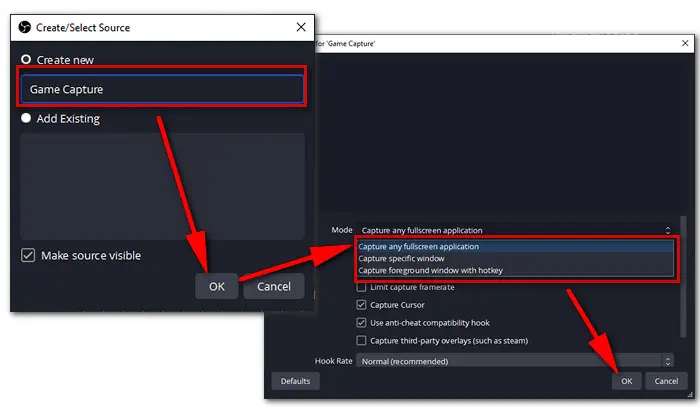
Step 3. Then give your video source a new name and click on the OK button.
Step 4. For recording gameplay, you need to select a mode to decide the recording area in the properties window. Hit OK to save the changes.

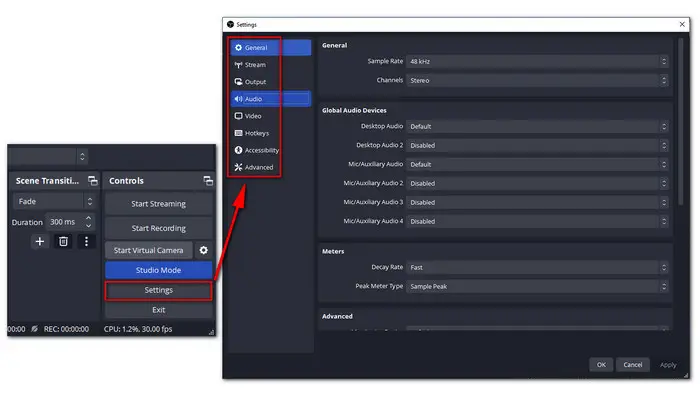
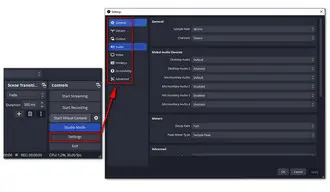
Step 5. Under the Controls section, go to Settings > Audio to manually set up your audio devices. Remember to press OK to back to the main dashboard. You can also set the video resolution, frame rate, bitrate, etc. here.
Step 6. Then just hit the Start Recording button in the Controls box.
Similar to OBS, XSplit Broadcaster is capable of screen recording as well as live streaming media. But it is not open-source and it’s not free. It is only available on Windows 10/11 64-bit OS.
With XSplit, you can customize your resolutions and frame rates and create multiple, fully-customizable scenes in a single presentation. It exports the recorded video in MP4 format or FLV format.
XSplit Broadcaster supports layering different scenes, transitions, elements, live chat integration, webcam with effects, etc. You can stream to multiple broadcast outputs simultaneously.
Read the easy steps below to screen record on Dell laptop with XSplit Broadcaster.
Step 1. Get this recorder tool for Dell laptop here.
Step 2. For the first-time users, you need to create an XSplit account. You can also log in with your Twitch, Facebook, YouTube account, or others.
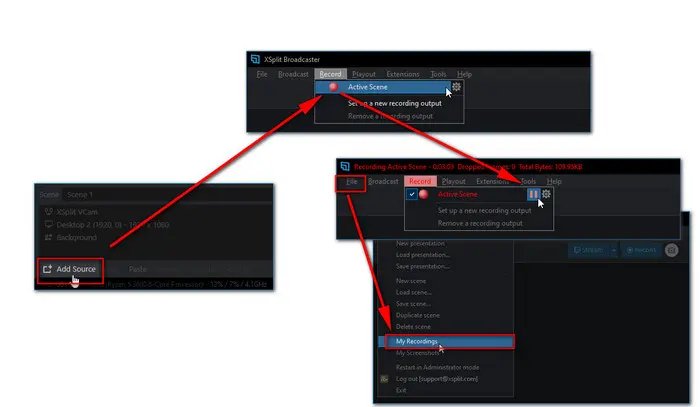
Step 3. At the left bottom of the main dashboard, click on the Add Source button to add your target game source.
Step 4. At the top menu bar, hit on the Record button and select Active Scene. Then the program will begin recording whichever scene is currently displayed on the XSplit Stage’s preview window.
Step 5. Next to the Active Scene, hit the pause button to pause the ongoing recording. To end the recording, still, go to Record > Active Scene.
Then you can navigate to File > My Recordings to locate your recorded files.

That’s all I want to share about how to screen record on Dell laptop. Sincerely hope you can find your wanted program here. Thanks for reading.
Terms and Conditions | Privacy Policy | License Agreement | Copyright © 2009-2025 WonderFox Soft, Inc.All Rights Reserved