Movie Maker, bundled with Windows XP and Vista, was a popular video editing software. It provides basic video editing functions such as cutting video, joining video clips, rotating video, adding music and text, etc. This tutorial focuses on how to rotate videos in Windows Movie Maker.
However, it was officially discontinued in 2017 and no longer supports newer Windows versions. Besides, it does not support the latest video and audio codec. If you’re using Windows 10/11 and want to process videos with modern codecs, an alternative is also recommended below.
How to rotate video in Windows Movie Maker?
Step 1. Open Windows Media Maker. Go to the Start menu, type Movie Maker, and press Enter on your keyboard.
Step 2. Click “Add videos and photos” on the top toolbar, locate the video you want to rotate, and import it into the window.
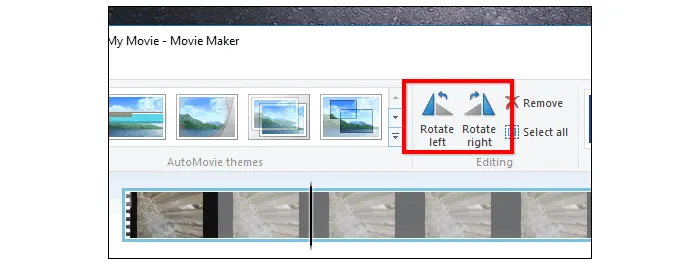
Step 3. Move to the top-right rotation options. You can select “Rotate left 90°” or “Rotate right 90°” and preview the output video on the left video player.
Step 4. Click the Movie Maker button on the top left corner, head to “Save movie”, then select a setting for the export. It will usually save the video in MP4 or WMV format. Besides, you can choose “Publish movie” to upload the video to YouTube , Vimeo, Facebook, One Drive, Flickr, etc. Next, wait for the Movie Maker to rotate videos. The process may take several seconds to minutes, depending on the file size and output settings.
There are many alternatives to Windows Movie Maker. One of the easiest alternatives is WonderFox Free HD Video Converter Factory.
It features a user-friendly interface and allows you to rotate, cut, trim, crop, apply special effects to videos, and add subtitles and audio tracks. You can also use it to change video format, reduce file size, improve quality, and download movies and music from websites. 100% free and no watermark and no built-in ads!
Download and install the software and see how to rotate video with this functional freeware below.
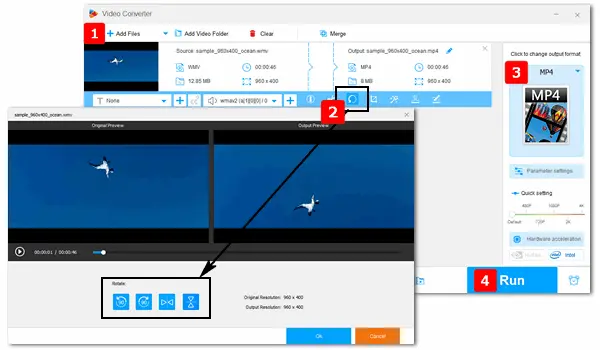
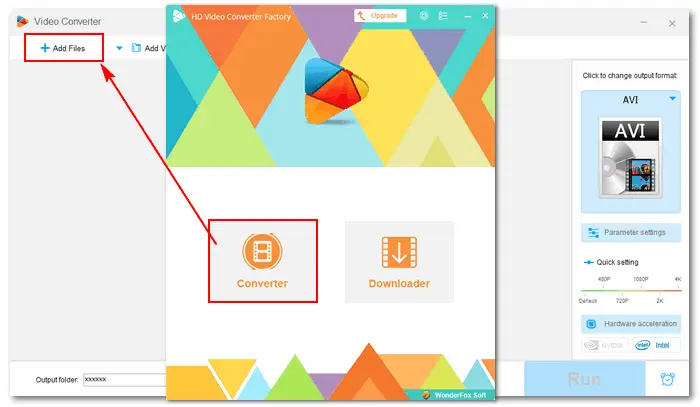
Step 1. Select Converter on the home interface and click Add Files to import the video you want to rotate. Direct drag-and-drop is also supported here.
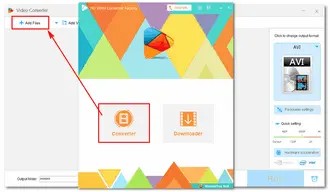
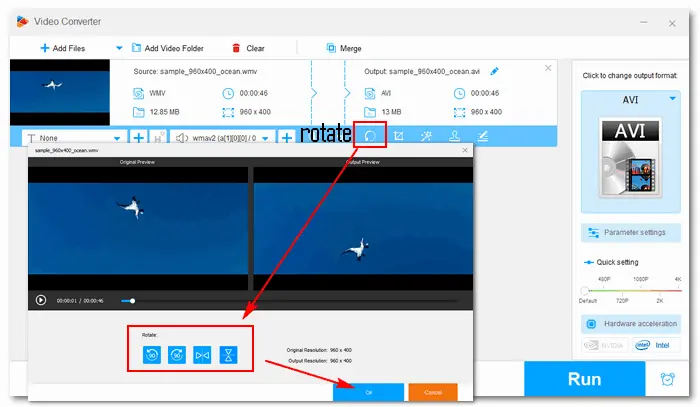
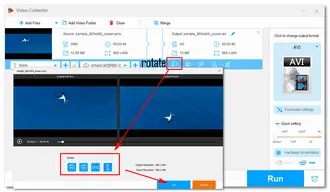
Step 2. Go to the edit column (in blue) below the source file and click the “Rotate” icon to enter the rotating interface. There are two preview windows. Pick a rotation option and preview the output video in the right-side window. If it’s okay, click the OK button to save your change.
This software offers four rotation methods: 90° clockwise, 90° counter-clockwise, vertical flip, and horizontal flip. Learn how to rotate a video 90/180 degrees in detail >
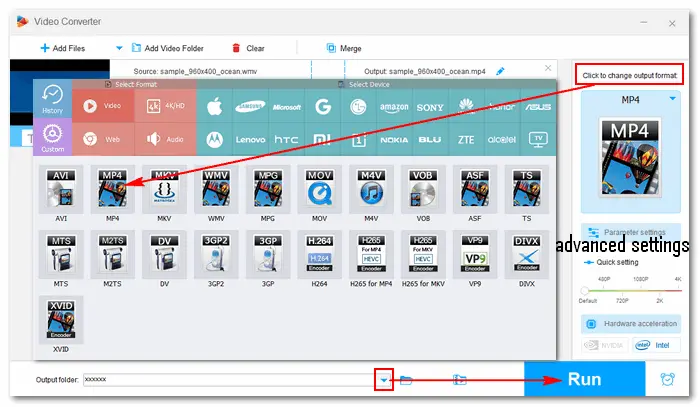
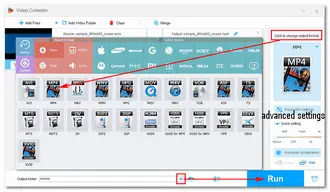
Step 3. Go to the “Click to change output format” section on the right side of the main interface. Click the format image below to select an export video format. For example, choose MP4 under the Video tab to convert videos to MP4 format. You can also choose other video and device presets, such as MOV, MKV, WebM, iPhone, Huawei, Samsung TV, Xbox, Chromebooks, etc.
Then, tap the bottom inverted triangle button to specify an output path. Press Run to finalize the video rotating process. Once done, you can check the output file in your folder.
Tips. In this free video converter and editor, you can also trim video files and adjust advanced parameters like bitrate, resolution, frame rate, aspect ratio, etc.
This article tells how to rotate video in Windows Movie Maker and its powerful replacement, WonderFox Free HD Video Converter Factory. Moreover, the alternative free video rotator has a Pro edition that offers more features, including a batch video downloader, HD screen recorder, GIF maker, and toolbox (ringtone maker, subtitle extractor, photo to video converter, and split-screen video maker). Upgrade to Pro to enjoy a simpler digital life!
Terms and Conditions | Privacy Policy | License Agreement | Copyright © 2009-2025 WonderFox Soft, Inc.All Rights Reserved