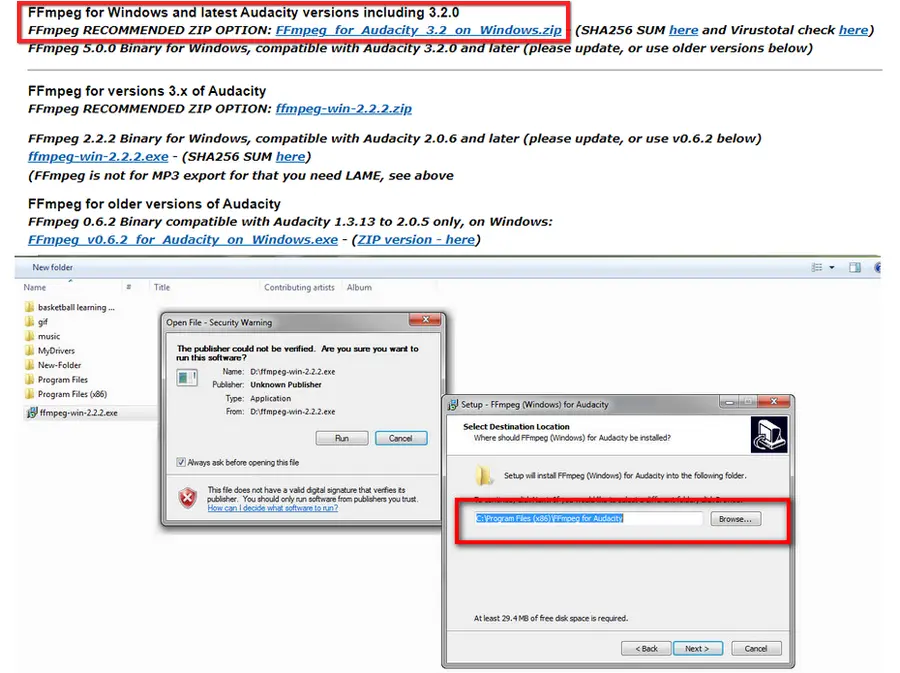
Step 1. Go to the FFMPEG library download page: https://lame.buanzo.org/#lamewindl
Step 2. Scroll down to “TO DOWNLOAD Lame and FFmpeg for Windows, click links BELOW” and click “FFmpeg RECOMMENDED ZIP OPTION: FFmpeg for Audacity 3.2 on Windows.zip” to download FFmpeg for Windows and latest Audacity versions.
Tips. Mac and Linux users can apply the similar steps to install the FFmpeg library for Audacity.
Step 3. Find the downloaded .exe file on your computer and double-click it to run the installer.
Step 4. Hit Yes > OK > Next >Next, and specify the destination as C:\Program Files\FFmpeg for Audacity or C:\Program Files (x86)\FFmpeg for Audacity for Windows 64 bit version.
Step 5. Click Next > Yes > Install. Now, you have finished the FFmpeg installation.

Now, restart Audacity. Before starting conversion, you can manually check if the FFmpeg library is installed for Audacity with the following steps.
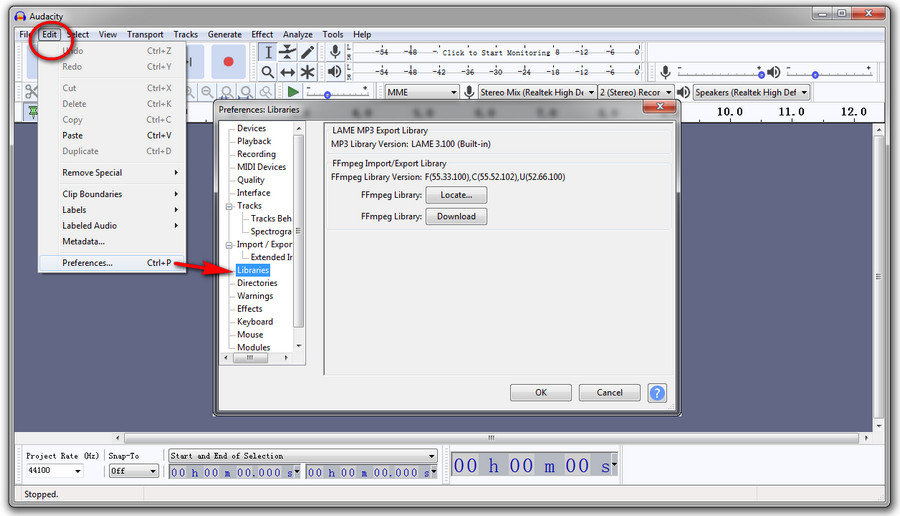
Step 1. Launch Audacity, go to Edit > Preferences.
Step 2. On the Preferences dialog, select Libraries > FFmpeg Library: Locate.
Step 3. If you have installed FFmpeg, a success dialog will pop up. If not, you will see a “Locate” FFmpeg dialog. Click Browse and select avformat-55.dll in the folder containing FFmpeg.
Step 4. Click Open > OK > OK.


