Want to extract the audio from your video files to M4A format for creating podcasts, playlists, or easier sharing online?
M4A is an audio format that often offers better sound quality compared to the widely used MP3 format at a similar bitrate while keeping a smaller file size. Moreover, for Apple users, it is a format compatible with iPhones, iPads, and other Apple devices.
The following shares two video to M4A converters to help you convert videos to M4A efficiently on the desktop and online. Keep reading to learn more informations.
WonderFox HD Video Converter Factory Pro is a professional and easy-to-use program that can deal with various video and audio conversions.
It can convert any video (incl. 8K and AV1) to M4A or other formats you like. Also, it can convert up to 10 files simultaneously with the batch conversion mode.
Before the conversion, you can also control the output audio settings like audio bitrate, sample rate, volume, etc. It is a professional and easy-to-use program that can deal with various video and audio conversions.
Key features you can enjoy during the video to audio conversion:
Before starting the conversion, you’d better download and installdownload and install this video to M4A program on your PC for preparation.
Launch WonderFox HD Video Converter Factory Pro after the installation.
Click to enter the “Converter” program and press the “+ Add Files” button to load the videos you want to convert. Alternatively, you can also drag and drop the files into the workspace directly.
💡 Tip: Can’t import your videos? Check if it’s corrupted or DRM-protected. Such a file isn’t supported in this video converter.


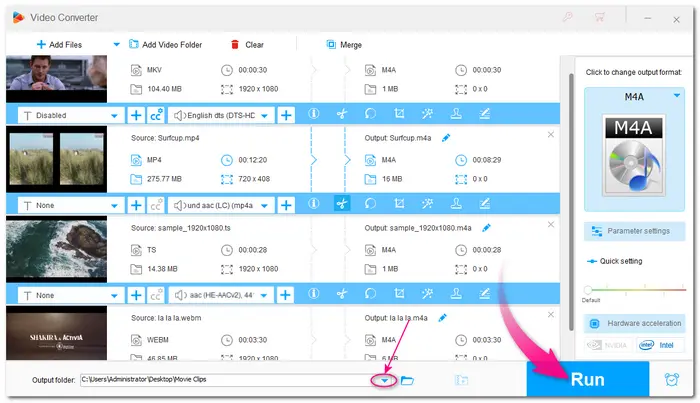
Go to the right side of the interface and click on the format image to expand the output format list. Then navigate to the “Audio” tab and select “M4A” as the output format.


If needed, you can click the scissor icon to remove the unwanted parts from the video or split the video into several segments. The “Merge” feature allows you to combine the video files into a single file.
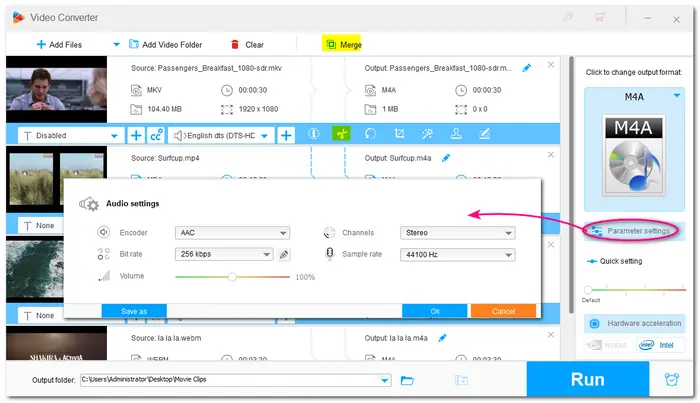
For advanced users, you can open the “Parameter settings” window to customize the output audio settings, like audio bitrate, channels, and sample rate, and adjust the audio volume.

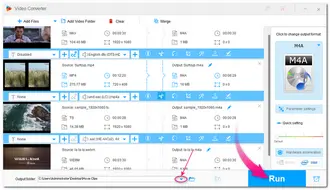
You can leave the output path as default (C:\Users\Administrator\Videos\WonderFox Soft\HD Video Converter Factory Pro\OutputVideo\) or click the ▼ button to set an output folder for the converted files. Finally, press “Run” to start the conversion immediately.
Once the conversion is finished, it will pop up a window to show you the converted M4A files. You can then play or share them.
Note: Before starting the YouTube video to M4A file conversion, please make sure whether it is legal to download YouTube videos and audio in your country. WonderFox does not allow downloading any YouTube Video and audio for distribution, sale, or commercial purposes!
Besides converting the local video files to M4A, WonderFox HD Video Converter Factory Pro can also help you download and convert YouTube videos to M4A. It is also capable of saving videos and audio from other 1000+ sites. If you wonder how to convert YouTube videos to M4A audio files, follow the steps below now!
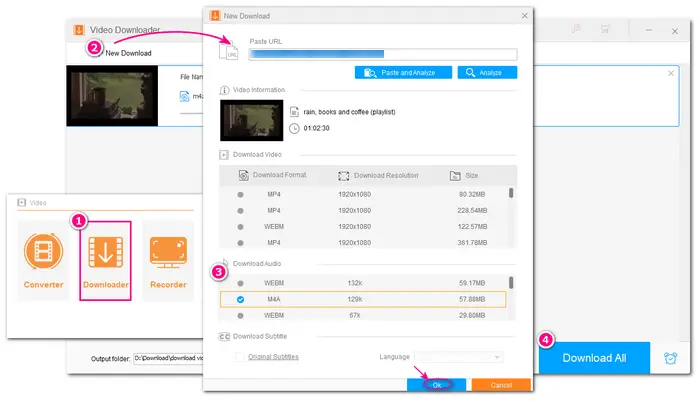
Step 1. Launch HD Video Converter Factory Pro and open the “Downloader” program.
Step 2. Go to the YouTube website, find the video you want to download, and copy the video link.
Step 3. Click “+ New Download” to bring up the download window. Press the “Past and Analyze” button and wait for the analyzing process.
Step 4. Head to the “Download Audio” section and select the “M4A” option. Click “OK” to add the download task.
Step 5. Hit “Download All” to download and convert YouTube to M4A.


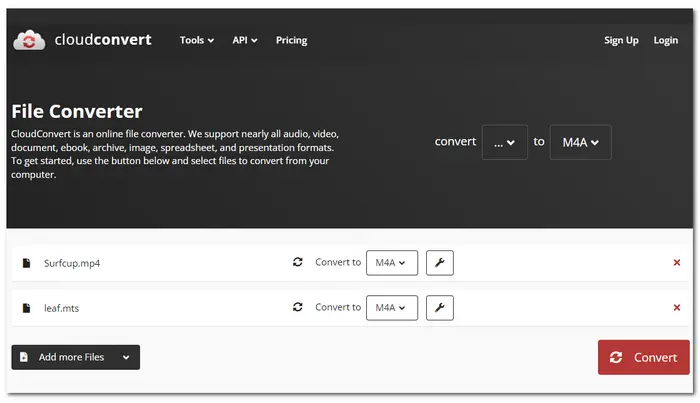
Want to find a reliable online video file to M4A converter to get your desired M4A files without installing any software? You have a wealth of options. And CloudConvert is a popular one.
It can convert videos from local drives, cloud services, and URLs to M4A quickly. You can trim the audio and customize other audio parameters before starting the conversion.
However, It limits the maximum file size to 1 GB and only allows 10 conversions per day.
Here’s a guide for videos to M4A conversion with CloudConvert:
Step 1. Visit the site: https://cloudconvert.com.
Step 2. Click “Select File” to add your video files.
Optional. Hit the wrench icon to trim the audio and change the parameters as you wish.
Step 3. Click “Convert” to start uploading and converting your video files.
Step 4. When the conversion is finished, click “Download” to save the converted files.
Above is the whole process of converting videos to M4A. The desktop and online converters are both easy to use and offer efficient conversion processes.
Though the online converter is more convenient to use, you may still not be advised to use it for large file conversions if your internet connection is unstable. Otherwise, it may take a long time or even finally crash. In this case, the desktop converter is a better choice for its batch mode and fast conversion speed. You can use it to convert multiple files. Get it here to have a free try now!
WonderFox HD Video Converter Factory Pro and CloudConvert can convert video to M4A for free but with limitations.
WonderFox HD Video Converter Factory Pro puts a 5-minute output on each file. CloudConvert only allows 10 conversions per day, and each file cannot exceed 1 GB.
The detailed conversion steps are outlined in this post.
Can VLC convert video and audio to M4A? Yes. You can create a M4A profile with VLC and then convert your files to M4A. Here’s how to do:
Step 1. Install and open VLC.
Step 2. Click “Media” and choose the “Convert/Save” option.
Step 3. Press the “+Add” button to add the file you want to convert. Then click “Convert/Save”.
Step 4. Hit the Profile last icon “Create a new profile”. Then type “M4A” in the “Profile Name” box. Switch to the “Audio codec” section. Check the “Audio” box and select the “MPEG 4 Audio (AAC)” option from the “Codec” drop-down option. Then click "Create".
Step 5. Expand the profile option box and select the M4A profile you just created.
Step 6. Click “Browse” to rename the file and choose the destination folder. Finally, press “Start” to start the conversion.
Terms and Conditions | Privacy Policy | License Agreement | Copyright © 2009-2025 WonderFox Soft, Inc.All Rights Reserved