As a Windows 10 user, you may want to find an easy-to-use Windows 10 screen and audio recorder to record screen with audio on Windows 10. When you are participating in an online meeting, making a video tutorial, hoping to record gameplay highlights to share online, etc., a handy screen and audio recorder can always do you a favor. Here, two handy screen and audio recorders for Windows 10 are provided for you. Moreover, this post will lead you through the detailed steps of how to record screen on Windows 10 with audio. Just read on!
For screen recording in Windows 10 with audio, WonderFox HD Video Converter Factory Pro can be your best choice. It is an all-in-one video & audio processing tool featured with an efficient screen and audio recorder that can record computer screen with audio on Windows PC in a handy way. You can use it to freely record part of the screen or the whole screen without hassle. While recording the screen, you can choose to record the system sound, the mic audio, or both with the screen. Apart from recording screen with audio, you can also record audio-only files in MP3, AC3, AAC, and WAV formats. Moreover, it allows you to save the video recordings in several popular formats, including MP4, AVI, MOV, and MKV.
If you want to further edit the video recordings, you can even utilize its built-in video editor to cut, crop, merge, and add text and images... to the recordings. It also allows you to compress the recordings with high-quality preserved to save the storage space.
Free downloadFree download this Windows 10 screen and sound recorder and follow the guide below to see how to screen record on Windows 10 with audio.
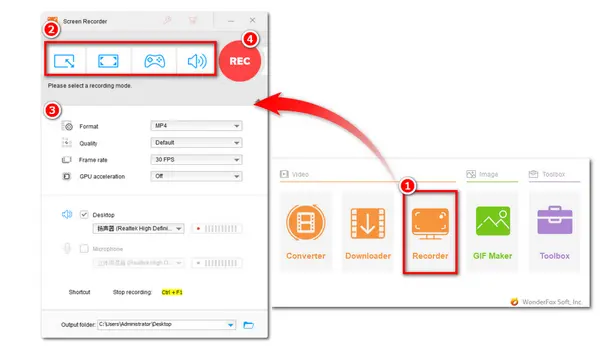
Launch HD Video Converter Factory Pro on your PC after the installation. Choose Recorder module to enter the Screen Recorder interface.


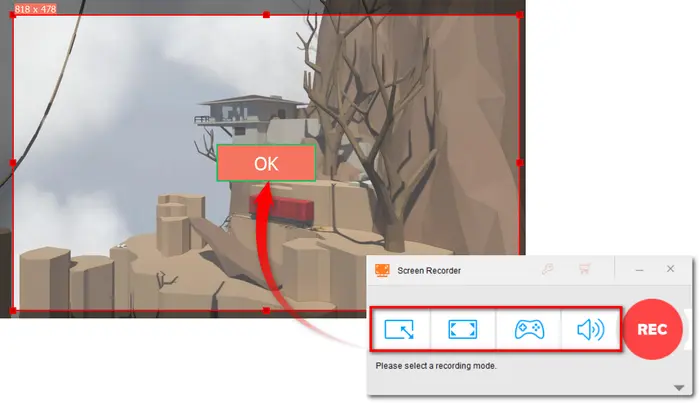
After entering the Screen Recorder interface, you can choose one mode (Custom mode, Full screen recording mode, Gameplay recording mode) for the recording task. For Custom mode, you need to move your mouse to select the specific part you desired and then click the OK button.

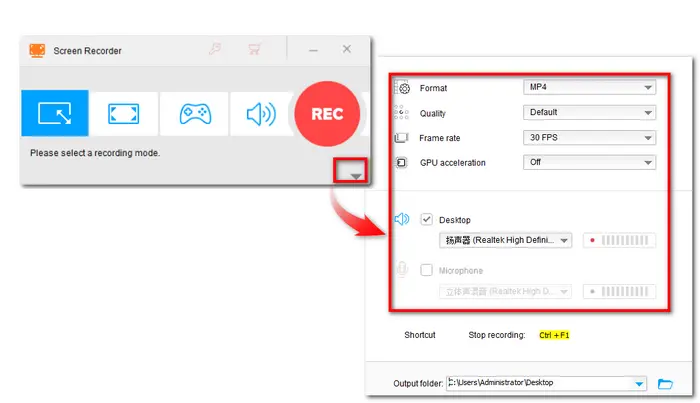
If your Screen Recorder interface doesn’t show the settings part, click the bottom-right triangle button to bring up the recording settings. Here you can modify the recording format, quality, frame rate, and turn on/off GPU acceleration (if your computer supports hardware acceleration). Then, check the audio source. You can check the Desktop to record the screen sound or Microphone to record external sound or combine them together.

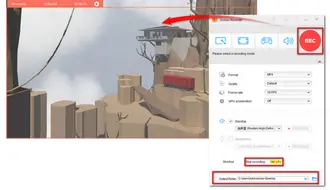
Before starting recording, move to the bottom of the interface and click the inverted triangle button to specify an output path. At last, click on the red REC button to start recording. You can press the hotkey Ctrl + F1 to finish the recording task. The recorded video will show up in the folder you set before.

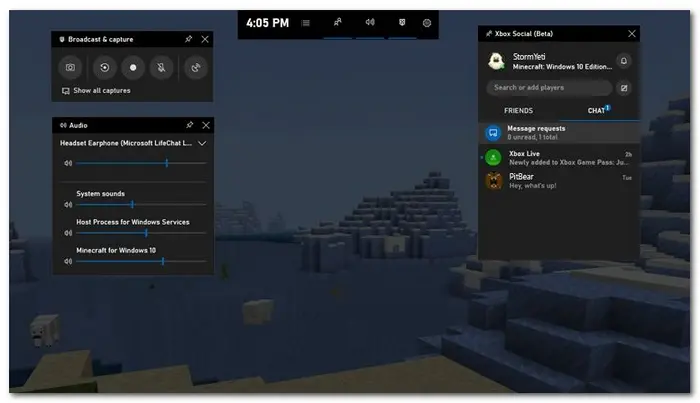
If you don’t want to download any software, you can take advantage of the Windows Xbox Game Bar. As its name suggests, it is primarily designed for gameplay recordings. But it also works well with other screen activities. However, this Windows 10 default screen recorder can only record video in full screen mode within a single application window and cannot record the entire Windows 10 desktop. But it can still be a simple screen recorder with audio.
The following is the simple instruction on how to record screen and audio with it.
Step 1: Open the app, web browser, or game that you want to record.
Step 2: Press “Win +G” on your keyboard to quickly open the Xbox Game Bar. If the “Win +G” hotkey doesn’t bring up the Game Bar, make sure that it is enabled. You can search “Game Bar Settings” in the Windows 10 search box. Then turn on the switch next to the “Enable Xbox Game Bar” button.


Step 3: After opening the Game Bar, the recording tools will appear and the Capture function is in the top-right corner.
Step 4: Click on the third record button or use the hotkey “Win + Alt + R” to start the recording. It will record screen with the system sound. If you want to record screen with the external sound, you can click the fourth microphone-shaped icon. Then a small recording widget will display on the screen showing the recording time.
Step 5: When you finish the recording, click the stop icon on the recording widget to end the recording. Then you can find the recording in the Gallery section.
Above is all the information about how to screen record on Windows 10 with audio. Both screen recorders are handy to use. But frankly speaking, if you want a feature-rich Windows screen and audio recorder, WonderFox HD Video Converter Factory Pro can be the best for you. It allows you to record screen and audio without limitations, in many formats, and in different modes. You can also start editing or compressing after finishing the recording. Anyway, hope this post can be helpful to your problem. That’s all. Thanks for your reading!
Terms and Conditions | Privacy Policy | License Agreement | Copyright © 2009-2025 WonderFox Soft, Inc.All Rights Reserved