Best Free Video & Audio Processor: HD Video Converter Factory

Sometimes, we often have the need to merge multiple video clips into one complete file. But when using traditional video editing tools to join videos, they usually perform "re-encoding", which not only takes a long time but may also lead to the loss of video quality.
If we have higher requirements for video quality or need to process a large number of video segments, lossless merging becomes an ideal solution. Then here comes the hero - LosslessCut.
LosslessCut is a free, open-source, and cross-platform tool. It focuses on "lossless" editing, which avoids re-encoding. This helps you:
Instead of special effects, filters, or other professional editing functions, if you only need simple and quick editing like cutting or merging, LosslessCut is the right one for you.
If you already have LosslessCut installed, jump directly to the tutorial section.
GitHub Releases: Visit the official GitHub releases page and download the latest version of the executables for your operating system.
App Stores: For those who want the advantage of a secure and simple installation process with automatic, stable updates, consider getting it from Microsoft Store (Windows), Mac App Store (macOS), or Snap Store/Flathub (Linux).
Third-party Sources: If you cannot access GitHub, consider trusted third-party mirrors or app stores. Some communities like VideoHelp may also provide portable versions.
LosslessCut supports many common container formats, such as MP4, MOV, MKV, WEBM, etc. But to merge files without re-encoding, they should share identical encoding parameters like codecs, resolution, frame rate, and other technical specifications.
Also Read: Check Bitrate of Video | Check FPS of Video
If these parameters differ, you may run into various problems. In that case, you can first use a video transcoding tool to perform batch conversion to make them unified before using LosslessCut to merge them.
It's best to rename the video files beforehand, such as "Segment 1" and "Segment 2", and put them in one folder uniformly to avoid confusion during the operation.
Make sure you leave enough hard disk space, especially when merging multiple large files.
You'd better keep backups of the source video files first to avoid the loss or damage caused by unexpected merging.
Start LosslessCut and wait for the main interface to load completely.
Click "File" > "Open" or "Open folder" to import video files that need to be merged in the pop-up dialog box.
You can also directly drag and drop all the videos into the window of LosslessCut.
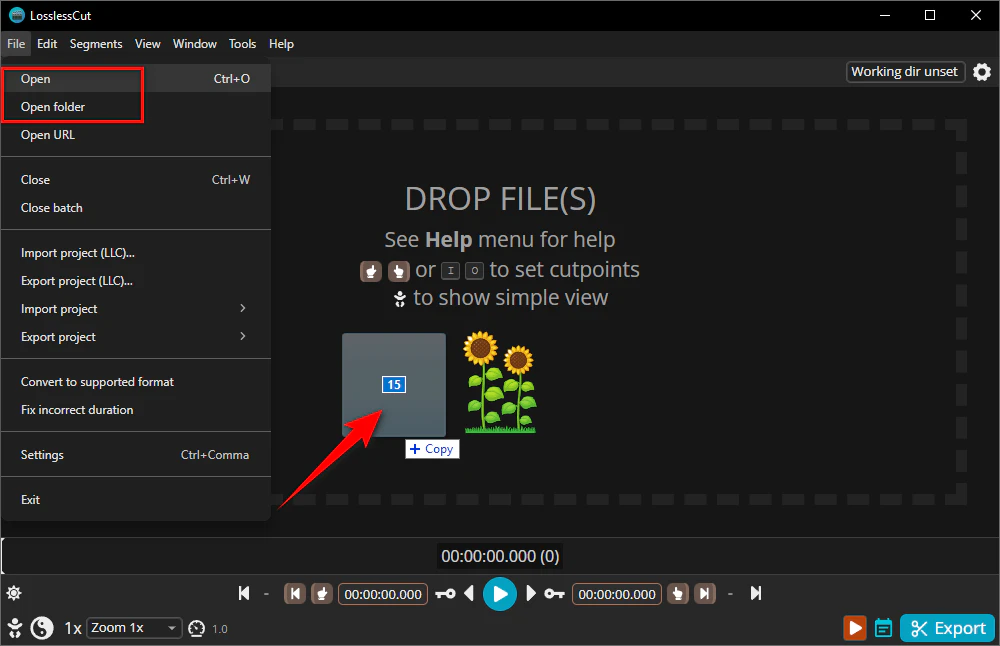
After importing, all the videos will be added to the "Batch file list" on the left side. LosslessCut typically lists them in the order of file names. You can click the "AZ" icon to sort the list.
If you need to adjust the merging order, you can manually click and drag each one right there so that they are in the order that matches your plan (e.g., chronological sequence).
If you accidentally add the wrong file, right-click on the video and click "Remove".
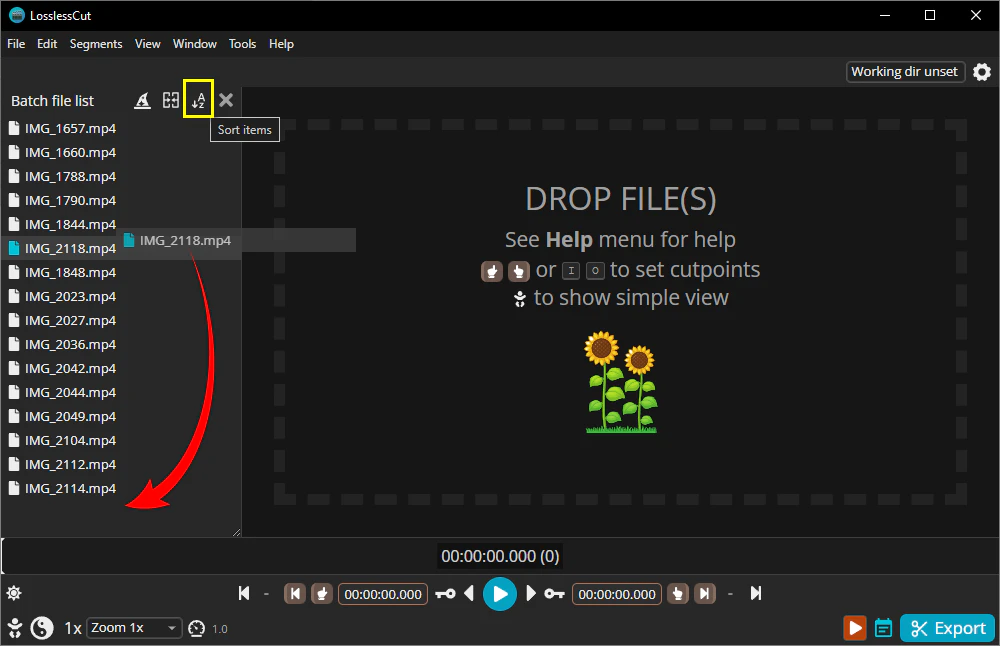
By default, LosslessCut will save the combined video in the same directory as your original files. To change it, click on the "Working dir unset" button and specify a destination folder.
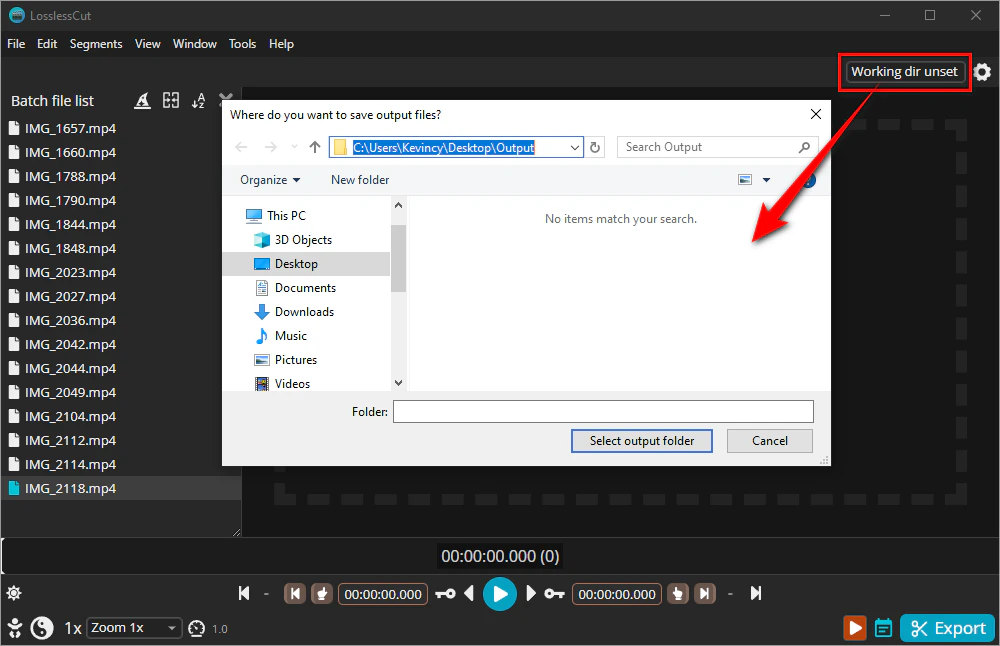
Once everything is ready, go to "Tools" > "Merge/concatenate files". You can also click on the "Merge" icon next to the "Batch file list" to open a new window.
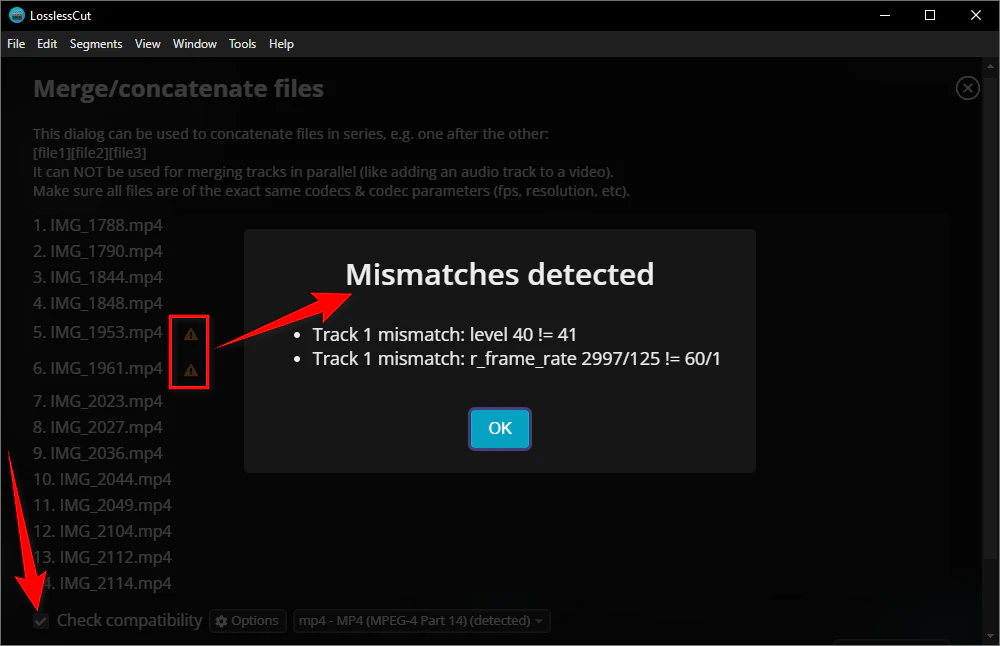
First, mark the "Check compatibility" option. This is to double-check that the videos are eligible for lossless combining.
LosslessCut will prompt a "Mismatches Detected" warning in at least one file if the provided videos have incompatible encoding parameters. Click on the warning icon to check the detailed mismatched information.
Remove those incompatible items or re-encode them and re-import into the list.
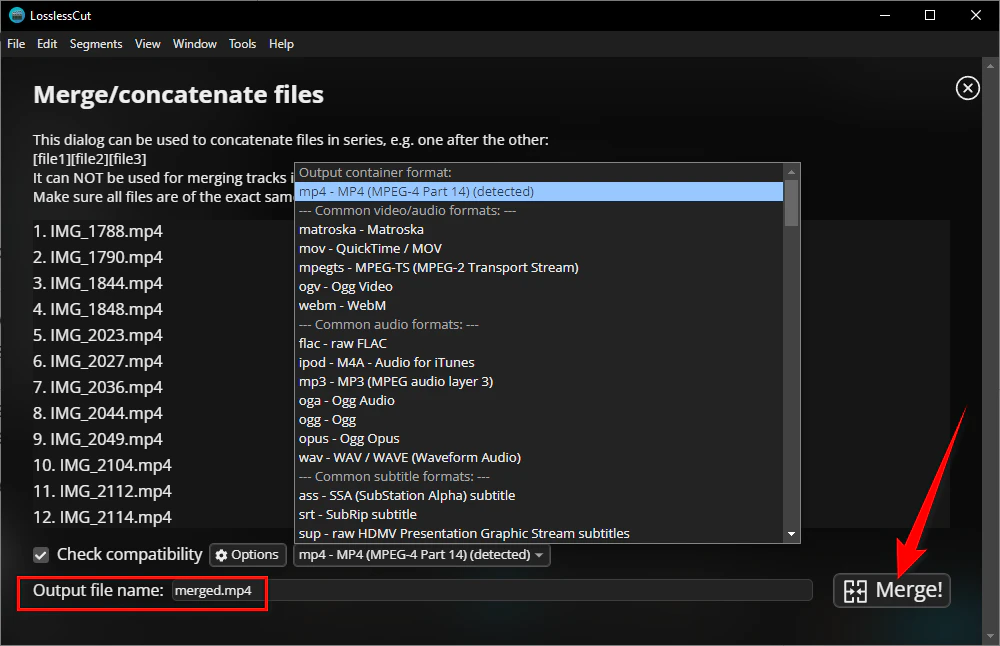
If there’s no problem, then you can select an output format in the drop-down menu, popular choices are MP4, MKV, and MOV. Actually, LosslessCut will automatically choose the format of your source video files.
Now give your merged video a name, and click "Merge!".
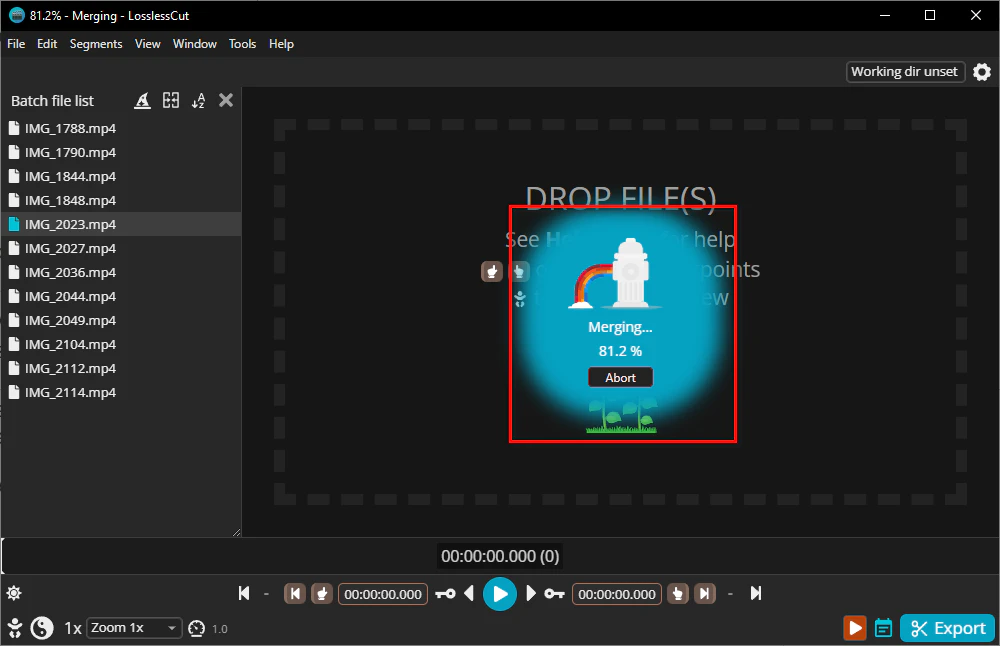
A progress bar will appear on the main interface. Lossless merging is usually very fast because it doesn't involve re-encoding. And you’ll be prompted when the merging process is finished.
Once merging is complete, navigate to the output folder you selected.
Open the merged video file and play it using VLC or another media player to ensure:
WonderFox Free HD Video Converter Factory is another great option to consider when you want to merge videos without re-encoding. What may surprise you is that this tool allows for batch merging video files in different groups.
To be specific, you can group video files created from different devices (e.g. GoPro, Dji, etc.) for merging. This can save you a lot of time and effort. It also stands out with additional features for video transcoding, format conversion, and basic editing, all in a user-friendly package.
Here's why I recommend it:
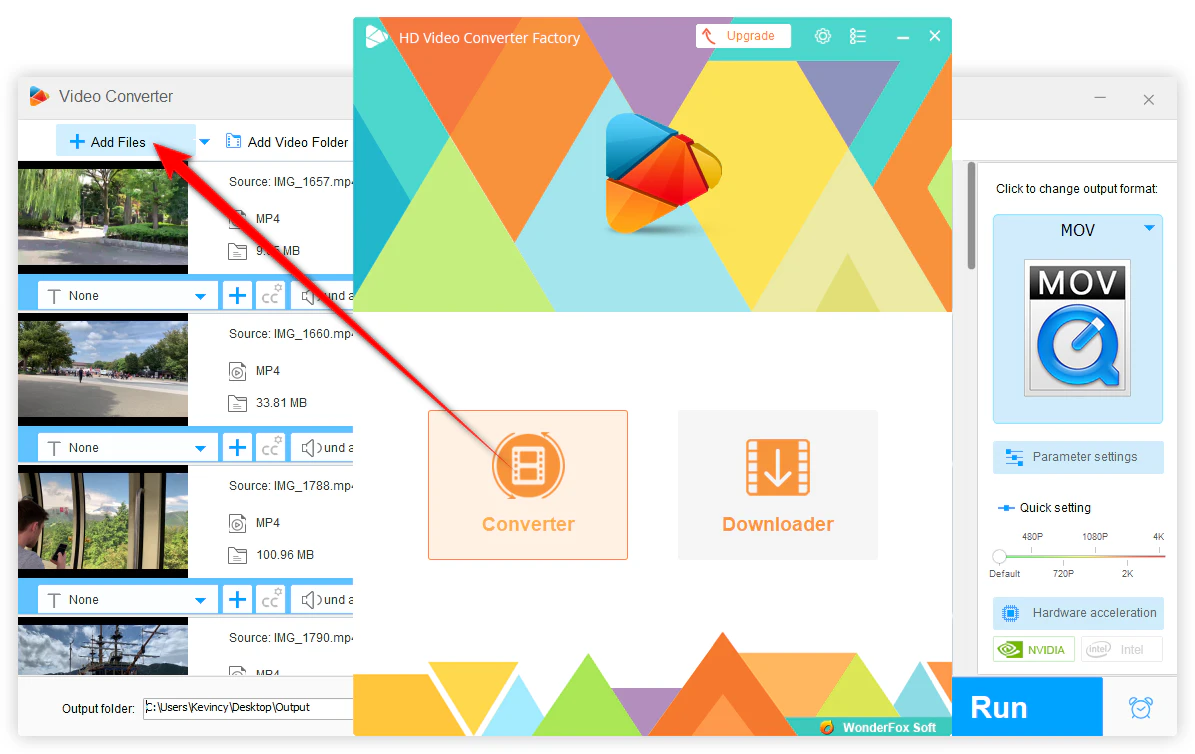
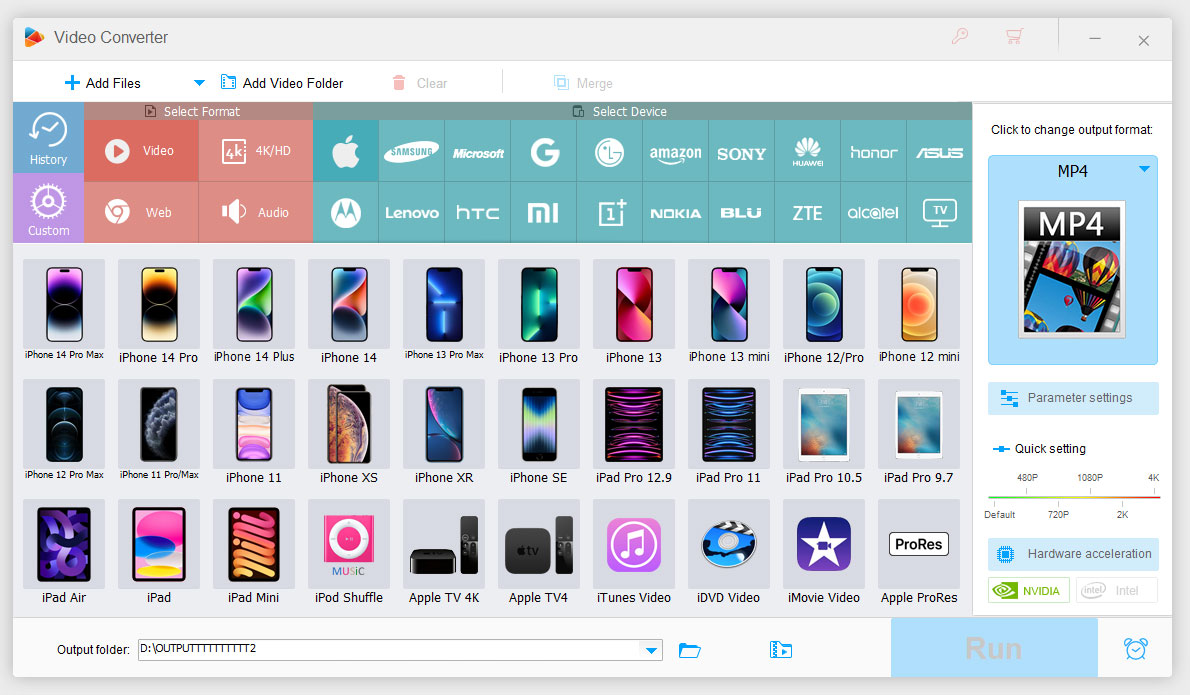
Next, click on the "Output Format" menu on the right side to expand the full list of 600+ presets. To avoid re-encoding, it's recommended to select the original video format with settings unchanged.
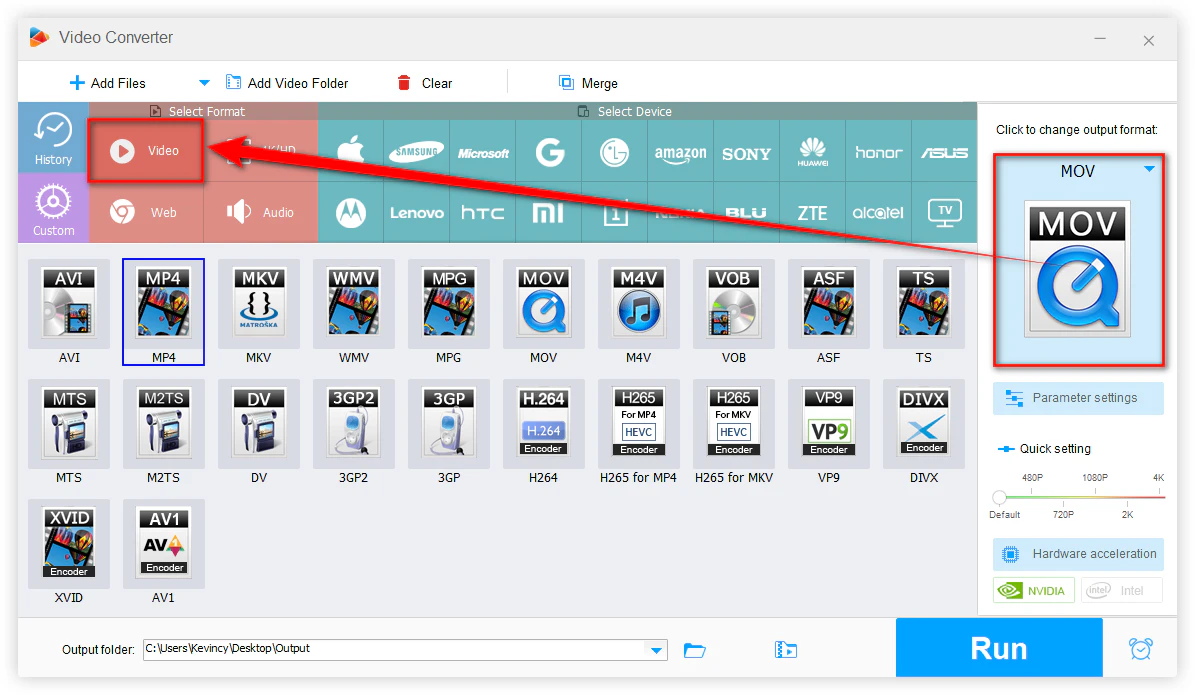
After adding files, click on the "Merge" button on the top menu to open a new window. Then your imported videos will display in the "Video list" section.
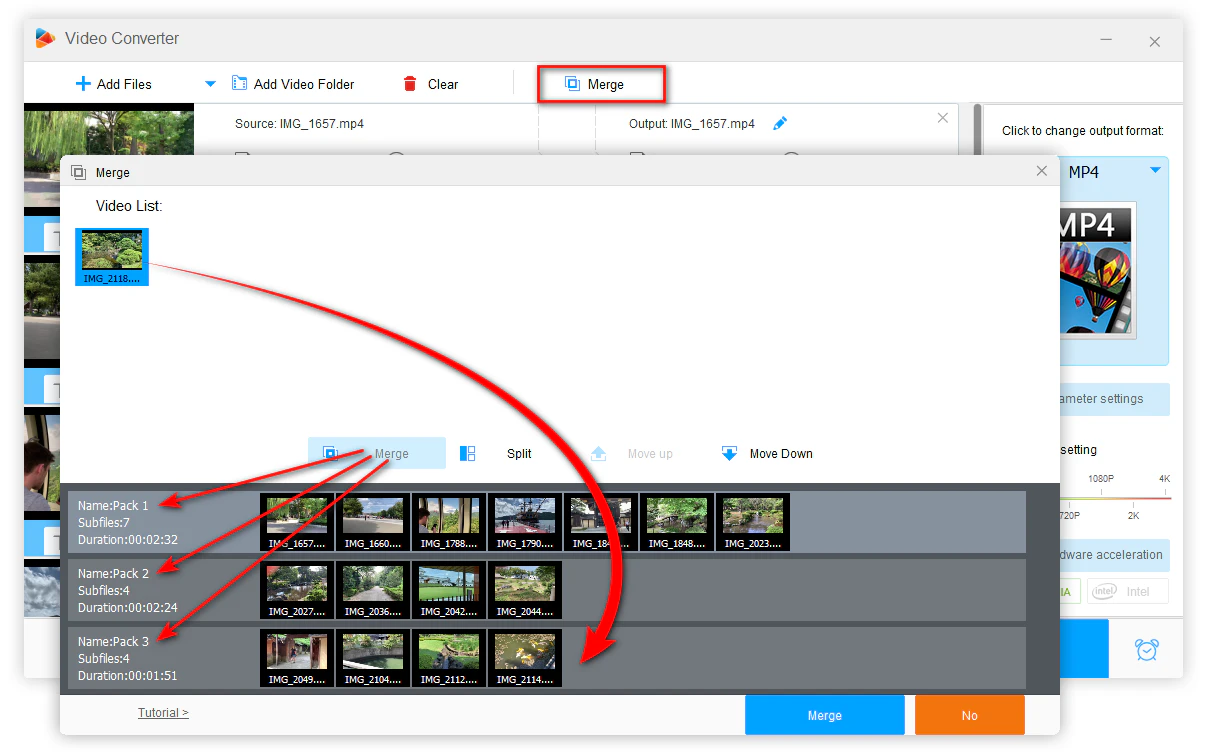
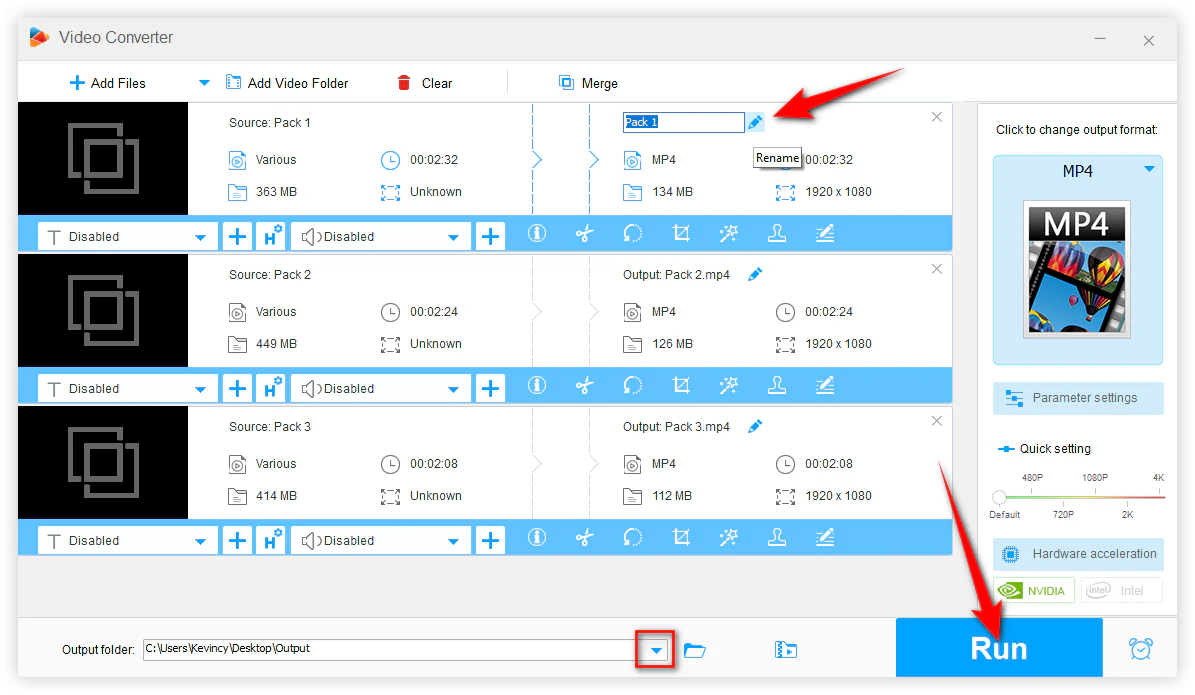
You can click the Pencil icon to rename your merging group.
At the bottom of the interface, click on the "Down Arrow" icon to choose where you want to save the merged video. Finally, click on the "Run" button.
Once the process is complete, go to your directory to play the output video to ensure that the merging was done correctly.
If your videos are from different sources or have inconsistent properties, re-encoding is inevitable.
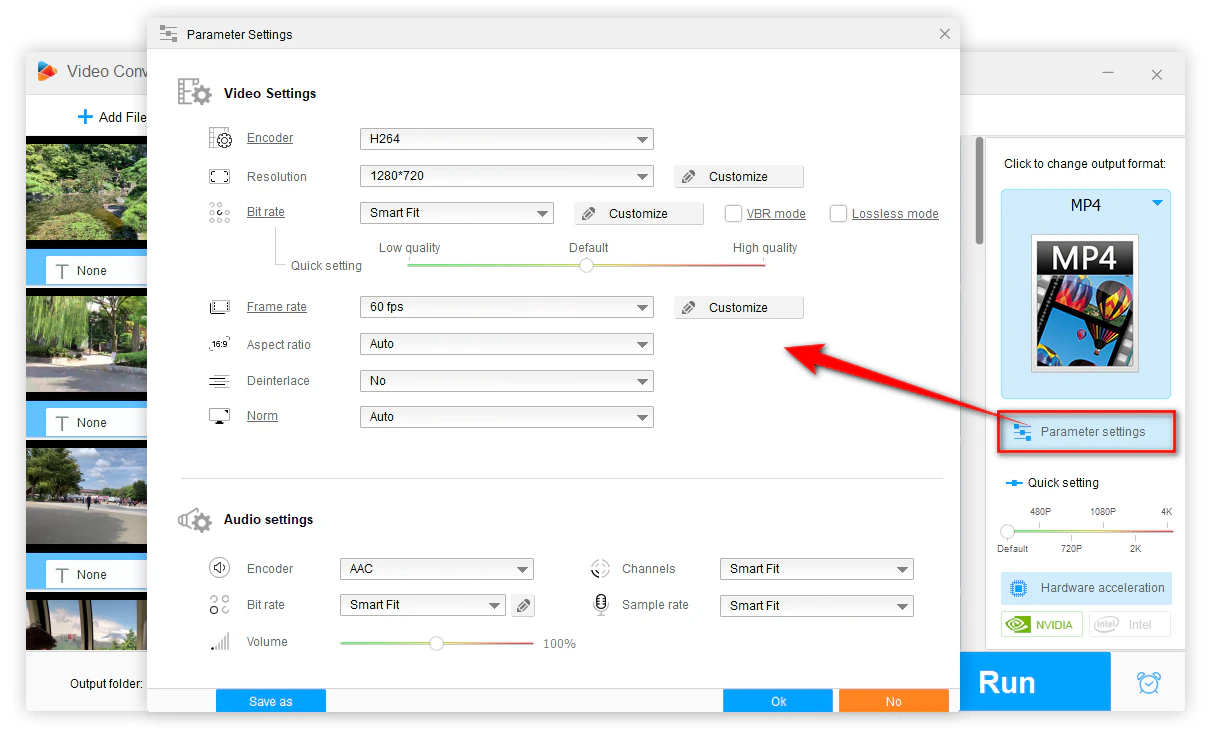
After loading your videos, choose an output format like MP4, and then click on the "Parameter settings" button. On the new pop-up window, you're able to uniform specs like codec, resolution, frame rate, and audio settings.
After the re-encoding, you can combine those files without a hitch.

Important Tips
1. Ensure all source videos have the same properties for lossless merging.
2. If any mismatch exists, the program will force re-encoding and automatically adjust the quality.
3. Make full use of the "File information" feature (the first icon on the editing toolbar) to check video codec, resolution, and other parameters.
4. If videos have inconsistent specifications, use this tool to convert all files to the same settings in advance.
5. If you only need a portion of some files, use the "Trimming" tool to cut or split video into parts.
With this guide, I bet you can quickly merge video clips without losing quality using LosslessCut. It's commonly used for stitching video segments from Dashcams, Drones, GoPro cameras, or other recording devices because they always share the same encoding settings.
If your videos are from different sources or re-encoding is necessary, LosslessCut is not the best tool for merging. Instead, use a converter-based editor like WonderFox Free HD Video Converter Factory. DownloadDownload here and give it a shot. It won’t let you down.
Both tools are free and excellent for video merging. Cheers!
A: It comes down to distribution costs and user convenience. The GitHub version is unsigned, which can trigger antivirus warnings and lacks automatic updates. App stores resolve these issues but require fees for signing certificates and hosting. Users comfortable with unsigned binaries can always get it free from GitHub.
A: No, you won't lose quality as long as the videos have the same format, codec, resolution, frame rate, and audio properties. LosslessCut simply joins the files together without altering their structure, so the resulting merged video retains the exact same quality as the original clips.
A: Let's say if your videos do not share the same:
Then you may proceed in LosslessCut, but it will likely fail to merge them properly or the resulting file might not be playable.
In this case, you need to re-encode them to match before merging.
A: Sometimes different video clips have metadata or audio offsets that can cause sync issues. Ensure your clips are from the same source or have consistent technical properties. If the problem persists, try re-encoding them to uniform specs before merging.
WonderFox
HD Video Converter Factory Pro
Terms and Conditions | Privacy Policy | License Agreement | Copyright © 2009-2026 WonderFox Soft, Inc. All Rights Reserved.