Audio bitrate refers to the number of bits used per unit of playback time that shows audio after source coding. The pace of the sound is its bitrate. Generally speaking, the higher bitrate, the better the sound quality.
On the other hand, WAV is an uncompressed audio format developed by Microsoft. Although many devices and media players today work well with 32-bit WAV files, it is not the best bitrate setting for WAV because the 32-bit file doesn’t have ample storage space. Thus, you’re recommended to convert the WAV bitrate to 16-bit (1411 kbps), exactly the same as CDs.
To change the bitrate of WAV files, an audio bitrate converter is necessary. If you have a Windows-based computer, WonderFox HD Video Converter Factory Pro (a professional audio/video file converter) is the most recommended. With the software, you can convert WAV to MP3, FLAC, M4A, or other audio formats. Besides, you can change the audio codec, bit rate, sample rate, channels, and volume, and cut, merge, or WAV files without a hitch! The user interface is intuitive, and the output file is high-quality. Try it now!
Free downloadFree download the dedicated audio bitrate converter and follow the simple steps below.
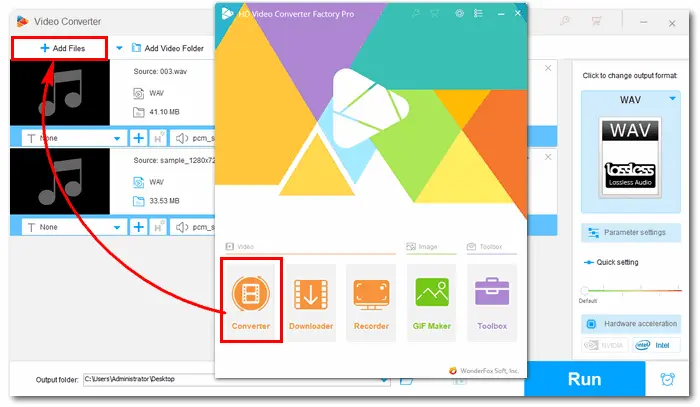
Launch HD Video Converter Factory Pro and enter the Converter interface. Click Add Files to import WAV files from your PC to the bitrate converter. Or you can directly drag and drop them therein.


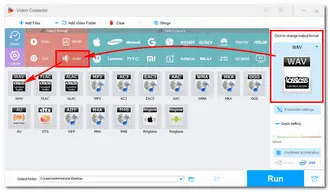
Unfold the format list on the right side of the interface. Go to the Audio category and choose WAV.
Tips. If you have different ideas about the output format, you can choose other formats to convert WAV to MP3, OGG, WMA, AAC, etc.


Open the Parameter settings under the format image. Head over to the Audio settings. Choose a bitrate value (1400 kbps) from the list or click the pencil icon to customize the bitrate to 1411 kbps.
You can also change the channels, sample rate, or volume as you like. Don’t forget to press the OK button to save the settings.


Click the inverted triangle button to specify an output path. Then press Run to start the process. Several seconds later, you can find the converted WAV files in your folder and enjoy them with better sound quality.


Some online converters also provide parameter options that you can change based on your needs. They allow you to convert the file format and change audio parameters without any software installation. They are convenient and easy to use. But online converters have strict limits on file size and the internet connection. You should notice that your source files cannot be too large and the network is stable.


Here’s an example of how to change WAV bitrate with CloudConvert:
Step 1. Visit https://cloudconvert.com/wav-converter.
Step 2. Click “Select File” to add WAV files.
Step 3. “Convert to” > “WAV”.
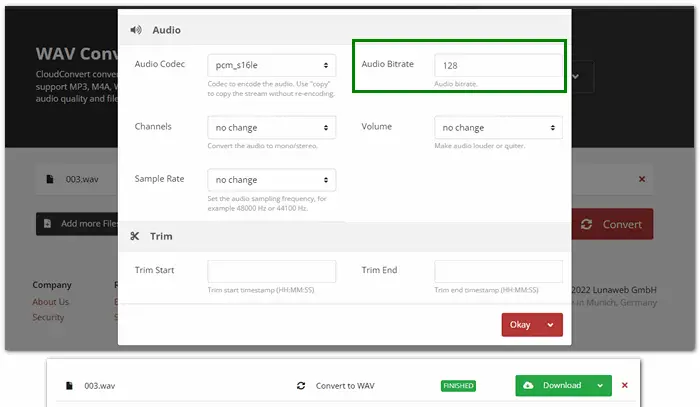
Step 4. Click the “wrench icon” > change the bitrate > click “OK”.
Step 5. Press “Convert” to start the upload and conversion process.
Step 6. When the process is finished, “download” the converted files to your computer.
The above is all about how to convert bitrate of WAV files. It’s not hard to get this job done with an easy and powerful bitrate converter. Finally, hope this article could be helpful to you. Thanks for your reading!
Terms and Conditions | Privacy Policy | License Agreement | Copyright © 2009-2025 WonderFox Soft, Inc.All Rights Reserved