A Chromebook is a budget laptop that runs Chrome OS, a Google-based operating system. Like Windows and Mac computers, Chromebooks also come with a screen capture feature. The following article will show you how to screen record on a Chromebook with this feature and two other recording apps. Please read on.
The quickest way to record the screen on your Chromebook is by using the keyboard shortcut. If your Chromebook doesn’t have a “Screenshot” key, press “Shift + Ctrl + Show windows” (rectangle-shaped icon with two vertical lines located in the top row) or “Ctrl + Shift + F5”.
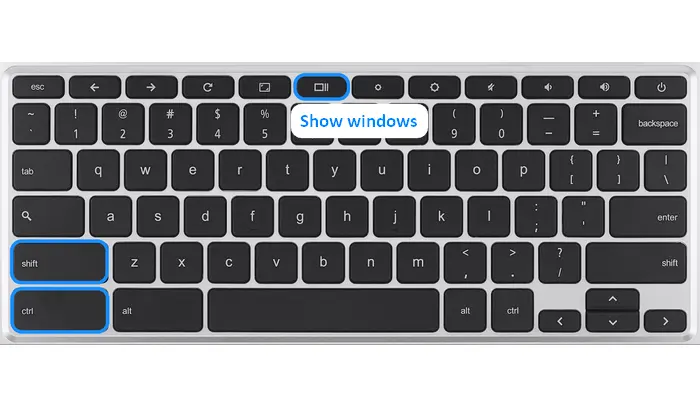
The Screen Capture toolbar is in Quick Settings on your Chromebook, and you can also launch it there.
How to screen record on Chromebook with Screen Capture?
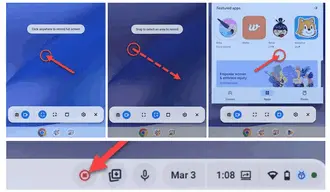
Step 1: After opening the “Screen Capture” toolbar, select the video icon for screen recording.
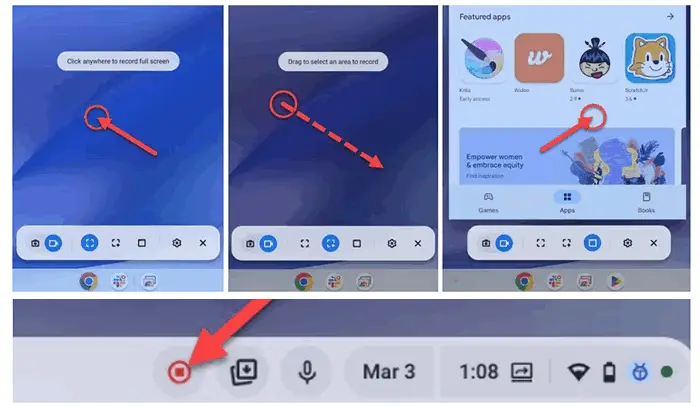
Step 2: Then, choose full screen, partial screen, or a specific window to record.
Step 3: Click the gear icon and adjust options like microphone, camera, and destination folder.
Step 4: Start recording after a 3-second countdown.
For Full Screen, click anywhere on the screen;
For Partial Screen, drag to select a recording area and click the “Record” button;
For Window, click the app window you want to record.
Step 5: Once done, click the red button on the Shelf to stop recording. After that, tap the “Screen Recording Taken” notification to locate the recorded video in the file manager.
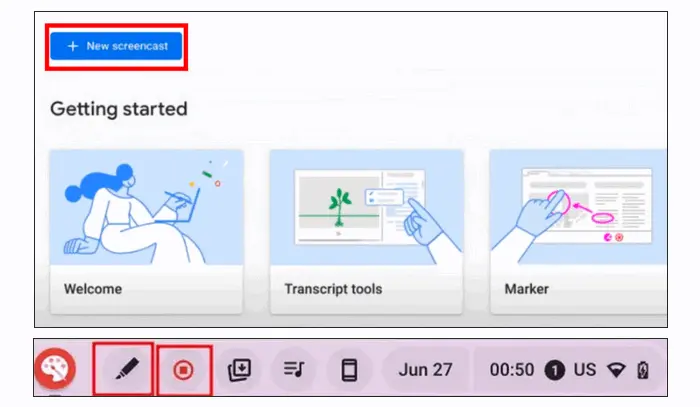
Screencast is an app built in Chrome OS 104 or later that you can use to record, trim, edit, and share videos on a Chromebook.
How to screen record on Chromebook with audio using Screencast?
Step 1: Open the app launcher and select “Screencast”.
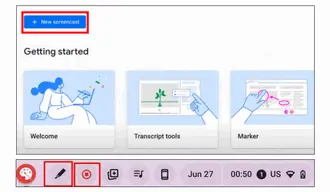
Step 2: Click the “New screencast” button, and a toolbar will appear at the bottom of the display.
Step 3: Select a recording mode and region and toggle on the “Microphone” option in settings.
Step 4: Tap the “Record” button to begin recording on the Chromebook. You can also use the “Pen” tool to add annotations while recording.
Step 5: Click the stop button to end the recording and check it in the Screencast app or share it directly via the link.
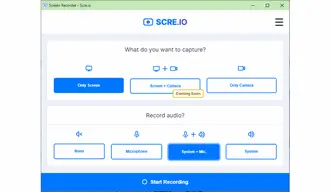
Another way to record your screen on the Chromebook is by using a screen recorder extension for Chrome. To screen record without a time limit and watermark, you can try SCRE.IO. It’s a free Chrome extension to record videos from your screen or camera.
How to record video on Chromebook with audio using SCRE.IO?
Step 1: First, add the extension to your Chrome and launch it.
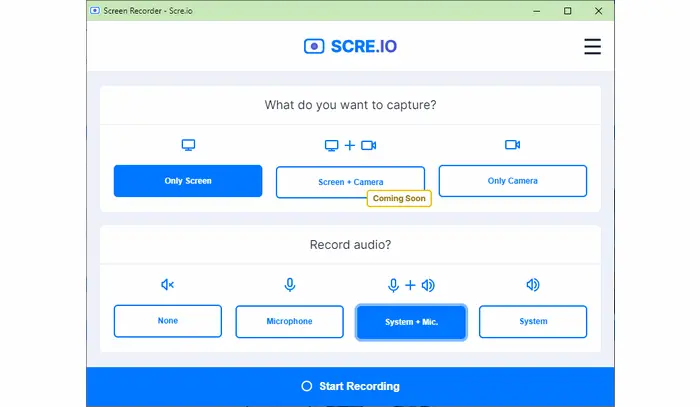
Step 2: Select your desired screen and audio capture options.
Step 3: Click “Start Recording” and choose the content you want to record. Make sure the audio option is enabled to share with the screen.
Step 4: Tap the Share button to begin the recording.
Step 5: You can pause or stop the recording.
Step 6: Click the “Save” button, and the recorded video file will be stored in the default download path.
Pro-tips: SCRE.IO saves videos as .webm files. You can convert them to MP4 format with the professional WonderFox HD video converter. Related readings: convert WebM to MP4 | convert screen recording to MP4
The keyboard shortcut or Screen Capture feature and the Screencast app are the most common ways to record your screen on a Chromebook. In addition to these built-in tools, you can utilize a third-party screen recorder like SCRE.IO, ScreenApp.IO, or Loom to take a screen and audio recording from your Chromebook.
That is all about how to screen record on Chromebook (with audio). Thanks for your reading!
Is there a recorder on my Chromebook?
Yes. Chromebooks have two screen recording tools:
Screen Capture, built in Chrome OS 89 and newer versions
Screencast, built in Chrome OS 104 and later versions
How long can a Chromebook screen record?
You can screen record on a Chromebook for an unlimited time as long as your device has enough storage space.
Reference:
Official support for screen recording on Chromebook
Terms and Conditions | Privacy Policy | License Agreement | Copyright © 2009-2025 WonderFox Soft, Inc.All Rights Reserved