When exporting a video from Premiere Pro, you may find the volume is too high or too low and needs to be adjusted for a comfortable hearing experience.
Premiere Pro offers built-in methods that can adjust the audio volume level in 4 different ways. If you don't know how, just follow this post to learn the step-by-step guide on adjusting or lowering the volume in Premiere Pro.
💡 Tips. For exported file clips or files not supported by Premiere, you can try this simple video processing tool to adjust the volume with only a few simple clicks.
https://www.videoconverterfactory.com/download/hd-video-converter-pro.exe https://www.videoconverterfactory.com/download/hd-video-converter-pro.exe
Here are 4 ways for you to adjust the volume in Premiere Pro. Keep reading and choose a suitable way according to your needs.
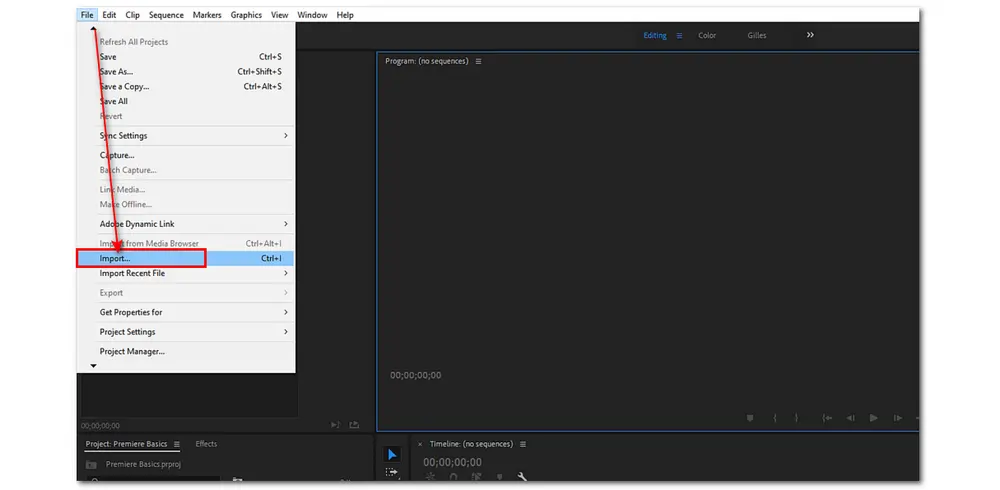
Before starting, you need to first import the media file into Premiere Pro. If the media file has been imported previously, go to the next step to adjust the volume. If not, you can use the Project Window or File tab’s drop-down option to import the media file. Then drag the file to the timeline.
Adjusting the volume level on the timeline is the easiest way and works for a single track.
✍🏻 Here are the steps:
Step 1. Select the audio from the sequence timeline.
Step 2. Hover your mouse over the volume band on the timeline.
Step 3. Click and hold the line to drag it up or down to increase/decrease the volume.
You can also position your mouse between two audio tracks. When the pointer changes to two black arrows, drag upward to increase the volume and drag downward to decrease the volume.

Adjusting the audio gain is suitable for processing one or more clips, ensuring consistent audio levels across your project. However, it may amplify unwanted noise if the clip is initially at low levels.
✍🏻 How-to steps:
Step 1. Right-click the clip in the timeline and choose "Audio Gain".
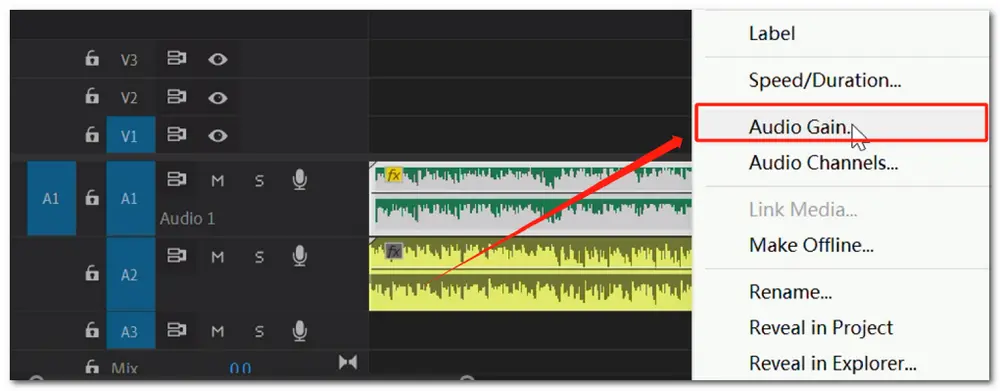
Step 2. It will offer 4 options for you to adjust the audio gain.
Generally, you can enter a value in the "Set Gain to" field to set the gain to a specific value or enter a positive or negative value in the "Adjust Gain by" field to increase or decrease the volume.
Step 3. Click "OK" to save your change.

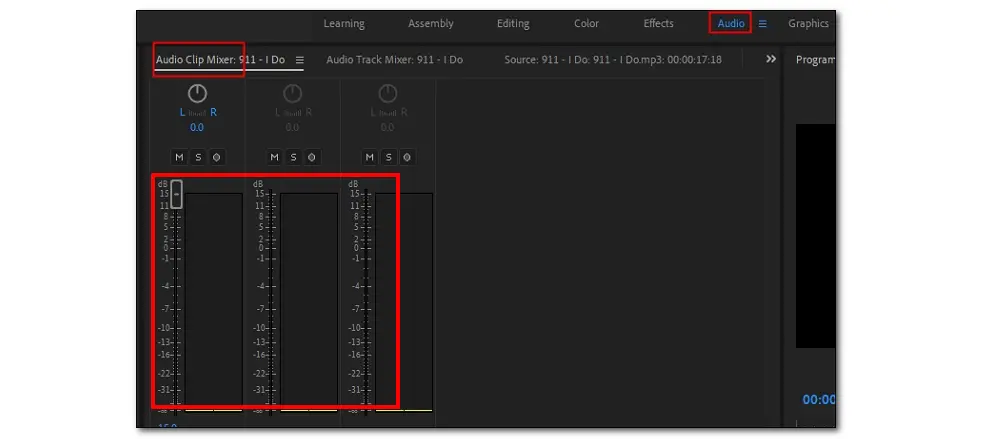
The Audio Track Mixer contains a certain number of audio track sliders that directly correspond to the number of audio tracks available in the timeline.
It can adjust the volume, channel volume, and more in the timeline for one or more clips; however, requires more understanding of the software, so it is not recommended for beginners.
✍🏻 Follow the steps below:
Step 1. Go to the top left of the screen or navigate to "Window" > "Audio Clip Mixer" to find the "Audio Clip Mixer" panel.
Step 2. It will show you different sliders for each audio track in the sequence. Identify the track of your audio clip and find the corresponding slider.
Step 3. Click and drag the slider up or down to increase/decrease the volume.
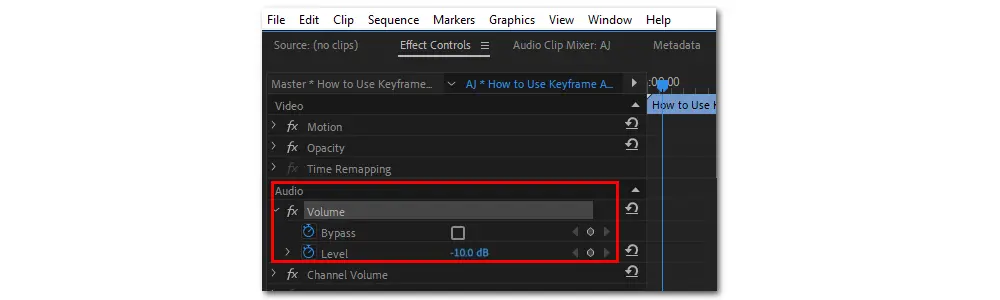
If you want to adjust the volume to a gradually fading in/out effect, use keyframes to adjust the volume.
✍🏻 Here are the steps:
Step 1. Click the "Show Keyframes" icon beside the audio track and choose an option from the drop-down list.
📌
Clip Keyframes: Animate audio effects for the selected clip.
Track Keyframes: Animate audio effects for the entire track.
Track Panner: Adjust a track's volume level.
Step 2. Select the Pen tool and choose the start point where you want to insert a keyframe on the audio track. Then, select the endpoint by repeating the step.
Step 3. Select one keyframe and drag it up or down on the audio track to increase or lower the volume to create a fade-in/out effect.
After you adjust the volume to your desired level, you can then save your file to your device or go through other professional editing steps.
Want to lower the volume with a simple tool? Try WonderFox HD Video Converter Factory Pro! It offers a direct way to make a video/music file less loud with a few simple clicks. Its batch processing mode even makes the job more efficient and time-saving for multiple file tasks.
Though Premiere Pro offers 4 ways to adjust and lower the volume and even applies a fade-in/out effect to the volume, here are some cases in which you can try another simpler tool to control the volume:
👉 1. Only need to increase or decrease the volume without additional editing. Premiere Pro may be a little troublesome to import, process, and export files.
👉 2. Your media files cannot be imported into Premiere Pro due to the format/codec incompatibility issue.
👉 3. You want to simply adjust the volume for the Premiere Pro exported files.
So, this post shares an easier way to adjust and lower volume with a few simple clicks.
WonderFox HD Video Converter Factory Pro is an all-in-one video/audio processing tool that can increase or decrease the volume for almost all video and audio files. The batch processing mode can even process multiple files simultaneously with one click to save you time. Its user-friendly interface and simple workflow make it suitable for non-tech-savvy users.
As a video converter, you can also use it to solve the video format/codec incompatibility issues for Premiere Pro for further editing.
Free downloadFree download this tool first and read the following to learn detailed steps.
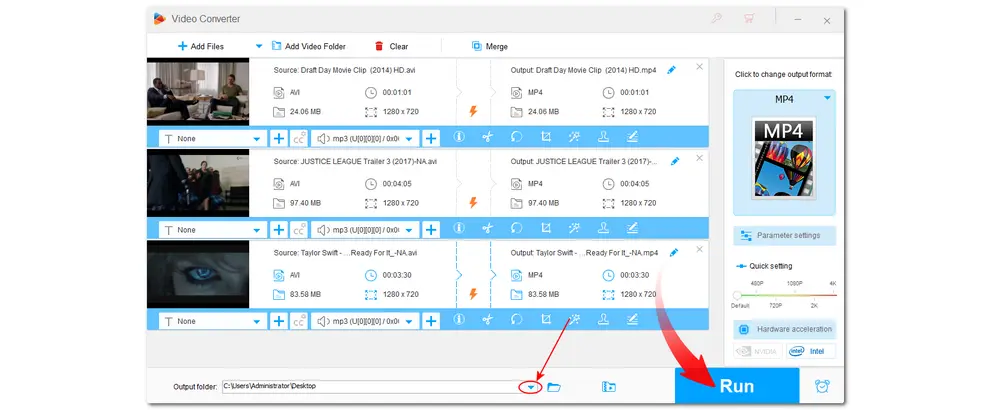
Launch HD Video Converter Factory and open the “Converter” module. Click “+ Add Files” to import the source files or directly drag and drop them into the program.

Hit the format image on the right side of the interface to expand the output format library. You’re recommended to choose “MP4” under the “Video” category for the best compatibility with various platforms. You can also choose the original format if you don’t want to change the file format.

Now, press the “Parameter settings” button underneath the format image. In the pop-up window, navigate to the “Audio settings” section and find the “Volume” option.
You can move the slider to the left to lower the volume on a percentage basis. If you drag the slider to 0%, then it will mute the video files.
On the contrary, you can also drag the slider to the right to boost the volume up to 200%. Then click “OK” to save the change and go back.
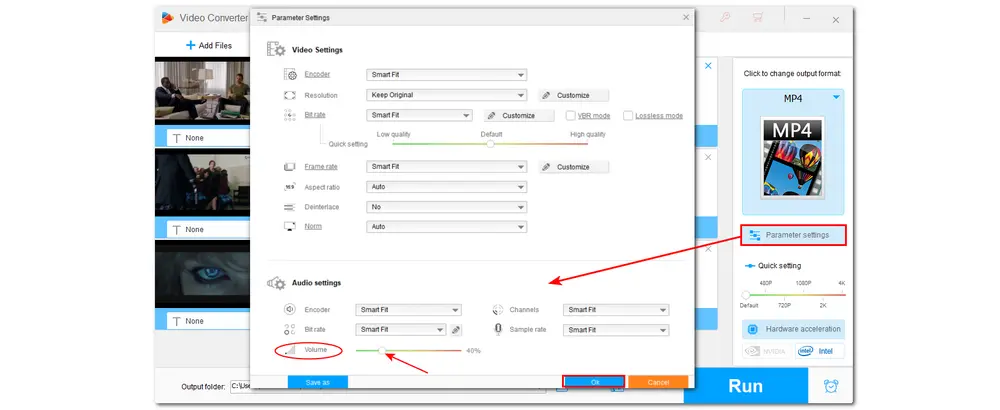
You can also change the video codec, resolution, bitrate, frame rate, etc. if needed in the "Parameter settings" window.
Once you decreased the volume, you can now click the down arrow icon at the bottom of the interface to specify an output path for the exported files. Finally, press “Run” to start exporting files.
💡 If the conversion is supported by GPU acceleration, it will show a "GPU" icon on the conversion task.
💡 Hardware acceleration (Intel QSV and Nvidia NVENC) is available for H.264 and H.265/HEVC encoding.
💡 When the parameters are the same for the imported and exported files, it will enable the Lightning Mode, which supports 50x faster conversion.
💡 Once finished conversion, you can click "Open" on the pop-up window to quickly access the converted files.
Besides decreasing the file volume, HD Video Converter Factory Pro can convert unsupported files for Premiere Pro. With its wide format support, issues like Premiere Pro MKV, MP4, AVI, etc. can be easily solved by changing the file format or encoder.
If Premiere Pro won’t play the sounds, it might be because of the following reasons:
The sound could be disabled;
The sound could be muted;
The file contains the incompatible audio codec;
There is no audio in the video file;
...
You can check the possible solutions in this post: Quick & Handy Fixes for Premiere Pro Audio Not Playing.
In Audio Premiere Pro, the Audio Gain setting is independent of the output level settings. You may adjust the gain of the master clip to ensure that all instances of the clip added to the timeline have the same gain levels, or you can also change the gain of a single clip in the timeline.
Now, you can adjust the volume in Premiere Pro in four ways. Just choose a suitable way according to your needs.
If you want to lower the volume more quickly without a complex interface or steps, just give HD Video Converter Factory Pro a try. BTW, it also enables you to change the file format/codec for smooth editing in Adobe Premiere Pro.
Thanks for reading. Have a nice day!

WonderFox DVD Ripper Pro
WonderFox DVD Ripper Pro is ready to help you back up your DVDs and convert them to digital formats without difficulty. The DVD to ISO image/ DVD folder feature enables you to copy your DVD with flawless 1:1 quality and content. It also enables you to convert DVDs to 500+ digital formats you want. DVD editing and compressing are also provided. Download it here to enjoy a fast and trouble-free DVD-ripping experience.
* Please DO NOT use it to rip any copy-protected DVDs for commercial purposes.
Privacy Policy | Copyright © 2009-2025 WonderFox Soft, Inc.All Rights Reserved
