Best Video & Audio Processor: HD Video Converter Factory Pro
In video editing, sometimes we need to replace the audio track in a video, such as adding new background music to the video or fixing audio issues. You don't even need an advanced video editing tool to do this, Shutter Encoder can make it super easy.
Next, we'll introduce in detail how to use Shutter Encoder to replace the audio track in a video, including the specific operations and function settings for each step. Meanwhile, in response to possible compatibility issues, we will also provide an alternative solution and some advice.
Shutter Encoder is a feature-rich open-source and free tool that supports the editing and conversion of multiple video, audio, and image formats. It is highly favored by users for its simple interface and powerful functions, and is suitable for both beginners and professional users.
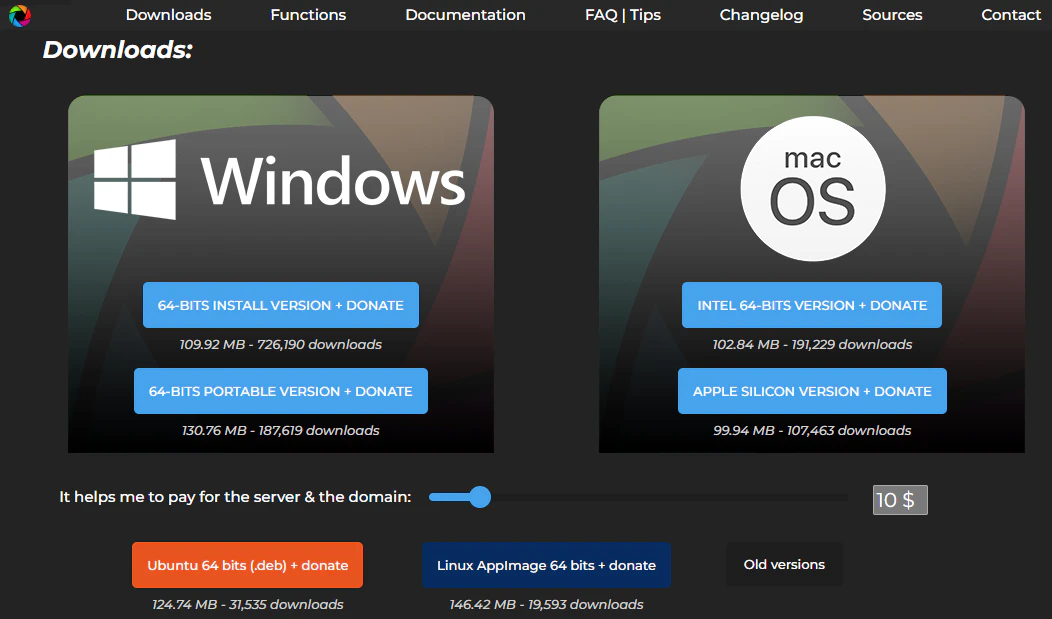
Visit the official website, download, and install the latest version of the installation package according to the operating system (Windows / macOS / Linux).
Run Shutter Encoder. When you open it for the first time, you will see the main interface of the software. The default language is generally English, and you can switch to other languages in the settings.
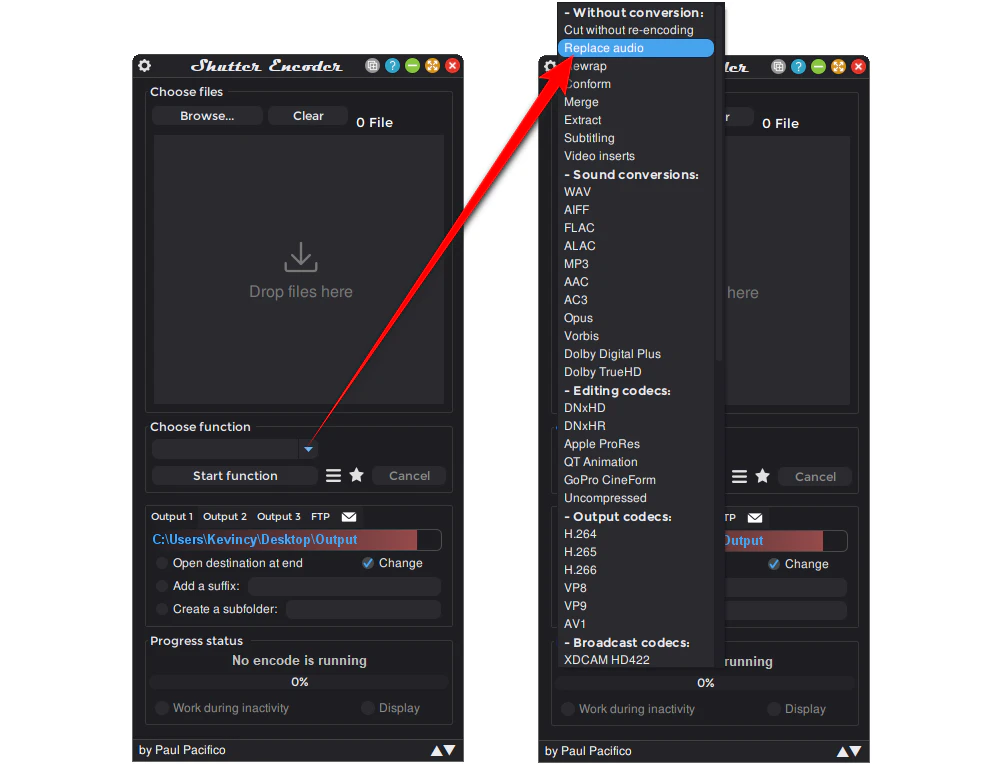
Navigate to the "Choose function" section in the middle area of the software's main interface. Select the "Replace audio" option from the drop-down menu. This function is specifically designed for replacing the audio track in a video.
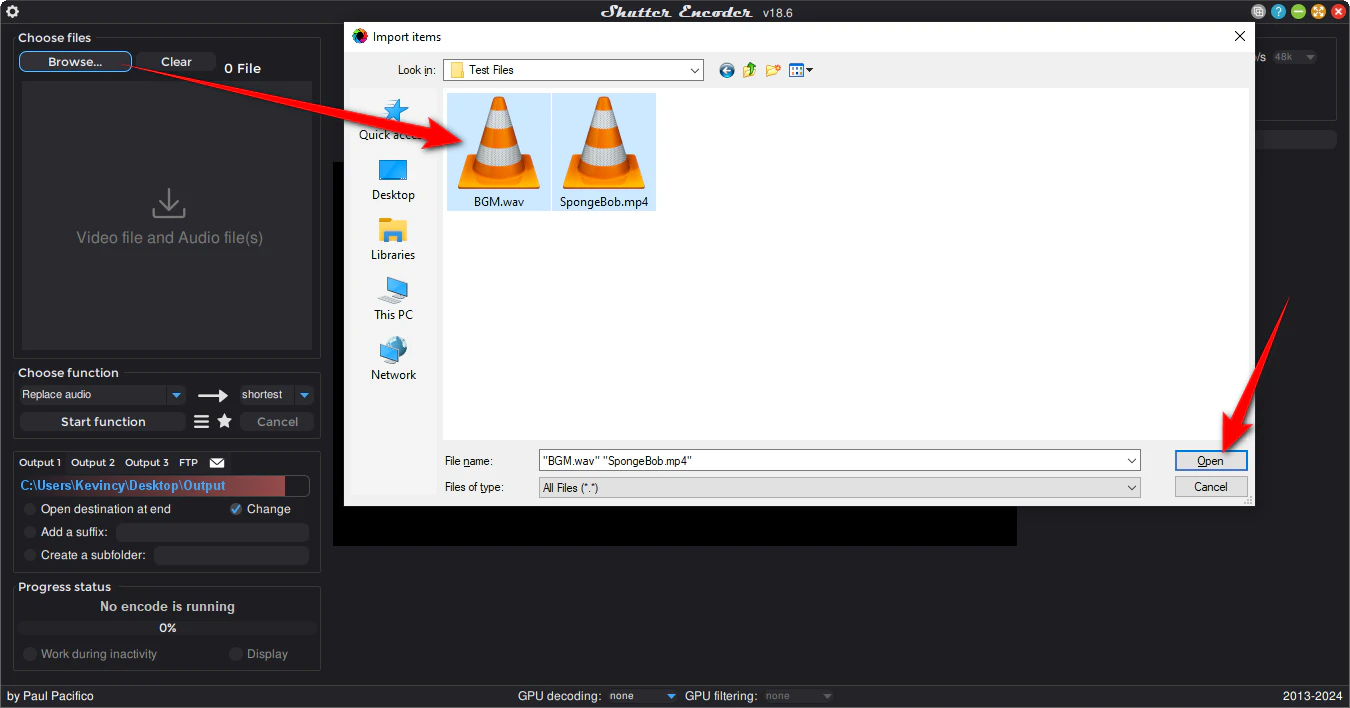
Click the "Browse" button, successively select the target video file and the audio file you want to replace in the pop-up file browsing window, and then click "Open" to import the files. You can select multiple files by holding down the Ctrl or Shift key.
You can also directly drag the video and audio files to the "Choose files" area. Shutter Encoder will automatically recognize them and list them in the to-be-processed list.
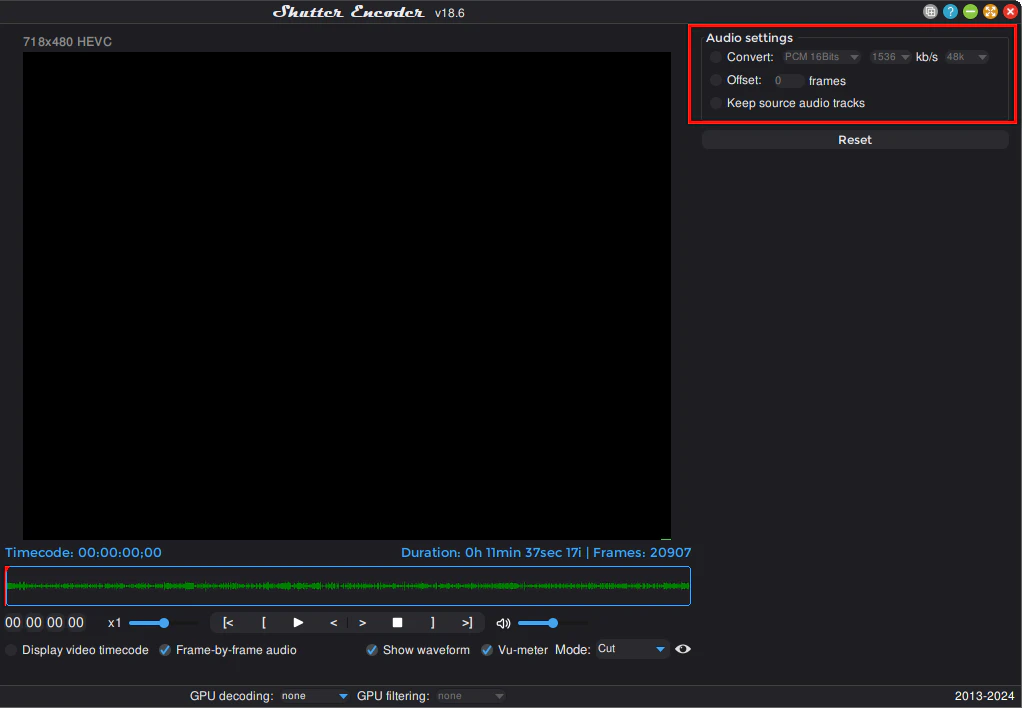
In the "Replace audio" mode, Shutter Encoder provides some optional functions on the right panel for handling the audio track in more detail.
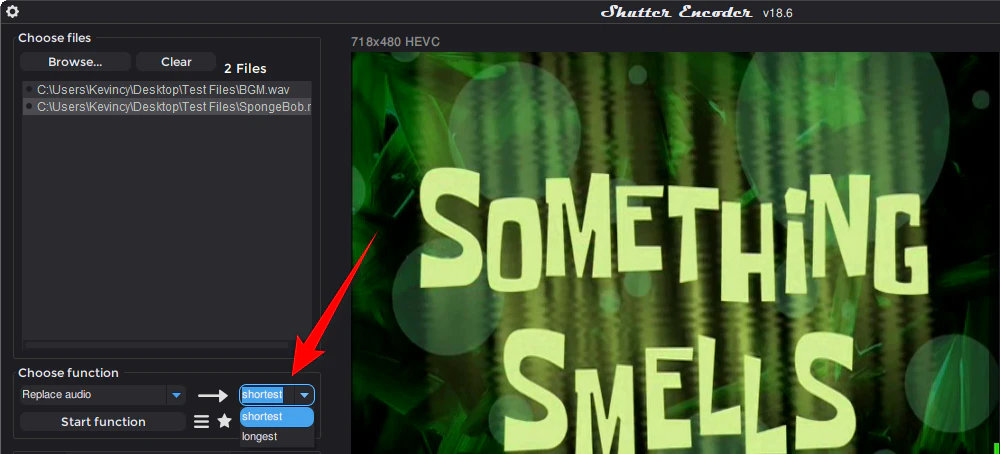
Next to the "Replace audio" function, you need to choose "shortest" or "longest" to handle the situation where the audio and video durations are inconsistent:
Choose the appropriate option according to your needs to ensure that the output file meets your requirements.
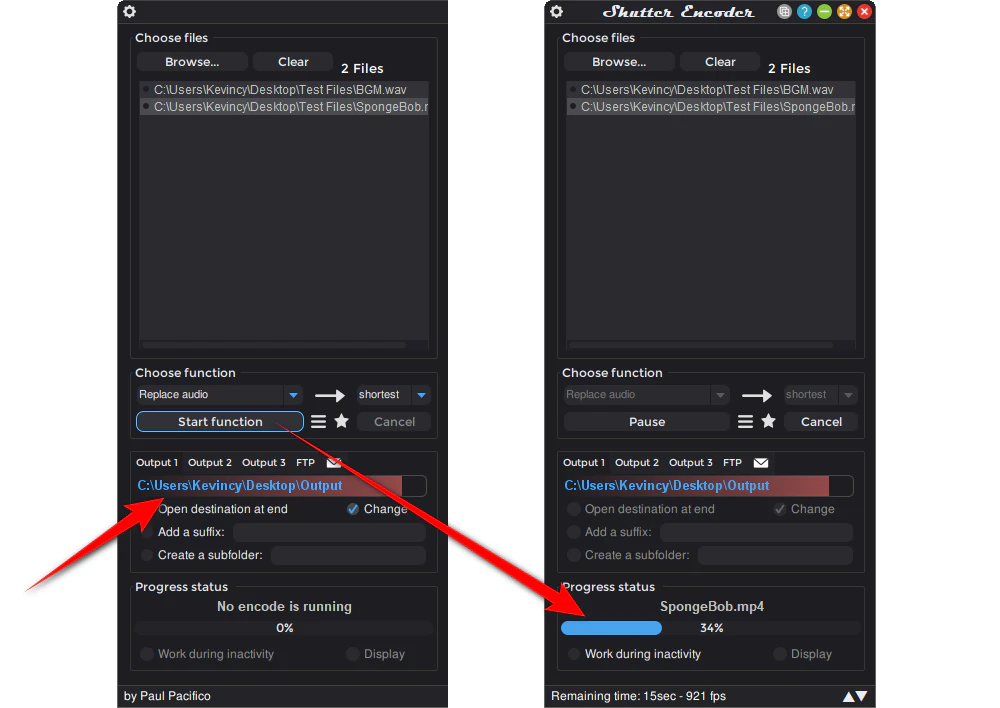
Click on the "Change" button, and select the location where you want to save the output file in the pop-up dialog box. You can customize the file name or use the default naming format of the software.
When everything is ready, press the "Start function" button, and Shutter Encoder will start processing the video and replacing the audio track. Wait for the progress bar to complete, then you can find the new video file in the specified directory.
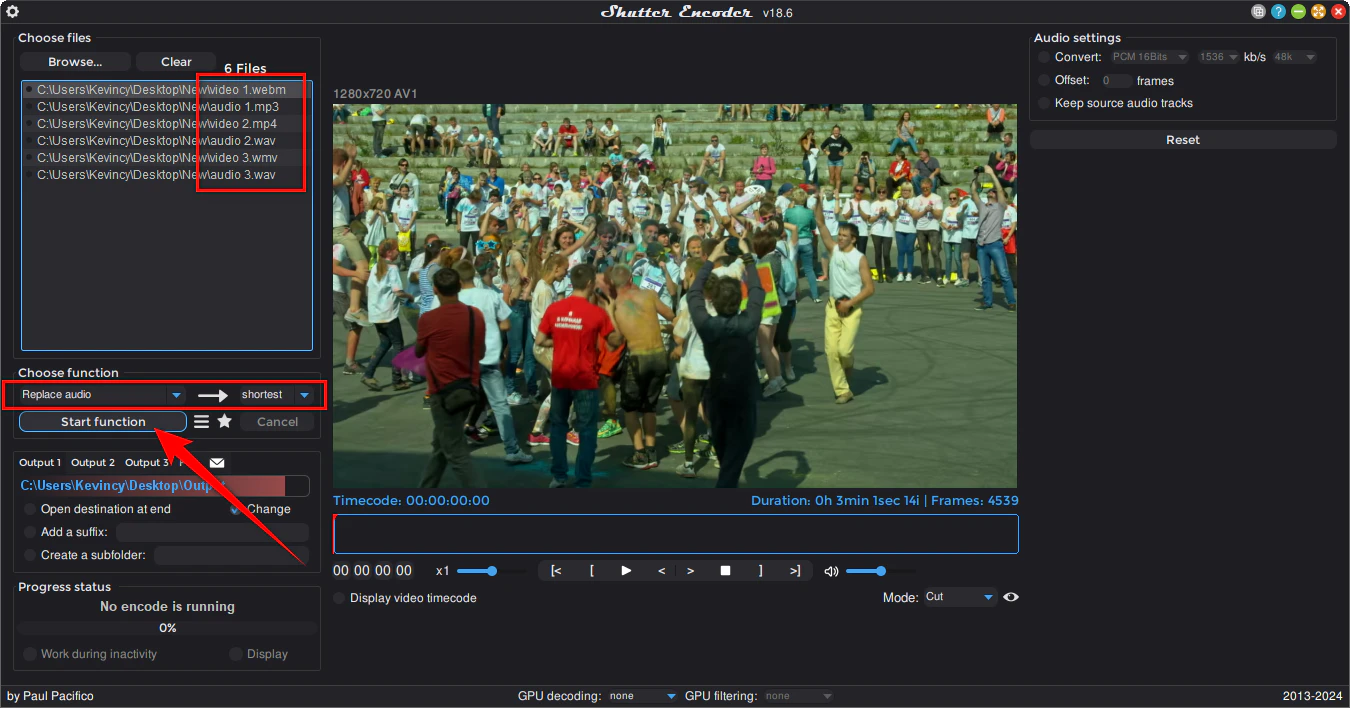
In some cases, we need to process multiple groups of "video + audio" files at one time. Shutter Encoder also provides a simple batch queue processing function. The specific steps are as follows:
First, prepare a series of video and corresponding audio files, and ensure that they are arranged in the following order:
By the way, it is best to rename these files in a simple way. Too long and complicated names may cause unexpected problems.

Drag and drop these files in the same order to the "Choose files" window, or use the "Browse" button to import them one by one. Add the video file first, and then the audio file.
Be careful not to mess up the order, because in the current version, you are not allowed to re-order files in the "Choose files" area.
After setting the parameters of the "Replace audio" function, click "Start function". Shutter Encoder will replace the corresponding audio tracks for each video in the queue order, which can greatly save you time and effort.
Due to the wide variety of video and audio formats and the fact that each video container has a certain support range for audio formats, Shutter Encoder may also report errors or fail to convert normally when facing uncommon formats or special files. Here are several feasible solutions:
Shutter Encoder will try its best to convert your audio to an audio format supported by the current video container, but if you frequently encounter the replace audio not working issue, such as specific types of files cannot be converted or report errors, it is recommended to contact the Shutter Encoder's developer Paul through the X/Twitter or Reddit.
Submit your problem, send the audio and video sample files, attach the log information (right-click on the "Progress status" section then copy it in the "Show console" window), and a detailed description. Then wait for subsequent feedback and updates.
This process may take some time, but it is also a good way to contribute to the software ecosystem.
When Shutter Encoder is powerless to deal with certain file formats, you can also try other tools, such as WonderFox HD Video Converter Factory Pro. It also has powerful audio and video processing capabilities and supports more than 600 presets, which can meet various format conversion and editing needs. Here's how to use this tool to replace audio for your video files:
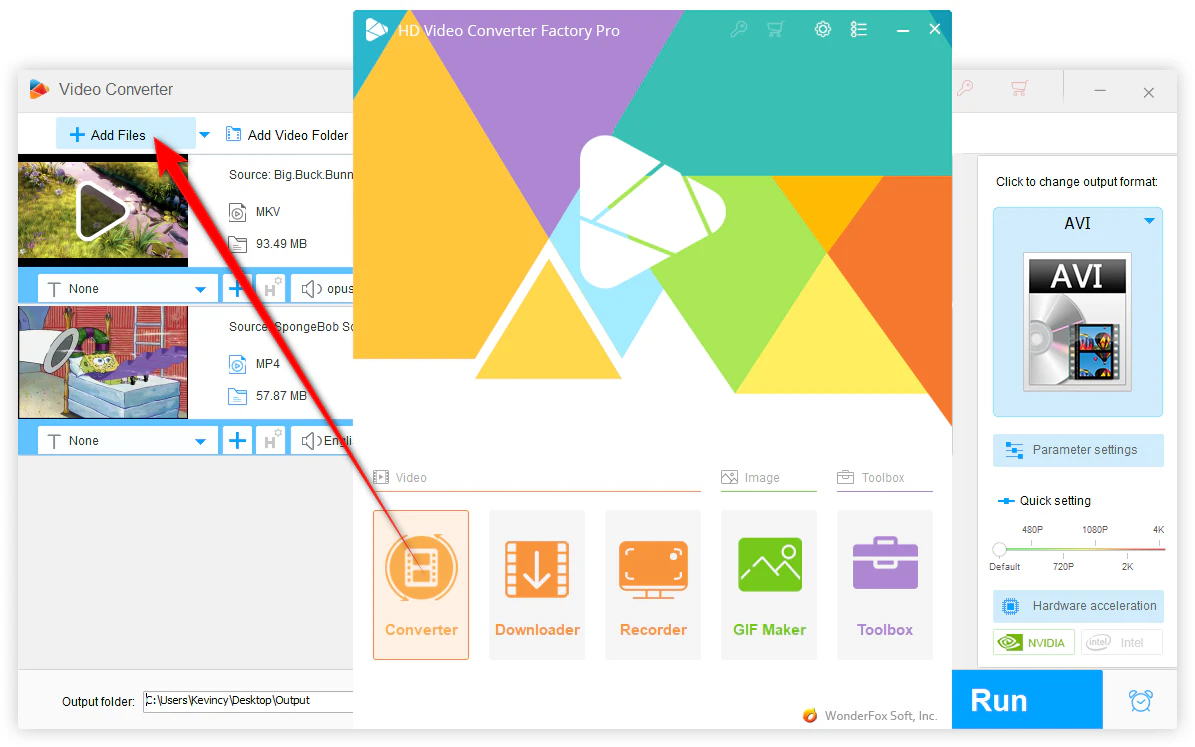
DownloadDownload and install HD Video Converter Factory Pro on your PC. Start the software, open the "Converter" module on the main interface, click "Add Files" to import the target video, or directly drag and drop it into the blank space.
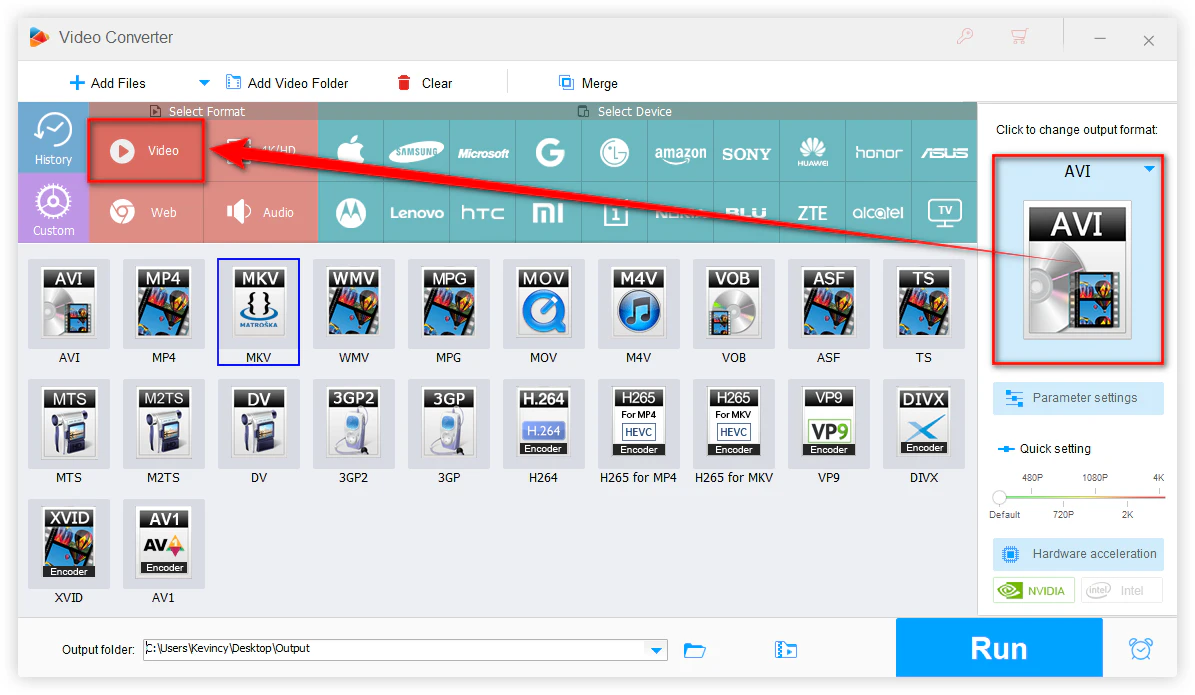
On the right side of the interface, you can open the format list, which contains more than 600 preset options. Select an output format that fits your needs.
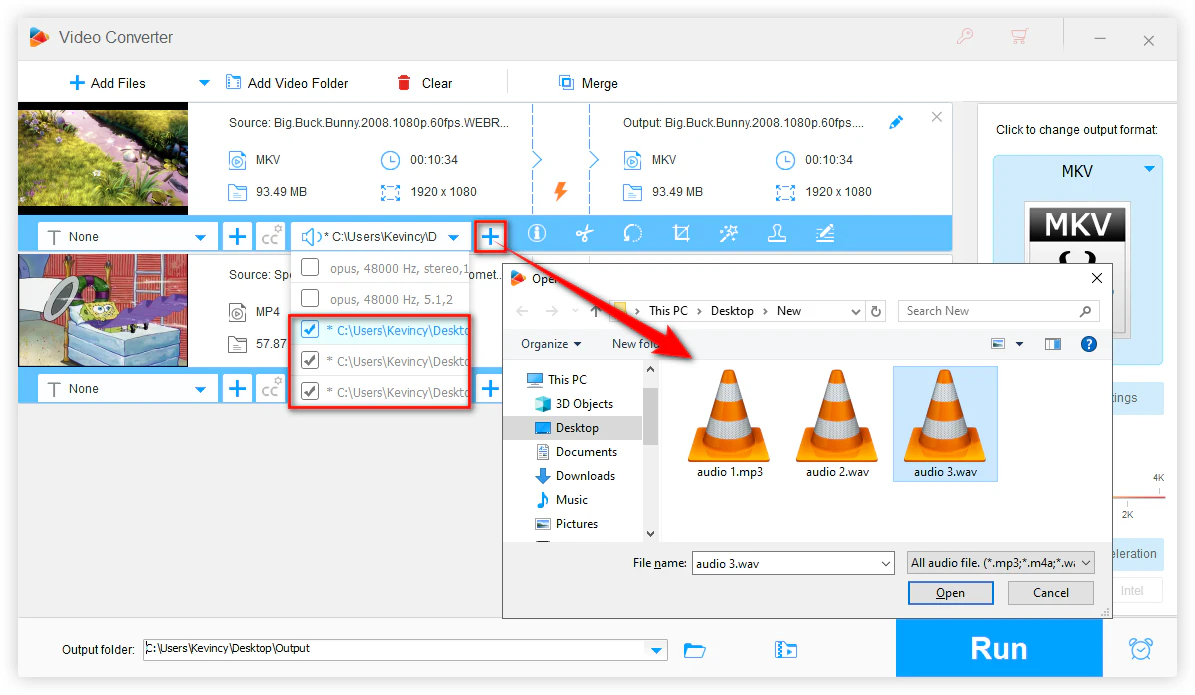
In the editing toolbar, click the "plus sign" next to the audio track menu, select the audio file you want to replace and click "Open" to confirm.
If you need to add multiple audio tracks to the video, make sure that the output format supports multiple audio tracks, such as MKV; and check all the audio tracks that need to be retained and added in the audio track menu.
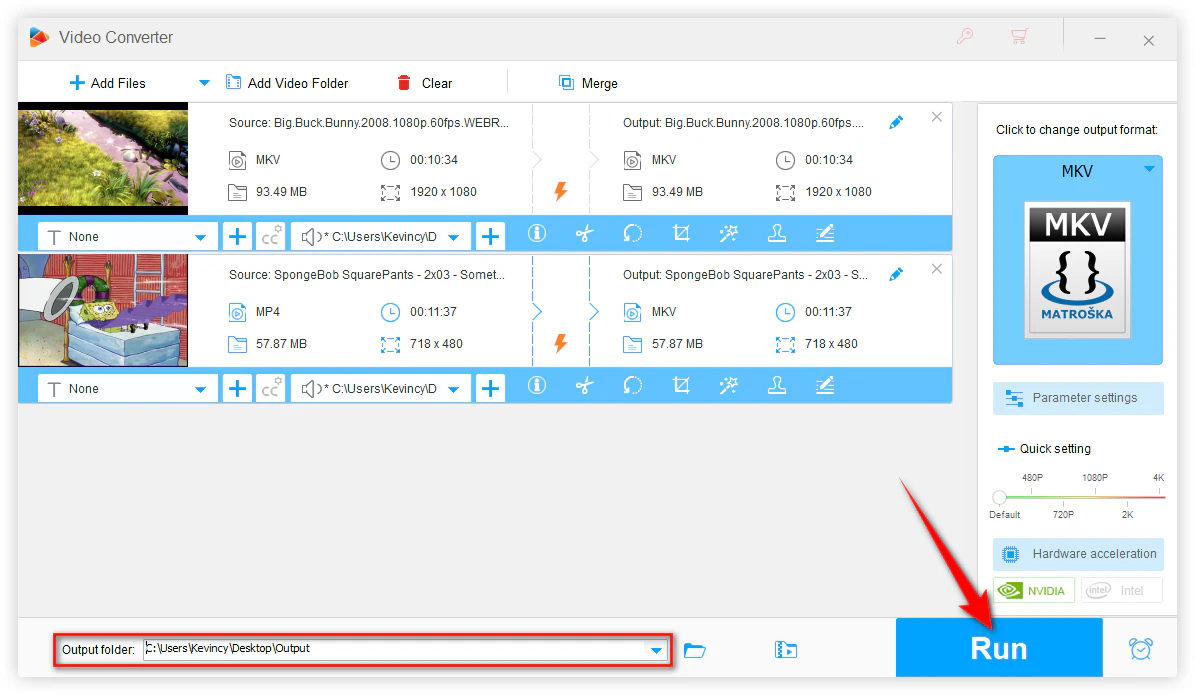
At the bottom of the software, click on the "inverted arrow" icon to select an output directory to store the processed files.
Finally, click the "Run" button, and the software will automatically process and generate a video with the new audio track.

Note: In the case of inconsistent audio and video lengths, if the audio duration exceeds the video, this software will discard the extra part by default. If you want to replace only a certain segment of the audio, you can use its "Trim" function to cut the audio in advance.
Likewise, use the "Merge" feature if you need to lengthen the audio to match a long video.
That's all. With these steps, you can easily use Shutter Encoder to replace the audio track in a video. In special cases, WonderFox HD Video Converter Factory Pro is also a multifunctional tool worth trying. Hope this article is helpful to you!
A: Yes. You can queue pairs of video and audio files in this order: video 1, audio 1, video 2, audio 2, etc. After choosing the "Replace audio" function, import them into the "Choose files" window, and hit "Start function". Shutter Encoder will process each pair in sequence.
A: When you choose the "Replace audio" function, check the "Offset" option from the right panel, then input the audio offset (in images per second). Preview it in the player until you are satisfied.
A: Sure. Choose the "Replace audio" function and check the "Keep audio source tracks" option from the right panel. Make sure your original video container supports multi-audio tracks.
A: You can use the "Cut without re-encoding" feature in Shutter Encoder or the "Trim" feature in WonderFox HD Video Converter Factory Pro to shorten the audio before replacing it, ensuring the durations match perfectly and avoiding extended silence or freeze-frames at the end of the video.
WonderFox
HD Video Converter Factory Pro
Terms and Conditions | Privacy Policy | License Agreement | Copyright © 2009-2025 WonderFox Soft, Inc. All Rights Reserved.