Best DVD Backup Tool: WonderFox DVD Ripper Pro
CyberLink PowerDirector is one of the most robust video editing tools available, but the recent releases of PowerDirector 2024, 2025, and the subscription-based 365 version have left many users puzzled about how to import video content from DVDs because the traditional "Capture" function seems to be gone in newer versions.
In view of this, this guide will show you how to import DVD content into the PowerDirector's newer interfaces, so that you can beautify your cherished memories, complete with transitions, special effects, and other professional-grade finishing touches.

Disclaimer
This guide is meant for making personal digital copies of DVDs for fair use only. Make sure you're following your local laws regarding DVD copying and backup creation. We're not here to encourage any copyright infringement!
Well, first, make sure you have the following things in place.
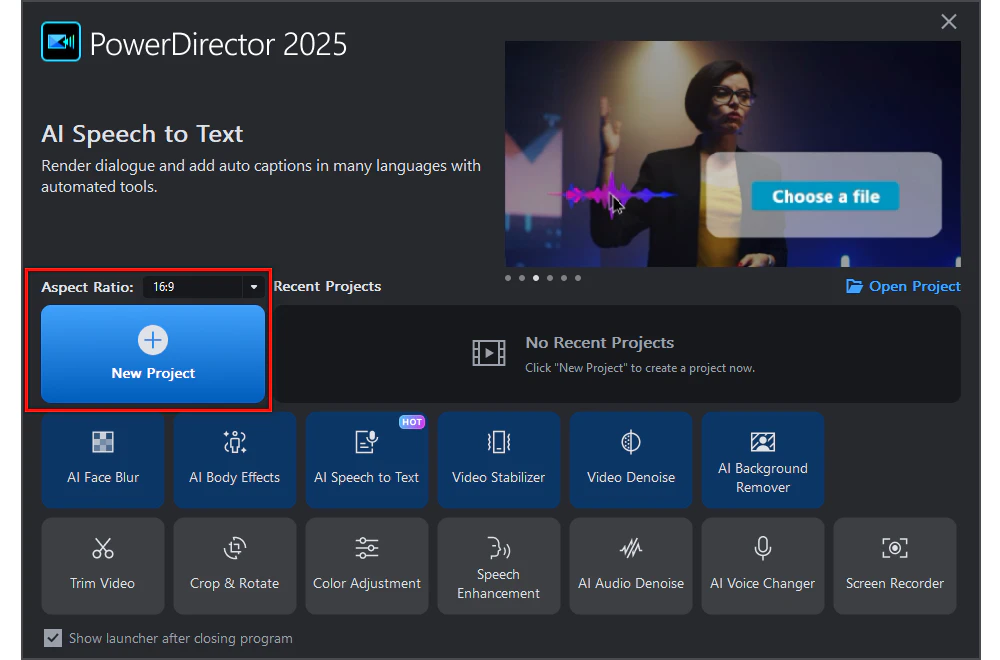
Let's start by launching PowerDirector. When you open the software, you'll be presented with an option to create a new project or open an existing one. Click on "New Project" if you're starting fresh. Setting your project's aspect ratio at this stage is good practice, especially if you know the DVD's native resolution.
The Media tab is your content management hub within PowerDirector. If you've used earlier versions of PowerDirector, you might remember the "Capture" function used to live above the Media Room. Now, you'll mainly rely on this area to detect and bring in your DVD content.
In the My Media panel, you will find an option labeled "Record" next to the "Import" button. Click on it and choose the "Record from Webcam" option in the sub-menu.
This might sound counterintuitive, but in the newer versions of PowerDirector, the process often starts as if you were selecting a webcam or another capture device. Once you click "Record from Webcam", PowerDirector attempts to detect all external video input sources, which includes your DVD drive.

If the DVD drive isn't detected automatically, click on the fourth icon labeled "Capture from an external or optical device". This should prompt the software to scan your machine's hardware for any available DVD drives. Once detected, the interface should display the disc type, format, and size, allowing you to proceed.

After the DVD drive is recognized, you should see a list of titles and chapters stored on the disc. DVDs are structured into various titles (which could be entire episodes of a TV series or a full-length movie) and chapters (sections of a title).
So, it's a good idea to preview the content and select the ones you want to import. This is useful if you only need specific scenes.
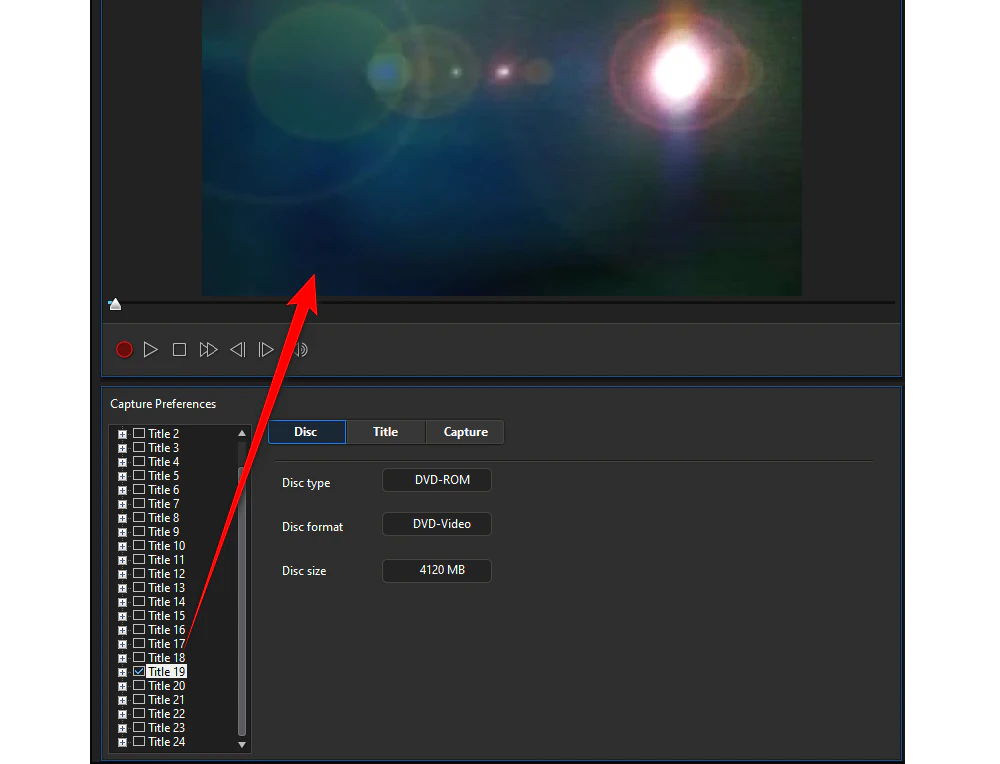
After you select the option what you want to import, click the "Record" button. PowerDirector will now start capturing the DVD footage and save it in MPG format.
When finished, you'll be prompted to name the newly created MPG file. Give it a descriptive name so you can easily identify it later in the editing process.
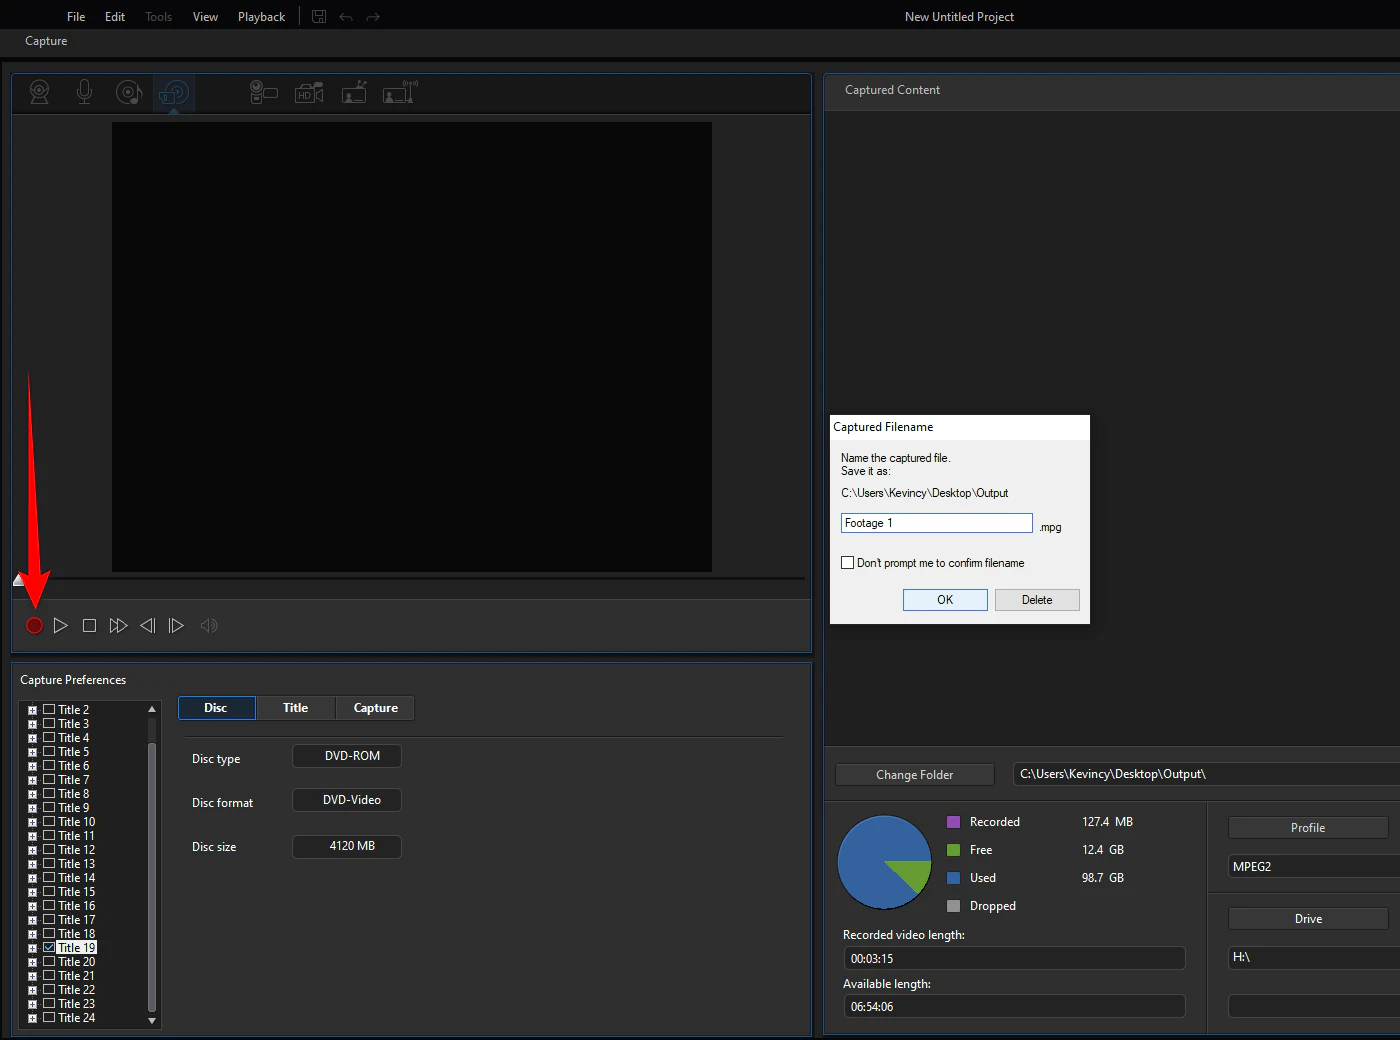
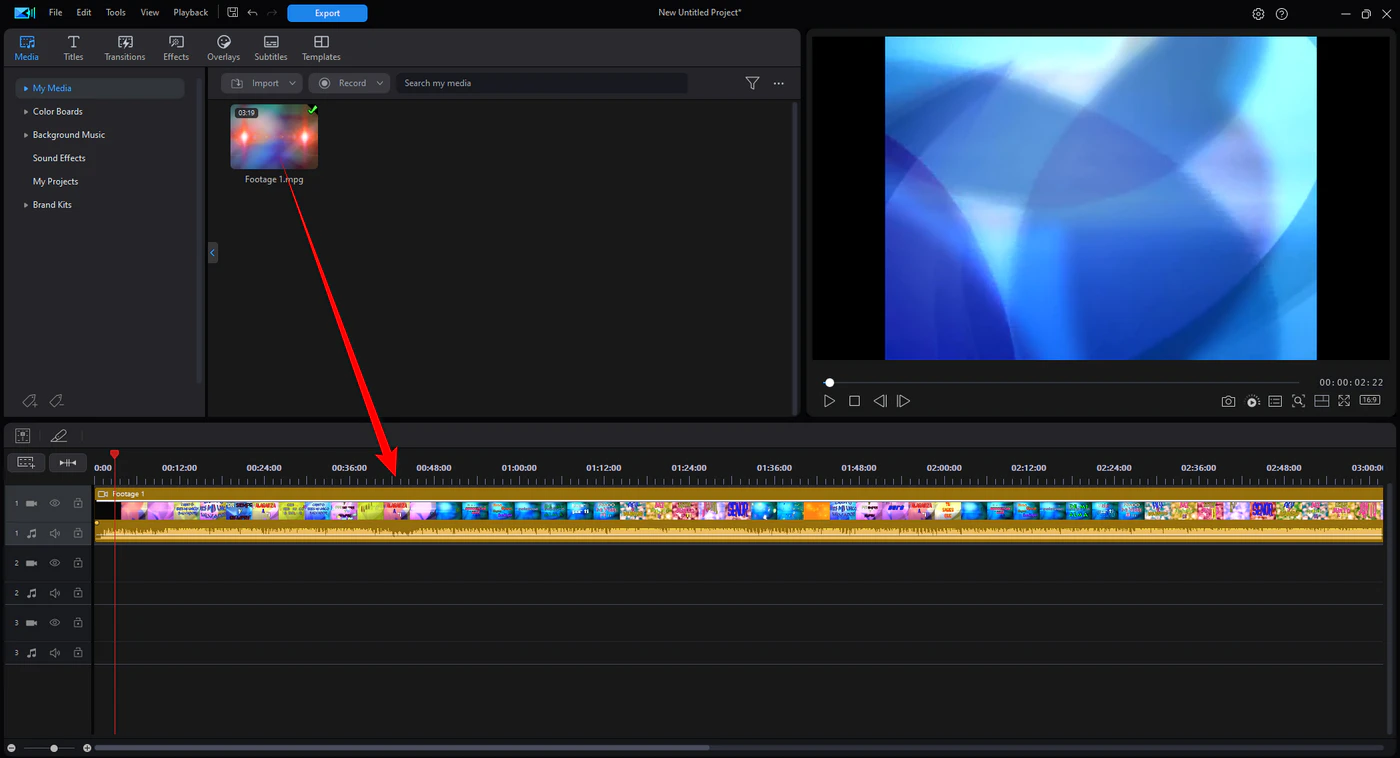
Once done, close the capture or recording window. In many cases, the captured footage should be available in your Media Library and added to the timeline automatically. If not, you can simply drag it onto the timeline to proceed.
Now, you can apply all PowerDirector's editing tools: trim unwanted parts, insert transitions, enhance color, add titles, and incorporate effects. This is where your creative work begins.

Important Note
You know, modern DVDs often employ various forms of encryption like CSS, Region Lock, or even Disney's X-Project DRM. If your DVD is copy-protected or encrypted, which are commonly found in commercial movie releases, you might encounter an error that says "Oops..., PowerDVD has stopped". PowerDirector isn't designed to bypass these protections. In such situations, you'll need a third-party solution to extract or convert the content from your DVD first. So keep reading.
For those who are dealing with store-bought DVDs or other protected discs, you may need to go beyond PowerDirector's native capabilities. This is where WonderFox DVD Ripper Pro comes into play. This software is known for its ability to handle both homemade and commercial DVDs, strip away copy protection, and produce high-quality digital files that you can easily import into PowerDirector.
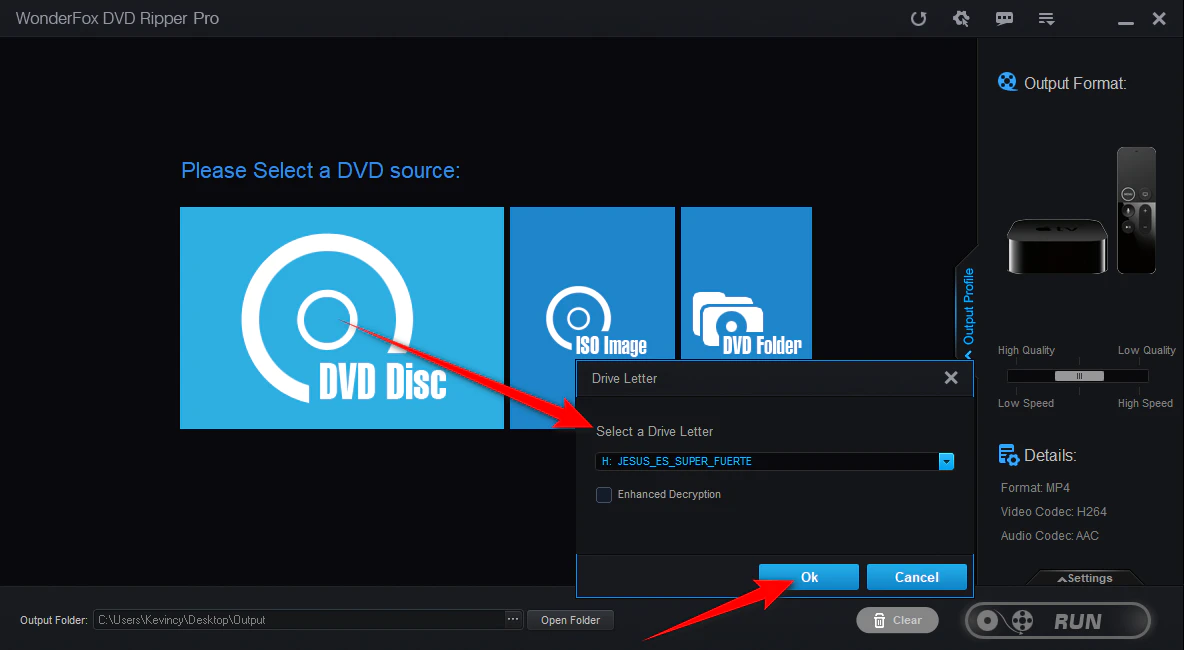
Now insert the DVD you want to rip into your DVD drive, let's see how to use this software to extract, convert, and prepare your DVD content for PowerDirector.
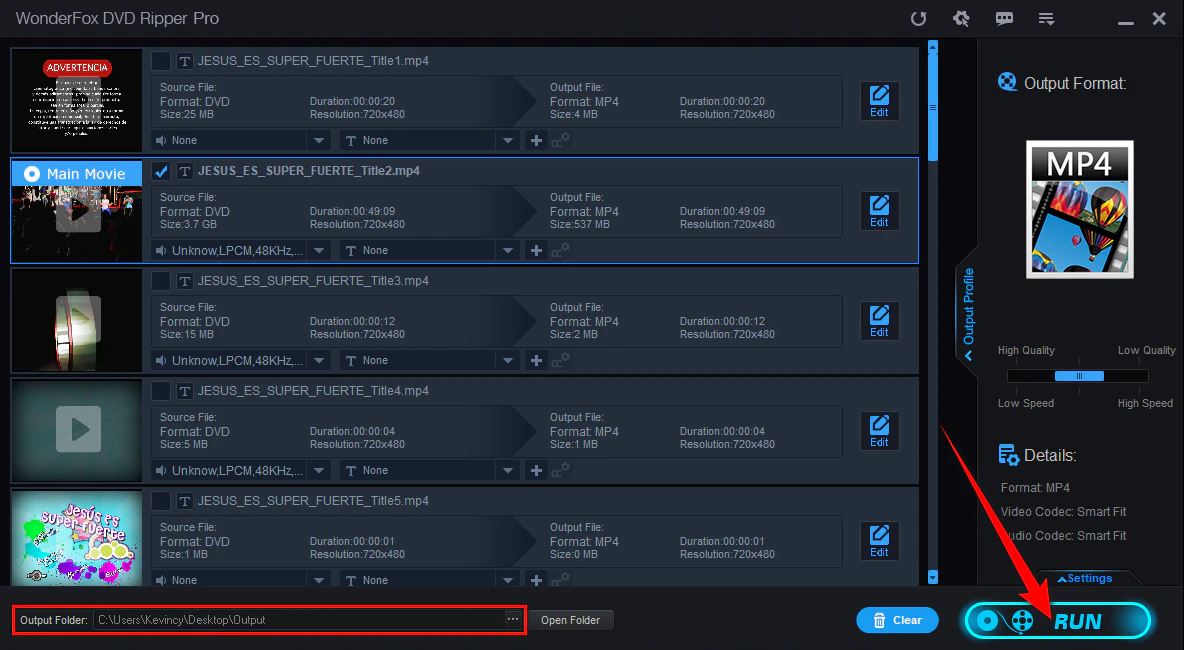
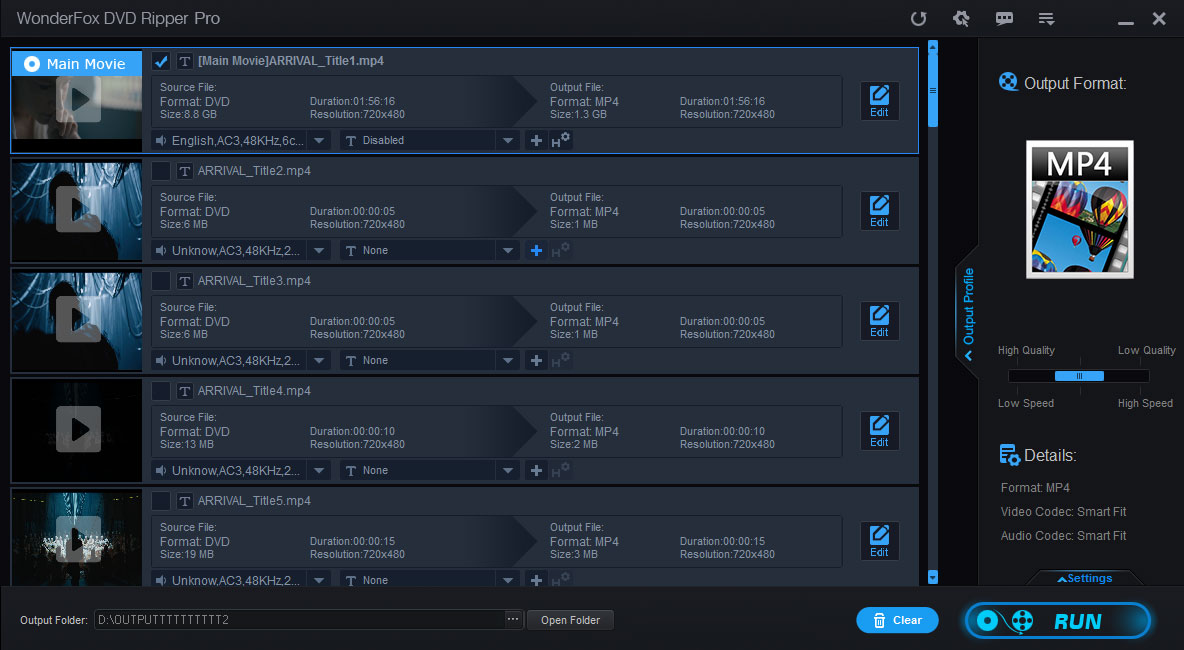
The software will automatically scan the DVD. This process might take a few seconds and all copy protection mechanisms can be removed (if there is any). It will intelligently identify and mark the main titles in the interface.
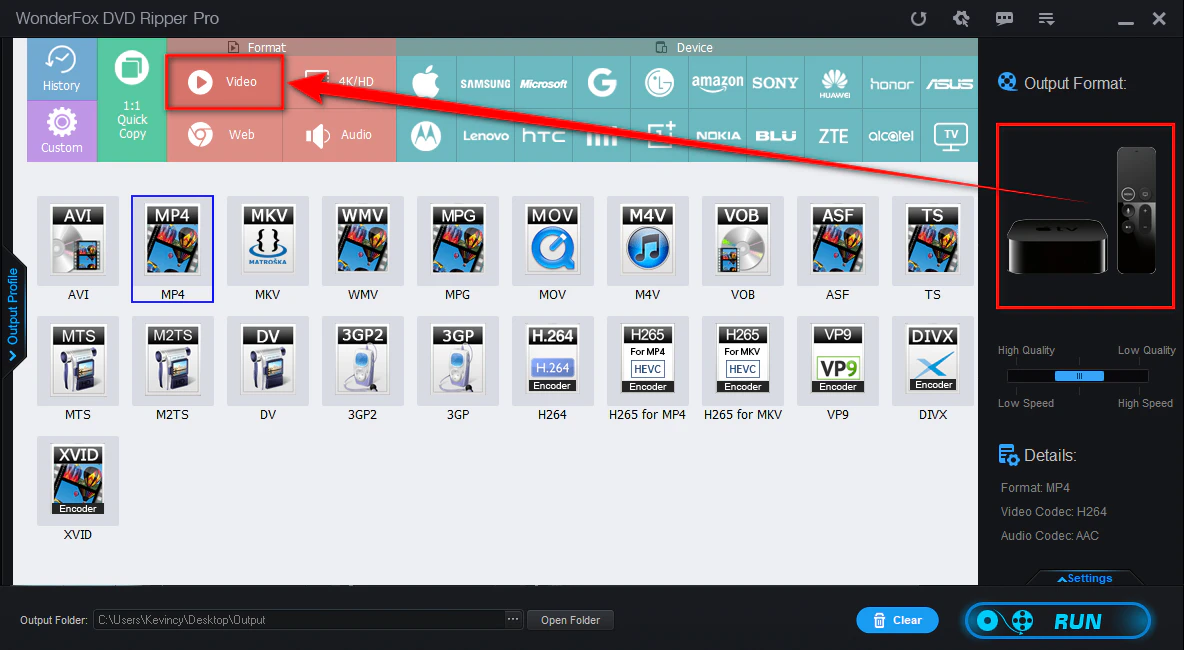
If you're tech-savvy enough, click on the "Settings" button to expand a panel where you're free to tweak some parameters like encoder, resolution, bit rate, and more for better performance.
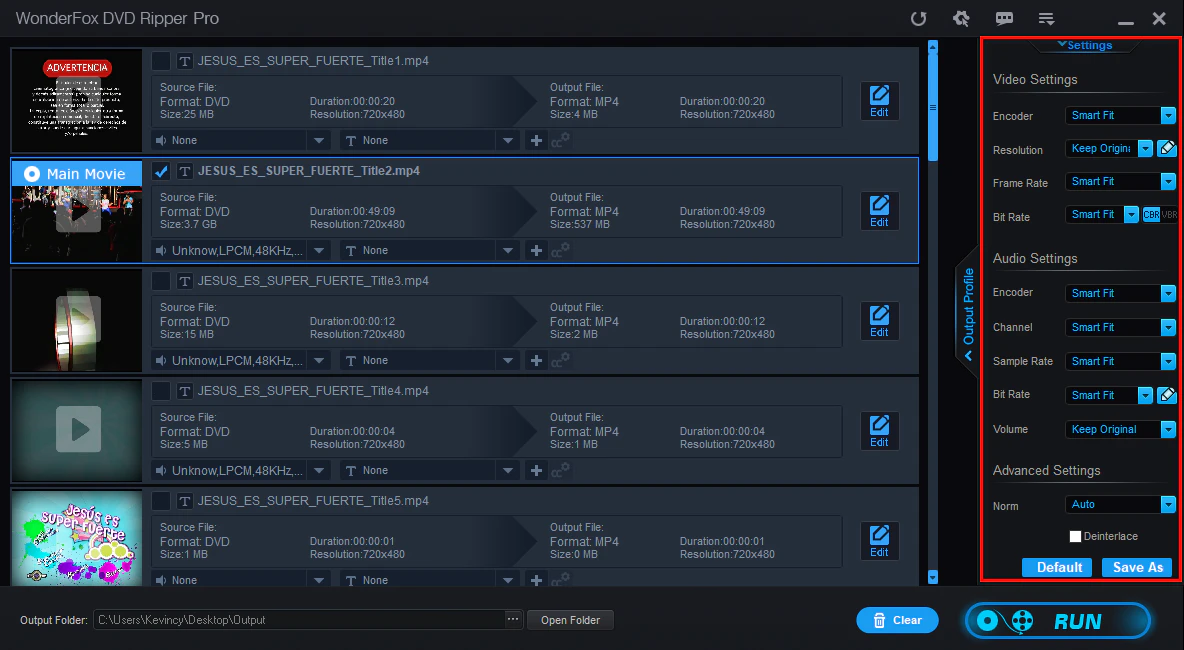
By default, this software typically selects the main movie title. However, if you want specific clips, episodes, or bonus features, you can manually choose them from the titles list. If needed, you can also press the "Edit" button to cut a clip from the DVD.
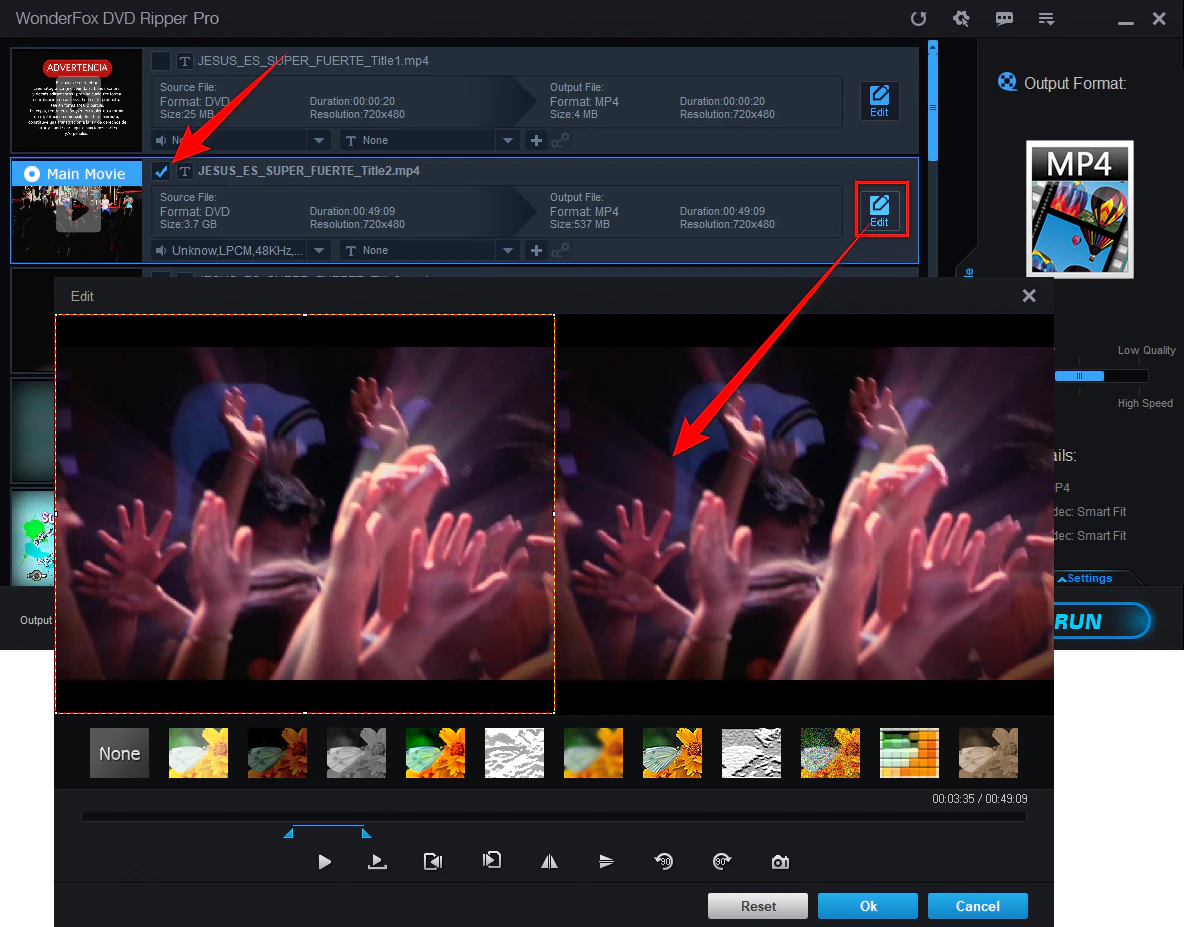
Once the ripping is complete, launch PowerDirector. Navigate to the Media Room and click "Import" to bring your newly converted video into your PowerDirector project for editing. Now you're free to enhance, cut, rearrange, and polish your footage without any compatibility issues.
In a nutshell, importing DVD content into PowerDirector 2024/2025/365 can be achieved through both the built-in Capture feature for unprotected DVDs and the WonderFox DVD Ripper Pro for copy-protected DVDs. I hope this article can be helpful to you and enable you to easily make your creative editing. Cheers!
WonderFox
DVD Ripper Pro
Terms and Conditions | Privacy Policy | License Agreement | Copyright © 2009-2025 WonderFox Soft, Inc. All Rights Reserved.