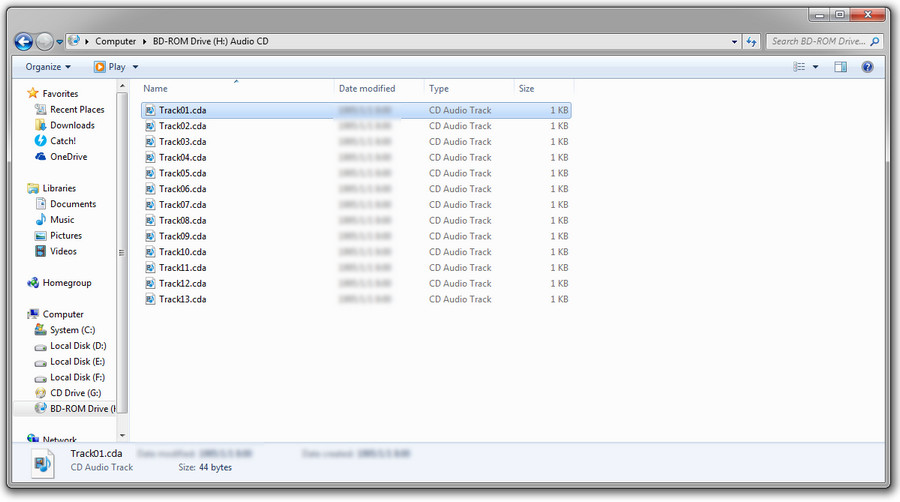
Different from the common audio formats like MP3, WAV, and FLAC, CDA doesn’t include real audio data. Instead, it is an indexing and shortcut file format that references to the related actual audio track. When one inserts an audio CD disc into a Windows computer, the Windows CD driver will automatically generate a list of 44-bytes CDA indexing information files to tell the computer when to play each audio track. By clicking these CDA shortcuts respectively, you can open associated tracks instantly.

Because of the fact that .cda files are representations of audio tracks, they can’t exist independently from the actual files to which they point. If you directly copy CDA files from an audio CD folder to your computer or other devices, the files will become invalid shortcuts and won’t play.

Use Free HD Video Converter Factory to enjoy music without file format restrictions and save free online music. The versatile software has support for all mainstreaming music sharing websites and can convert video/audio files to over 300 formats, codecs and devices.
For playing CDA files successfully, please make sure there is an audio CD disc these CAD files can refer to on your computer. Double click on a CDA file, and usually, Windows Media Player will be launched to play the audio track. Alternatively, you can right click on a CDA file, head to Open with, and choose another .cda player to open it. VLC Media Player, iTunes, RealPlayer, and Winamp all can play CDA files.
Oftentimes, people copy CDA files from a music CD with the aim of transferring the music to other devices for listening, sharing them with friends or for backup. Yet as we have mentioned just right, CDA files don’t contain audio data, the simple copy-and-paste action will not bring an expected result. Then, if you search for solutions on the Internet, you would find some instructions suggesting that you convert CDA to MP3 or WAV, which is actually the operation of ripping the CD and converting the music to MP3 or WAV. After all, it makes no sense to convert a separated CDA shortcut to an audio file. With this in mind, let’s learn how to rip CDs.
Step 1. Insert the CD disc into the built-in or external optical drive on your computer, then run Windows Media Player.
Step 2. Head to Library, under this tab, choose the CD drive letter from the left vertical menu bar.
Step 3. There will be a Ripping setting button at the top section of the window. Click it, then choose More Options.
Step 4. On the Options dialog, hit the Change button to choose a location for the exports, open the format drop-down list and choose the desired audio format. MP3, WAV, and WMA are supported. Based on your preference, there are more other options you can change. Then, click OK to save the settings.
Step 5. Tick the audio tracks you want to convert. Typically, it will select all tracks by default.
Step 6. Click the Rip CD button and convert the CD to WAV, MP3, or WMA.
We compile this post with the aim to help you get better understanding of .cda files and easily make use of such files in daily life, such as playing, backup, sharing, etc. Hopefully, you would find something useful after going through it.
WonderFox HD Video Converter Factory Pro
The excellent video suite provides a wide selection of video/audio process tools, including video downloader, video converter, video editor, screen recorder, GIF maker, side by side video maker, subtitle extractor, etc. The application features a concise and easy-to-navigate interface, flexible setting options, enrich functions, giving you a wonderful user experience.
Articles: Convert Video | Rip DVD | Download Video | Play Video | Share Media Files | Record Screen | Edit Video | Toolbox | Third-party Software | Kodi
Store | Download | About | Contact | Support | Privacy | Copyright © 2009-2025 WonderFox Soft, Inc. All Rights Reserved