This part shares two simple ways to help you remove the whole music track from a video file. Just read on and select a preferred way to get started now!
WonderFox HD Video Converter Factory Pro is an all-in-one audio/video processing tool designed for Windows.
It can remove the whole audio track from a video file while keeping the quality. You can even import multiple videos and remove the music simultaneously with one click. Its powerful format support allows you to import any video (incl. 8K & HEVC) and remove their background music.
Besides removing the background, you can also add a new audio track, trim and merge videos, add subtitles, and more with this software.
It can quickly export your videos with the support for hardware acceleration. Moreover, the user-friendly interface and simple workflow make it suitable for beginners.
Free downloadFree download the BGM removing software and follow the guide below to delete background music in videos now.
Step 1. Launch HD Video Converter Factory Pro after the installation and then open the Converter module.
Step 2. Click the center + button or the + Add Files button in the upper-left corner to import your source videos into the program. You can also directly drag the files and drop them into the blank space.

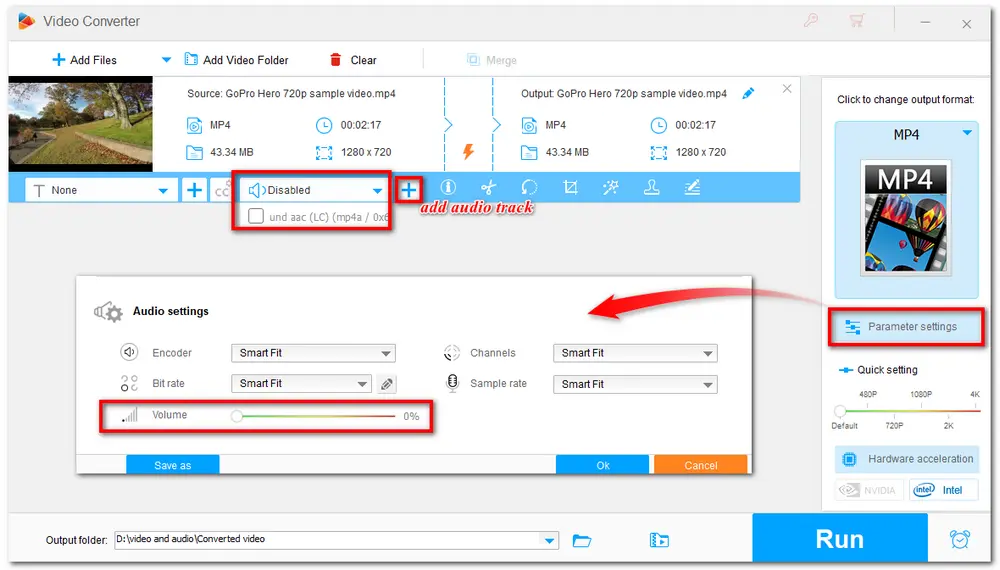
Step 3.Click the Audio Track section under the video and uncheck the soundtrack box.
(You can then click the + button to add your soundtracks to video files.)
You can also enter the Parameter settings window and head to the Volume setting. Drag the volume bar to 0% to mute the video.
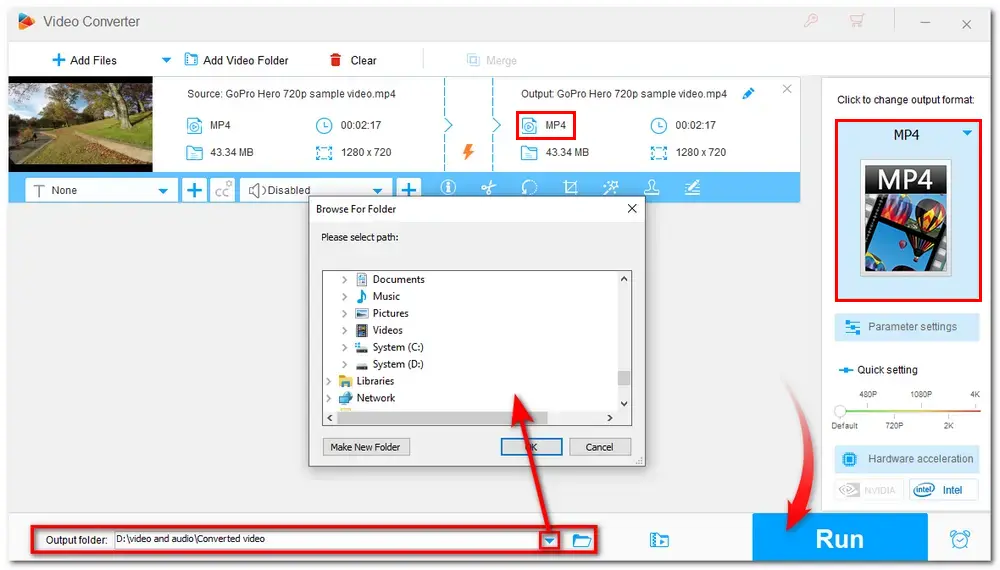
Step 4. Go to the right side of the interface and click the format image to enter the output format library. Select the original video format or other desired formats under the Video tab.
Step 5. At last, click the bottom inverted triangle button to specify an output destination or leave it as default. Then press the Run button to start exporting the video files.
VLC Media Player is a popular open-source multimedia player that also supports converting and editing videos. It can delete background music from various videos with its powerful format support. You can use it to remove the music from videos on Windows, Mac, and Linux.
Visit https://www.videolan.org/vlc/ to download VLC on your computer.
Let’s see how to remove background music from a video with VLC Media Player.
Step 1: Open VLC Media Player on your PC after the installation and click Media. Choose Convert/Save from the Media drop-down menu.
Step 2: In the new pop-up Open Media window, click + Add button to import the video file you want to get rid of the background music. Press the bottom Convert/Save button to bring up the next window.

Step 3: In the Convert window, you can choose a format from the Profile drop-down list. Here you’re recommended to select Video-H.264 + MP3 (MP4) format for the best compatibility.
Step 4: Click the wrench icon (Edit selected profile) to enter the Profile edition window. Navigate to the Audio codec tab and uncheck the Audio box. Then click the Save button to return to the Convert window.

Step 5: Press the Browse button to specify an output path. Finally, click the Start button to initiate the background music removal process.

🛠️ Issue Fixes: VLC Only Converts Part of Video? Here are the Fixes!
Besides removing the whole music track, you may just want to remove the background music but keep the voice. So this part offers a guide for you.
Audacity is an open-source audio editing application that is compatible with Windows, Mac, and Linux. It offers the Vocal Reduction and Isolation feature that can help remove the background but keep the voice.
However, it only supports importing audio files or the audio part from video files (with the FFmpeg library installed) and exporting the files in audio format.
You may then need to use a tool like WonderFox HD Video Converter Factory Pro to add the audio to your video.
Now, follow the guide below to see how to use Audacity to remove music from a video but keep the voice.
🎯 Note: Before starting editing, go to https://lame.buanzo.org/ffmpeg.php to download the FFmpeg installer for Audacity to import the video's audio track into Audacity.
Then, click the downloaded FFmpeg file to complete the installation. Pay attention to the destination location. By default, FFmpeg for Audacity will be stored in C:\Program Files\FFmpeg for Audacity.
Restart Audacity.
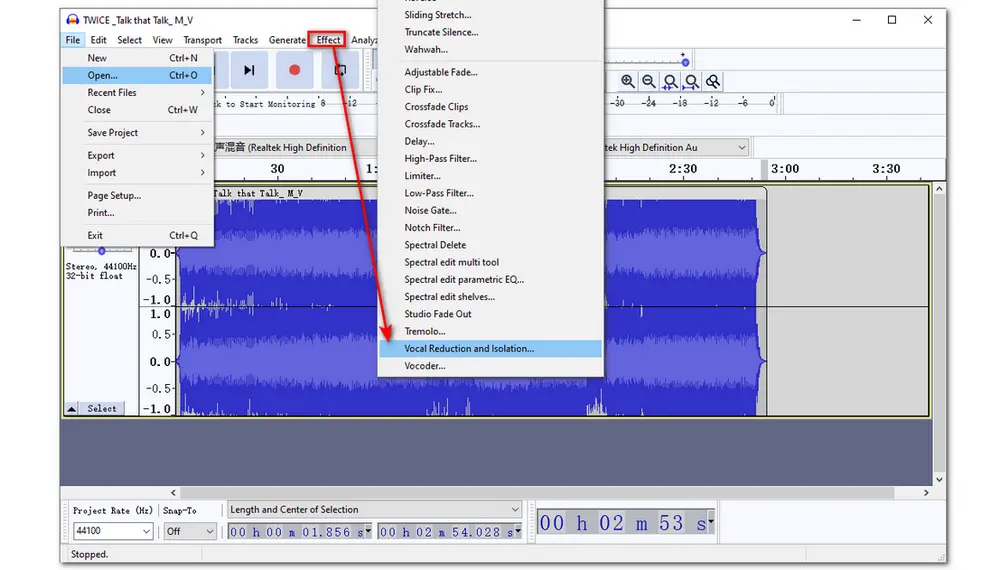
Step 1: Go to its File section, then click Open to import the audio file you extracted before. (If you don’t have Audacity, click here to download it: https://www.audacityteam.org/)
Step 2: Use the hotkey “Ctrl + A” to select the whole audio file and press Effect on the top menu bar. Find Vocal Reduction and Isolation effect (the second to last on the Effect drop-down list).
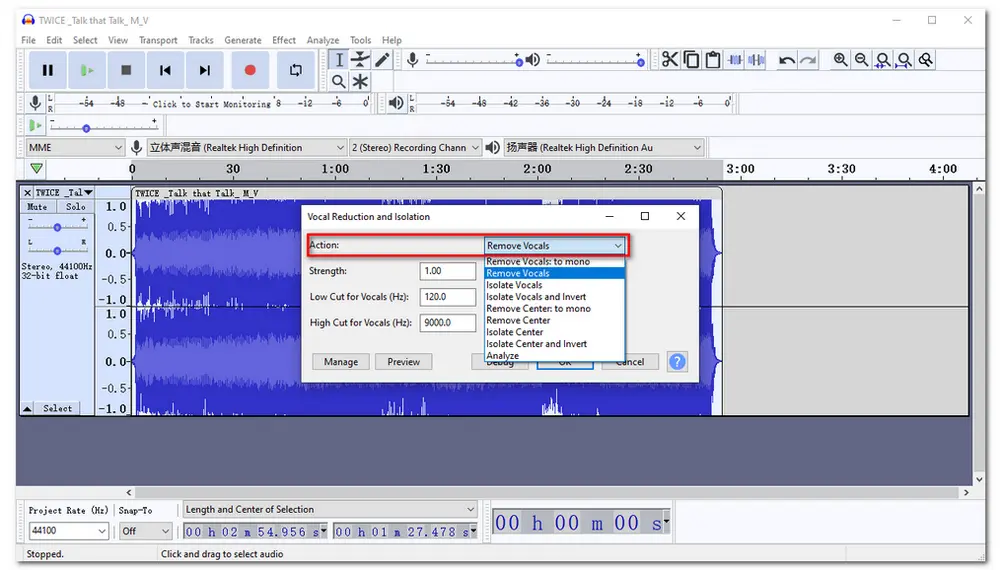
Step 3: In the pop up Vocal Reduction and Isolation window, choose Remove Vocals from the Action drop-down list to keep the voice but delete the vocal. You can also choose Isolate Vocals to remove the voice from background music. Then click OK and wait for a while.
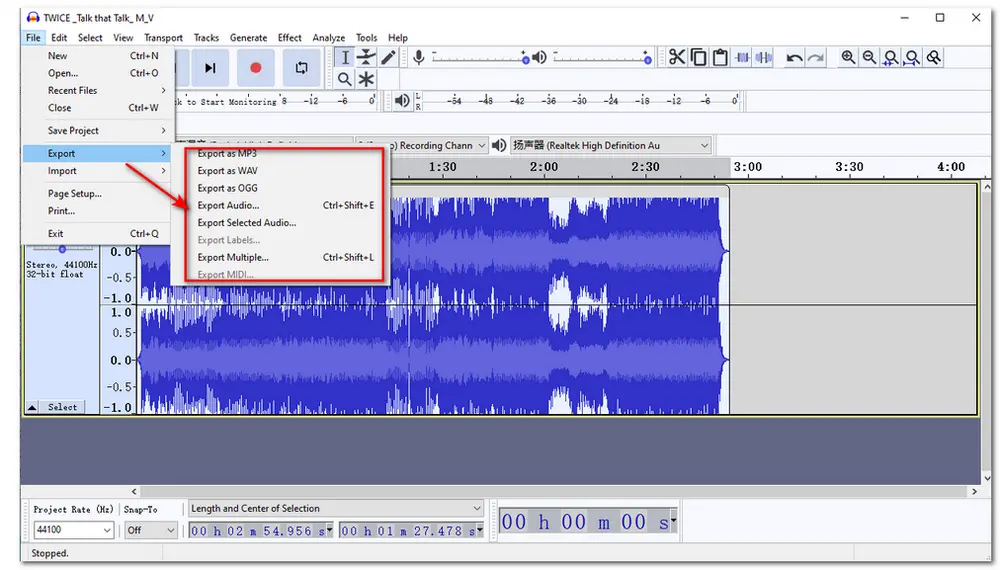
Step 4: Finally, go to the File menu and click Export button. You can choose one audio format to keep the voice file. Then you can add the voice to the video.
Media.io is an online video editor that offers many advanced and basic video editing features. It can separate the background music and voice from video and audio with its AI Vocal Remover feature. It supports many popular video and audio formats.
However, its free plan only allows video file sizes less than 100 MB.
You may then need to add a separate voice audio file to the video.
If your video is small-sized, just follow the guide below to start removing music.
Step 1. Open the Media.io music remover tool at: https://www.media.io/online-vocal-remover.html.
Step 2. Click Remove Vocals Online > Click To Upload to upload the video.
Step 3. Click "Download" besides the separated files. (It will download both vocal and background music as a ZIP file. You can then unzip the file and use the needed audio track.)
VocalRemover is a popular online AI-based vocal remover that supports separating the vocal and music from video and audio files. It also supports many other features like cutting, joining, recording, splitting, etc.
It is totally free to use without limitation and can export the file in MP3 or WAV formats.
Follow the guide below to start removing background music from your videos now.
Step 1. Visit https://vocalremover.org/.
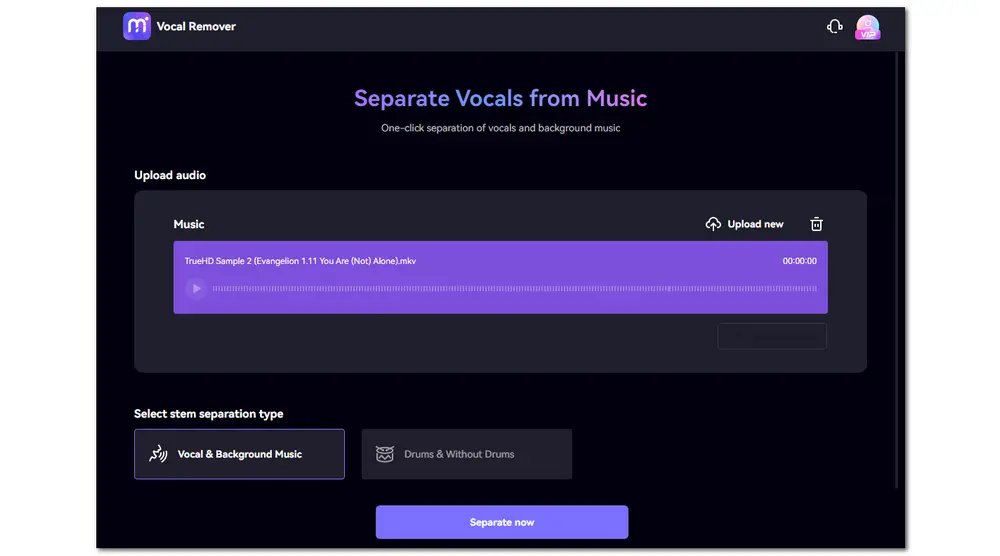
Step 2. Click Browse my file to upload the video. Then, it will automatically start the music and vocal isolating process.
Step 3. Choose an output format at the bottom-right corner and click "Save" to download the music, vocal, or music + vocal to your device.

This post has introduced several effective ways to remove background songs from videos. Whether you want to remove the whole background music track or only remove the background music but keep the voice, you can find the solution in this post. Just choose one according to your needs.
By the way, WonderFox HD Video Converter Factory Pro is highly recommended for you. It can import any video and remove the whole background music track from them without issue.
If you want to separate music from vocals, just give Audacity or Media.io a try. They can help you remove the music from your audio file but keep the voice.'
Yes. There are many apps and online tools that can remove music from videos. You can use WonderFox HD Video Converter Factory to remove the whole music track from a video or use Audacity to remove the music but keep the voice in a video.

WonderFox DVD Ripper Pro
WonderFox DVD Ripper Pro is a professional DVD ripping program that can easily remove all the DVD encryptions and rip any DVD, be it homemade or commercial, to all popular formats and devices including MP4, MKV, MP3, WAV, Android, iPhone, etc. without a hitch. It also lets you edit, compress, and improve the video quality of DVDs at high efficiency. Download it to enjoy a fast and trouble-free DVD-ripping experience.
* Please DO NOT use it to rip any copy-protected DVDs for commercial use.
Privacy Policy | Copyright © 2009-2025 WonderFox Soft, Inc.All Rights Reserved
