Screen recording is useful for users to capture and create important content on their device, such as:
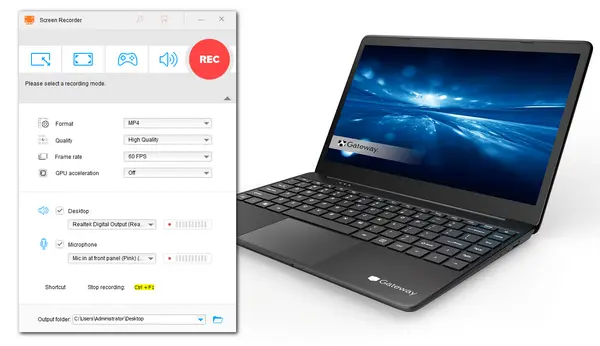
If you have a Gateway laptop and want to know how to screen record on it, you've come to the right place. This article will guide you through two recording tools and the detailed steps on how to start the recording on your Gateway laptop.
Since the Gateway laptop usually comes with the Windows system, you can just use the Windows pre-installed screen recorder - Xbox Game Bar, to screen record your Gateway laptop. Though Game Bar is designed for gamers to capture their gameplay, you can also use it to record the screen with audio on your laptop if your computer is running Windows 10 or Windows 11.
However, you can only use it to record for 4 hours at most, and it doesn’t support customizing the recording region. Additionally, it cannot record the desktop screen or the file explorer. Considering it is free, you can still give it a try.
Follow the steps below to learn how to record the screen on your Gateway laptop using Game Bar.
Tips. Before opening the Xbox Game Bar, start the application you want to record.
Step 1. Press "Windows Key + G" on your keyboard to launch the Game Bar. If it's not open, go to Start menu > Settings> Gaming. Click the slider to activate the Xbox Game Bar. Then try the keyboard shortcut again.
Step 2. Click the "Record" button to start recording. Alternatively, you can press "Windows + Alt + R" to start screen recording on your laptop. (If you want to take a screenshot on your Gateway laptop, you can click the camera icon or press "Windows + Alt + PrtScrn.")
Step 3. Either way, the capture status bar will pop up with a timer and two recording controls. Click the microphone button to turn the external microphone on and off.
Step 4. When finished, click the Stop button in the recording bar or press "Windows + Alt + R" to stop recording.


Though Xbox Game Bar can record your Gateway laptop efficiently, it also has many limitations that may not satisfy your recording demands. Then, you can try a third-party screen recorder like WonderFox HD Video Converter Factory Pro. With it, you can capture screen, system audio, and microphone voice individually or simultaneously on your laptop with just a few clicks. Before starting recording, you can flexibly adjust the recording area, output format, quality, frame rate, etc. There is no time limitation on the recording files.
After finishing recording, you can further edit the recorded files.
Now, let’s check how to start recording on a Gateway laptop with WonderFox HD Video Converter Factory Pro.
Step 1. DownloadDownload and launch WonderFox HD Video Converter Factory Pro. Select the “Recorder” module.
Step 2. Choose a recording mode from “Custom”, “Full-screen”, “Game”, or “Audio-only”. If you choose to record the screen on your laptop, then select the recording area and press “OK” to confirm it.


Step 3. Select an output format, quality, frame rate, and GPU acceleration from each drop-down menu. Check the audio sources you want to record. (Desktop for system audio, Microphone for the external sound. To record screen with no sound, uncheck them.) Then click the bottom ▼ button to specify an output path.
Step 4. Hit the red “REC” button. It will start recording after a five-second countdown. You can then click the stop icon or press “Ctrl + F1” to end the recording.


After recording, you will be directed to a predefined file location. Here you can easily view your recordings. If needed, you can close the "Recorder" and open the "Converter" module from the app's initial interface to edit, compress, and convert your recording files.
Want to record your Gateway laptop screen? With the two methods in this article, you can easily record meetings, tutorials, video calls, game clips, online videos, etc. on your laptop. If you want to find more options, this article is for you: 10 Best Laptop Screen Recorders for Windows.
That’s all I want to share with you. I hope you can successfully record the screen on your Gateway laptop. Thanks for reading. Have a great day!
Yes, most screen recording software applications allow you to record audio alongside your screen capture. But note that you should select the correct audio source in the recording options.
Generally, you can take a screenshot by pressing the “Windows + Shift + S” or “Print Screen” (Print sc, Print sc, PrtScn) key on your keyboard. Then press “Ctrl + V” or “Ctrl + S” to save the screenshot. You can also press the “Windows + Print Screen” key to directly take and save the screenshot to your [C:\Users\[YOUR NAME]\Pictures\Screenshots] folder.
Yes. You can either edit the screen recording with a video editing tool on your laptop or directly use the WonderFox HD Video Converter Factory Pro to record and further edit your screen.
Terms and Conditions | Privacy Policy | License Agreement | Copyright © 2009-2025 WonderFox Soft, Inc.All Rights Reserved