Screen recording software has become very important in this digital age. When we are conducting a presentation, video call or webinar, a screen recording utility can help us capture all the information and details and archive them as media files for easy viewing and sharing. However, the built-in Xbox Game Bar on Windows 10 and 11 can only record one application window at a time, and cannot record the File Explorer and desktop. If you want to capture all desktop activity, you will need an external desktop video recorder. The good news is that there are many good desktop recording software out there. Below, I will share an excellent and free desktop recorder to help you record videos from your desktop smoothly. Continue reading.
WonderFox HD Video Converter Factory Pro stands out among its competitors as a powerful and easy-to-use screen recorder. It can be used as a desktop recorder to capture full screen activities on the desktop. It can also record any part of your desktop you want as well as record desktop audio. Just target the desired area and hit the record button to start.
As a versatile screen recorder, it offers multiple recording options and you can record MP4, MKV, MOV or WebM. It allows high-quality recording and supports hardware encoding. Additionally, you can crop your screen recording or trim and compress it in its built-in video editor. Now, let me show you how to record from your desktop using this desktop recorder.
Download and install Download and install the recommended desktop recorder and follow the steps below.
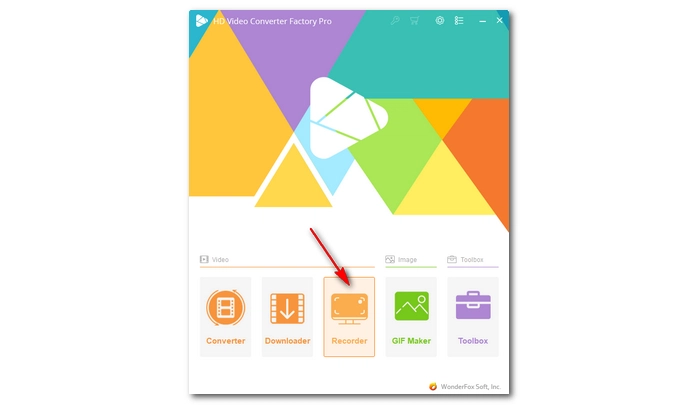
Run WonderFox HD Video Converter Factory Pro on your desktop and click the “Recorder” option.


To capture the whole desktop, choose the second full screen recording mode from the four recording modes on the top.
Next, freely adjust the recording format, quality, and frame rate, and turn on GPU acceleration as desired. Or you can leave them as default.
If you want to capture the desktop sound, remember to select the box before “Desktop”. You can also select “Microphone” if you want to record your voice. You’ll know the audio source is correctly set when the volume bar is active. Otherwise, select a different audio source from the drop-down menu.
Lastly, click the ▼ button at the bottom to set a destination folder for saving the recorded files.


Get your recording material ready and click the red “REC” button to start the recording after a five-second countdown. When the recording is complete, press hotkeys the “Ctrl + F1” on your keyboard to stop the recording. You will be taken to the output folder directly. Play or edit the recording as you like.
While the Xbox Game bar does not allow you to record from your desktop, you can use a third-party desktop recorder like WonderFox HD Video Converter Factory Pro to continue your recording. The free trial of the software offers 5 unlimited recordings where you can record anything on your desktop without time limit and watermark. Just give the software a try.
That’s all I want to share about the desktop recorder and how to record video from desktop. I hope this article was useful. Thanks for reading. Have a nice day!
Windows 10 has a gameplay capture tool called Xbox Game Bar, which can also be used to record applications. However, it cannot record from the desktop.
You can’t make Game Bar to record desktop because Microsoft forbids this action. The best you can do is to maximize your app in full-screen mode and record the full-screen window.
In Windows, you can use a desktop recorder such as WonderFox HD Video Converter Factory Pro to record the whole desktop efficiently. You can also try similar programs like OBS, Bandicam, Camtasia, etc.
WonderFox HD Video Converter Factory Pro provides five unlimited recordings where you can record your desktop with no time limit.
Terms and Conditions | Privacy Policy | License Agreement | Copyright © 2009-2025 WonderFox Soft, Inc.All Rights Reserved