This post shares two ways to record on Oculus Quest gameplay. If you want to record Oculus Quest gameplay on your PC, try the recommended screen recorder.
WonderFox HD Video Converter Factory Pro: Record Oculus Quest 2 gameplay on PC
Oculus Quest 2 is a fantastic virtual reality (VR) headset that offers the ultimate VR experience for gaming.
When playing VR games with Oculus Quest 2, you may want to capture the gameplay highlights or the whole gaming process for sharing with your friends or uploading to your channel. Oculus Quest 2 has a built-in recording feature but may require some settings to produce a good-quality recording.
You can follow this post to learn how to record Oculus Quest 2 gameplay with its built-in recording feature and adjust the settings. This post also shares a third-party screen recorder to help you record Oculus Quest 2 gameplay on your PC.
The Oculus Quest 2 headset offers a built-in recording feature. You can follow the guide below to learn the steps to record Oculus Quest gameplay with its built-in recording feature.
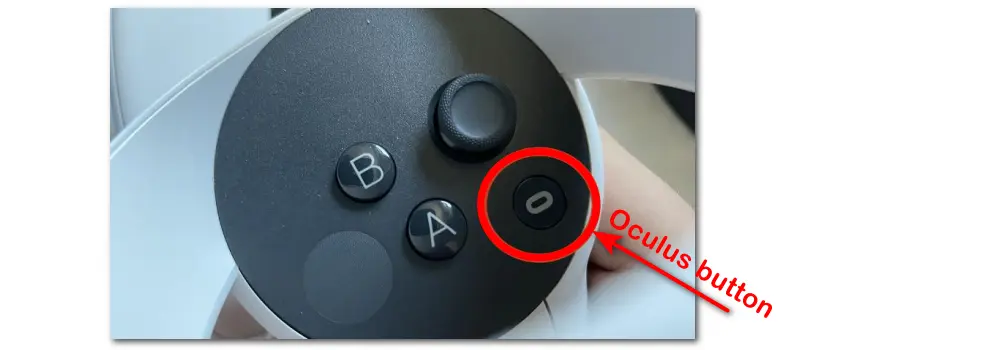
Step 1. Put on your Oculus Quest 2 headset and press the Oculus button on the right Touch controller to go to the Home menu.
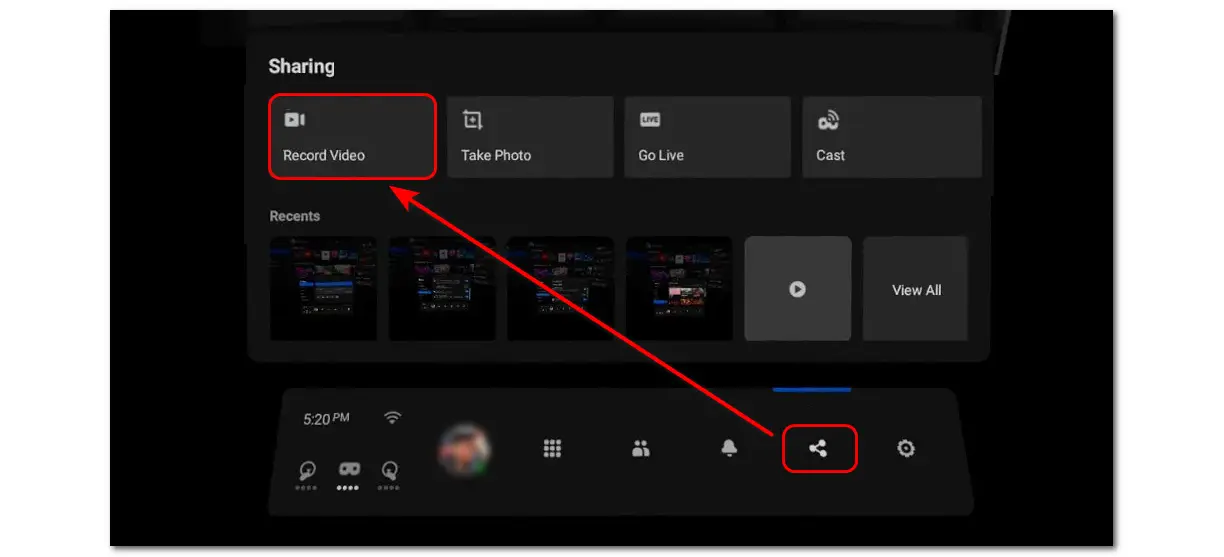
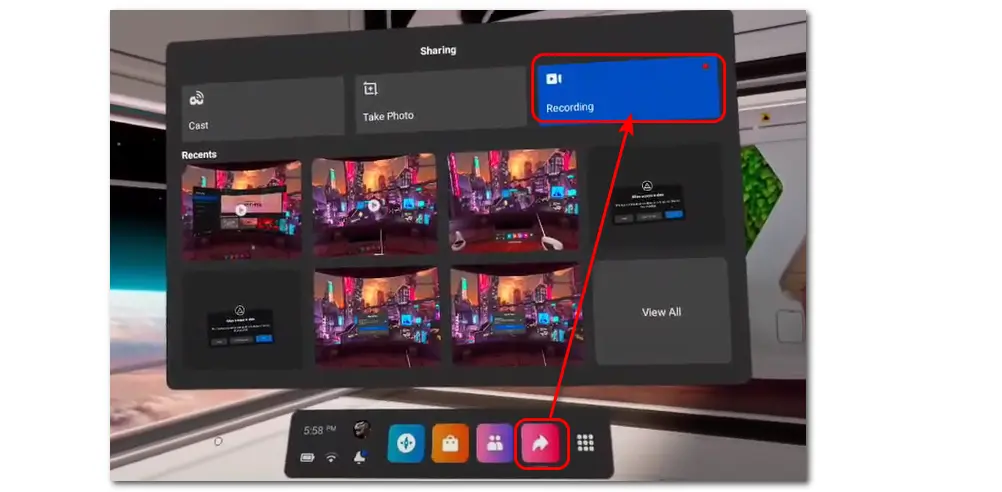
Step 2. Click the share icon from the right side to open the "Sharing" menu.
Step 3. Then you will see four options ("Record Video", "Take Photo", "Go Live", and "Chat") under the Sharing tab. Select "Record Video". Then it will show a red dot on the top-right corner of the Recording tab.
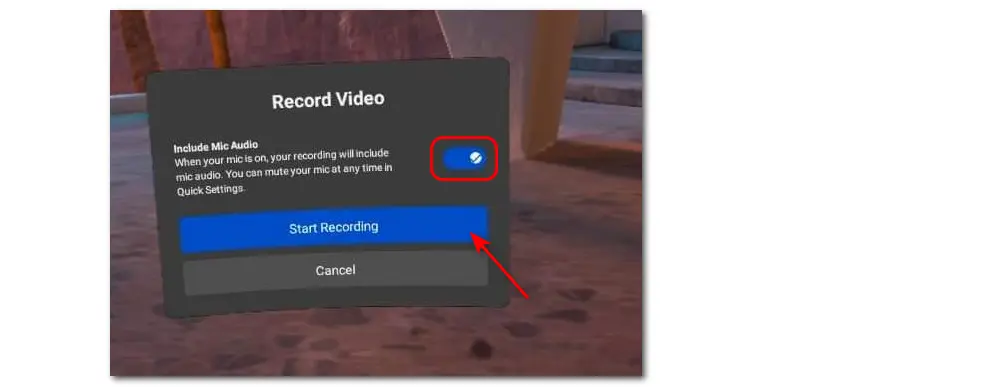
💡 💡 Tips. If you want to capture the Oculus Quest 2 gameplay with your mic voice, remember to select the toggle next to "Include Mic Audio" and then select "Start Recording".
Step 4. After finishing the gameplay you're recording, press the Oculus button on the right Touch controller again to bring up the universal menu.
Step 5. Select the share icon and then "Recording" to stop the recording.
✨💡🌟 Bonus Tip.
By default, the Oculus Quest 2 built-in recording feature will record the gameplay in 1024x1024 resolution, 30 FPS, and 5 Mbps. However, you can tweak the capturing settings higher with the following steps.
1. Visit https://sidequestvr.com/setup-howto to install SideQuest.
2. Plug your headset into the PC.
3. Select "Run ADB commands" and then choose "Custom Command".
4. Run the following commands one line by line, and press "Run Command" for each:
(It's recommended to choose the lowest resolution that suits your needs and reduce the resolution further if you experience performance issues such as dropped frames.)
Once complete, you can unplug your headset, and when you next record, it will give you a 30Mbps 1920x1980 capture.
Note that if the headset is rebooted, all these values are reset to the original defaults.

Though the Oculus Quest 2 built-in recording feature is convenient for capturing gameplay footage, there are some limitations, like the recording quality, being inconvenient for sharing, editing, etc.
In this case, you may wonder how to record your Oculus Quest 2 gameplay on a PC for higher recording quality, stable gaming performance, smooth sharing and editing experience, and enjoy the PC VR games.
The following shares an all-in-one screen recorder & editor tool and the steps to capture Oculus Quest 2 on a PC.
The steps to record Oculus Quest 2 gameplay on a PC are quite simple. But before starting recording, you need to cast the Oculus Quest 2 gameplay on your PC screen.
First, follow the guide below to share the Oculus gameplay on your computer screen.
Step 1. Go to the Meta's Oculus casting portal (https://www.oculus.com/casting/) in the browser on your PC and log in.
Step 2. Put on your Oculus Quest 2 headset and press the Oculus button on the right Touch controller to open the universal menu.
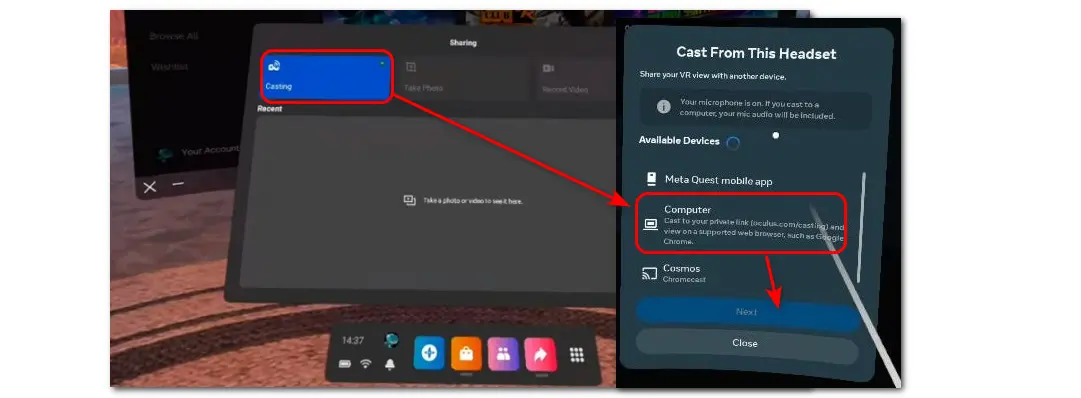
Step 3. Click the share icon and select "Cast" > "Computer".
Step 4. Select "Next" and follow the on-screen instructions to connect.
Then, download and install a screen recorder on your PC to start recording. Here, WonderFox HD Video Converter Factory Pro, a powerful gameplay recorder that can capture gameplay and any other screen activities on your PC, is recommended for you.
It offers a game recording mode that can capture the gameplay video in high quality up to 4K 60fps (depending on your screen resolution). You can also freely control the recording region, format, quality, frame rate, and audio source with a few simple clicks.
It also offers other features to help convert, compress, trim, crop, merge, add audio to the recorded clips, and more. The user-friendly interface makes it suitable for beginners.
Download it here to get started now.
Step 1. Launch WonderFox HD Video Converter Factory Pro and open the Recorder module.

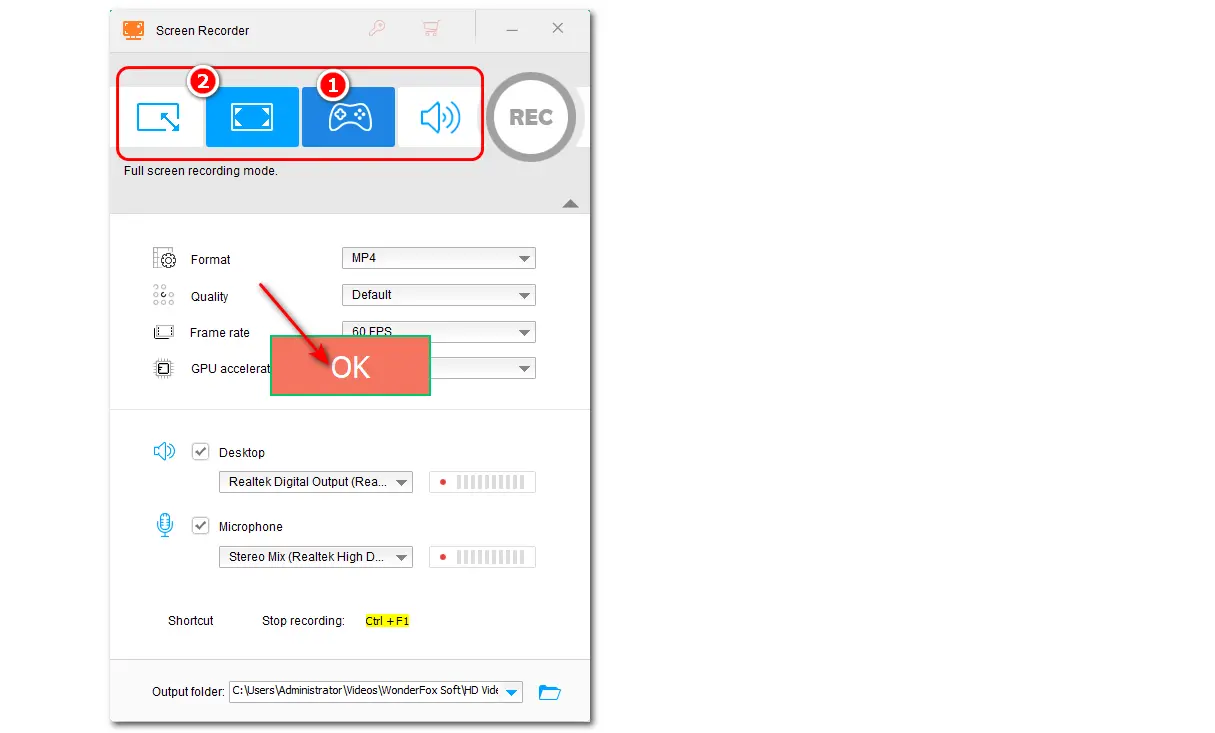
Step 2. Choose the Game recording mode and then select the “Custom” or “Full-screen” mode to set the recording region. Then, click “OK” to confirm the recording area.
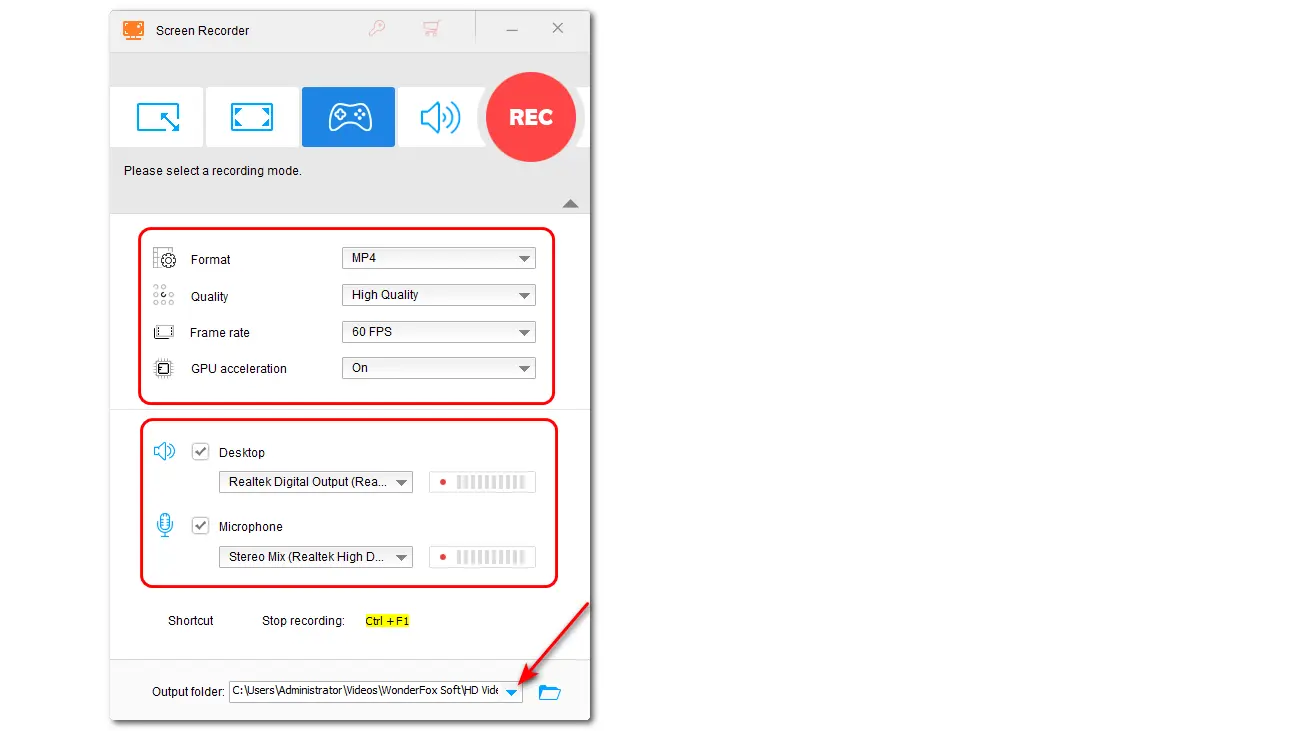
Step 3. Customize the recording format, quality, frame rate, and other settings according to your needs.
🎯 By default, the Game mode recording settings are MP4, default quality, and 60 FPS. You can change the Quality to High and turn on the GPU acceleration (if your graphics supports hardware acceleration) to enjoy a smoother recording experience.
Step 4. Adjust the audio source you want to capture or leave the default setting to capture the internal sound and microphone voice simultaneously.
Step 5. Hit the bottom ▼ button to set an output folder for your recordings, or just keep it default.
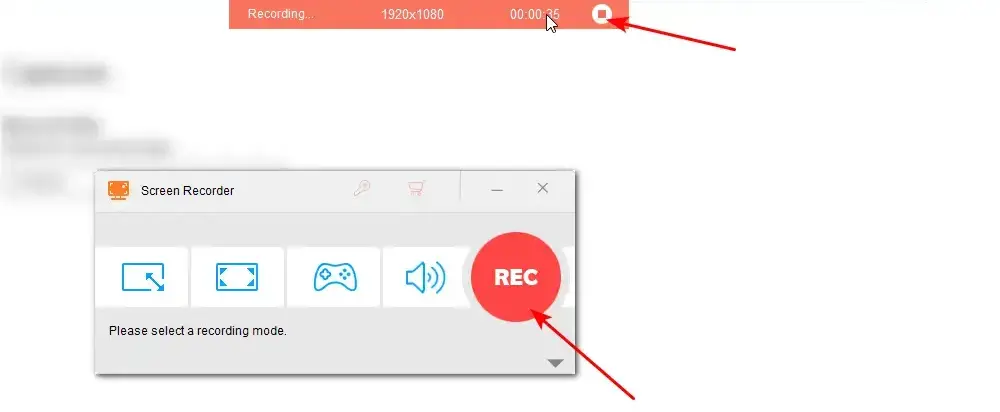
Step 6. Click the “REC” button, and the recording will start after a 5-second countdown. During this, you can start the gameplay you want to capture.
Step 7. Press “Ctrl + F1” or click the square icon on the recording status bar to stop and finish the recording.
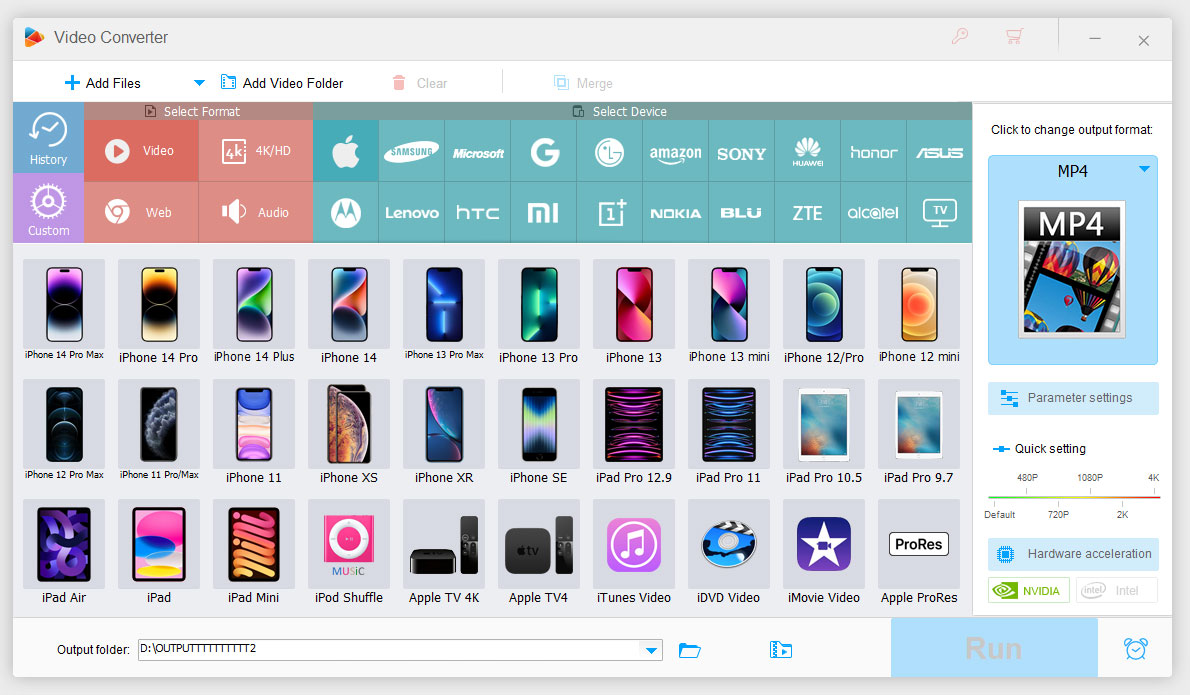
After finishing the recording, the recorded clip will be automatically saved to the path you set. You can then open the Converter module and drag and drop the recorded clips into the converter to trim, crop, and do more edits.
If you want to stop casting the gameplay on your PC after finishing recording, just press the Oculus button on the right Touch controller again and click the share icon > Stop casting.
Recording the VR gameplay on Oculus Quest 2 is not a difficult task with the above two methods. After reading this post, you can easily capture the Oculus Quest 2 gameplay with its built-in recording feature and a third-party screen recorder on a PC. You can just choose one way according to your own needs to start recording.
In addition, if you want better recording quality or a convenient sharing & editing process, using a third-party screen recorder (WonderFox HD Video Converter Factory Pro) is recommended. It can capture gameplay and other screen activities on your PC in high quality and offers more practical features for processing video. Free download this software here to give it a shot now!
Oculus Quest 2 only allows 2 hours of recording and will automatically stop recording after 2 hours to save the battery. However, the Quest 2 has a battery life of around 2-3 hours of gameplay, so to keep a good recording and game performance, you're not recommended to record long videos with the Oculus Quest 2 built-in recording feature.
Oculus recordings are saved in the /Oculus/VideoShots folder on your Meta Quest headset's internal storage. You can access them within the headset by pressing the Oculus button on your right Touch controller, selecting "Library", and choosing "Files".
Then, you can play, share, or delete the recording according to your needs.
To transfer the recorded videos from Oculus Quest 2 to a PC, there are two ways:
Way 1. Via USB-C connection
Way 2. Via SideQuest app
WonderFox
HD Video Converter Factory Pro


Terms and Conditions | Privacy Policy | License Agreement | Copyright © 2009-2025 WonderFox Soft, Inc. All Rights Reserved.
