Quick Summary: This post shares 4 methods to help you clip Warzone on PCs. You can use WonderFox HD Video Converter Factory Pro to get a simple and smooth recording experience or try other recommended screen recorders.
WonderFox HD Video Converter Factory Pro – Best Game Recorder for PC
Warzone is a free-to-play battle royale first-person shooter game. It has gained popularity among players since its release in 2020. When playing this game, some users may want to record clips of the game to share the highlights, skills, game scenes, etc. with their friends and fans. But, how to clip Warzone on PC? No worries! In this article, you will learn 4 methods to clip Warzone gameplay on PC with detailed steps. Read and choose a suitable way to capture the Warzone gameplay on your PC now!
Many screen recorders on the market can capture gameplay like Warzone on PCs. However, it is not easy to find a reliable recorder that is capable of capturing gameplay without lag.
The most recommended choice for you is WonderFox HD Video Converter Factory Pro. It is a powerful all-in-one video/audio processing tool that offers a built-in screen recorder. With it, you can record Warzone and other gameplay in high quality with just a few simple clicks. Moreover, you can enable the GPU acceleration feature to enhance the game recording performance.
More features are also provided within this tool!
Now, let's see how to clip Warzone on PC with WonderFox HD Video Converter Factory Pro.
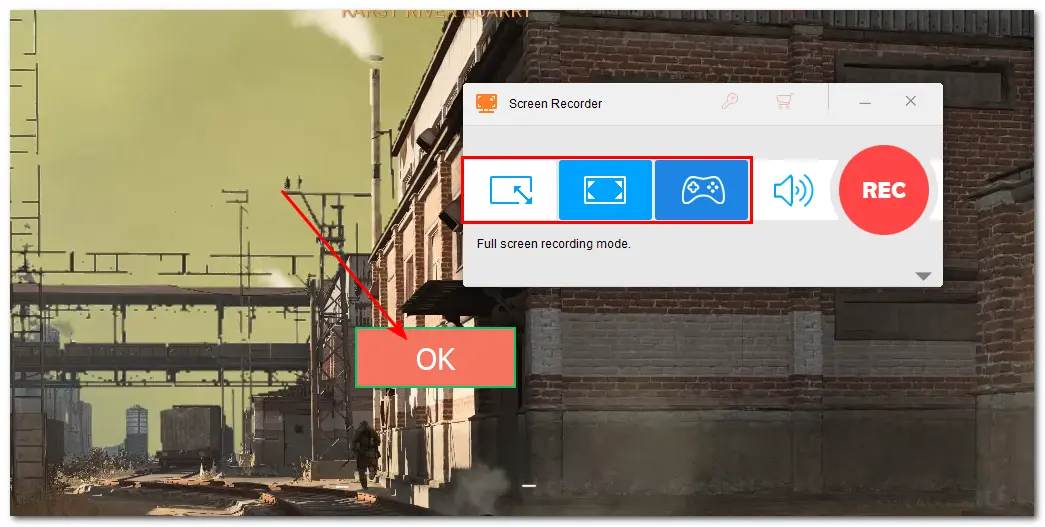
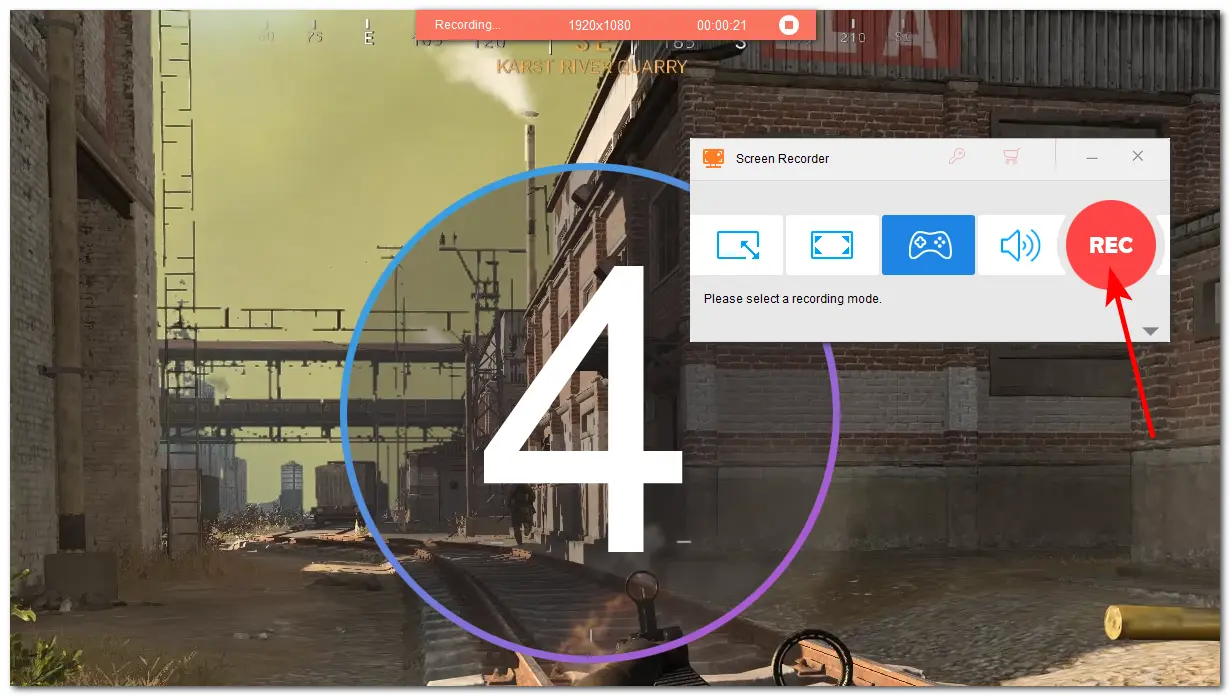
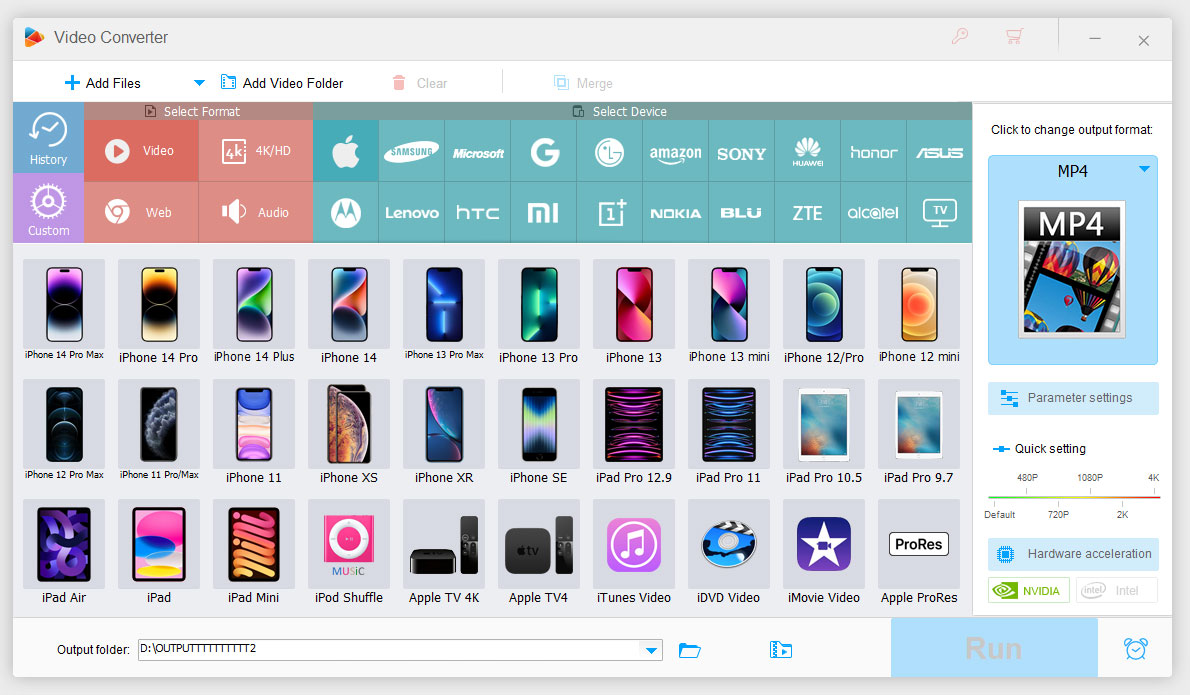
Step 1. Start the Call of Duty: Warzone gameplay and launch WonderFox HD Video Converter Factory Pro. Choose the "Recorder" module from the main interface.
Step 2. Choose the third "Game recording mode" and then select the "Custome" or "Full-screen" mode. Adjust the recording region and press "OK" to confirm the recording area.
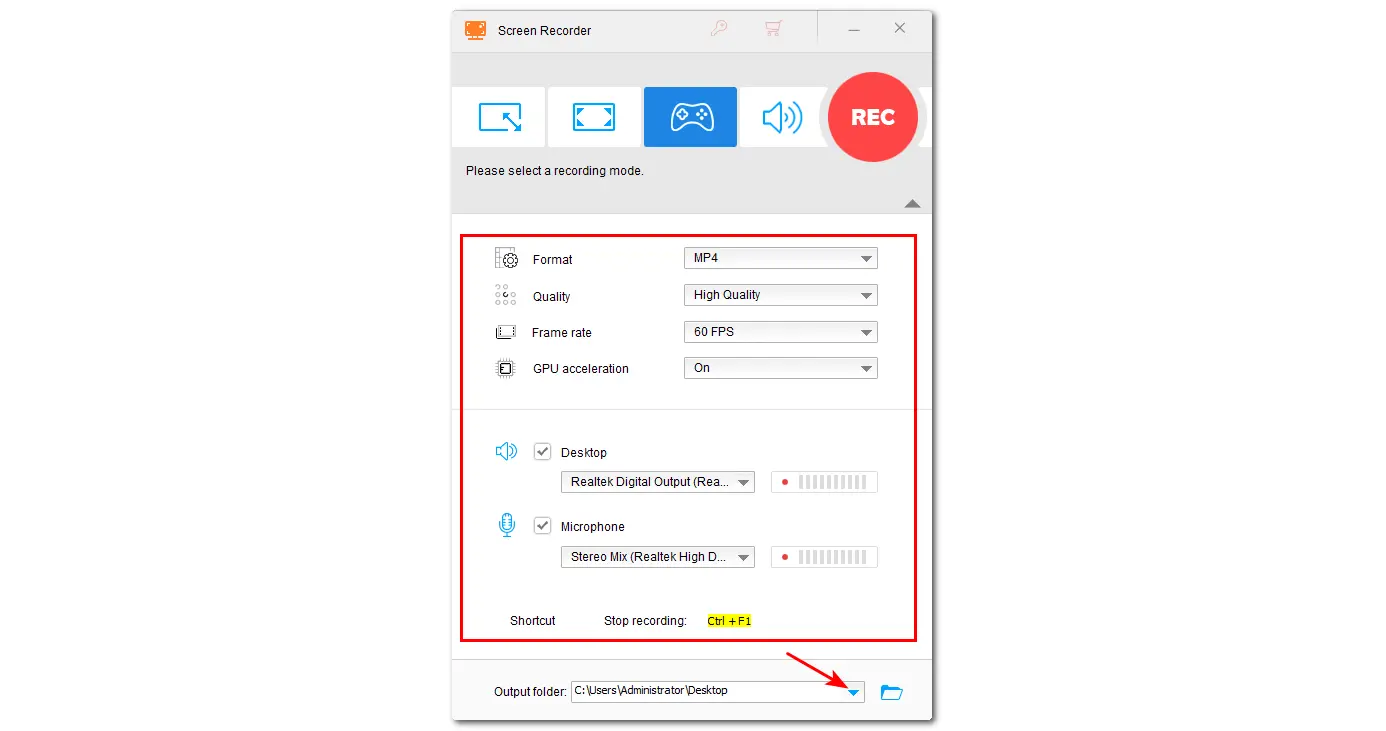
Step 3. The default recording settings are "MP4, Default, 60FPS, Off". You can customize the recording format, quality, frame rate, etc. as you wish.
Also, the "Microphone" and "System" sounds are enabled by default. You can choose to uncheck the "Microphone" box to avoid recording your voice or the background noise.
Click the bottom ▼ button to specify an output path.
Step 4. Now, click the "REC" button. It will start recording after a 5-second countdown. Once finished, click the square-shaped icon on the floating recording bar or press "Ctrl + F1" to stop recording.
Besides WonderFox HD Video Converter Factory Pro, this post also shares other tools for you to choose from.
If your computer is running Windows 10/11, you can directly give Xbox Game Bar a try. It is the default screen recording software for Windows 10/11 that can capture almost all gameplay, including Warzone on Windows PCs. With it, you can clip Warzone on Windows without installing any third-party software.
Here is a simple tutorial on how to use the Xbox Game Bar to capture Warzone gameplay.
Step 1. Press the "Start" button and go to "Settings" > "Gaming" to ensure the Xbox Game Bar is enabled.
Step 2. You can then switch to the "Captures" section to adjust the recording settings, like save path, recording length, audio source, video quality, frame rate, and more.

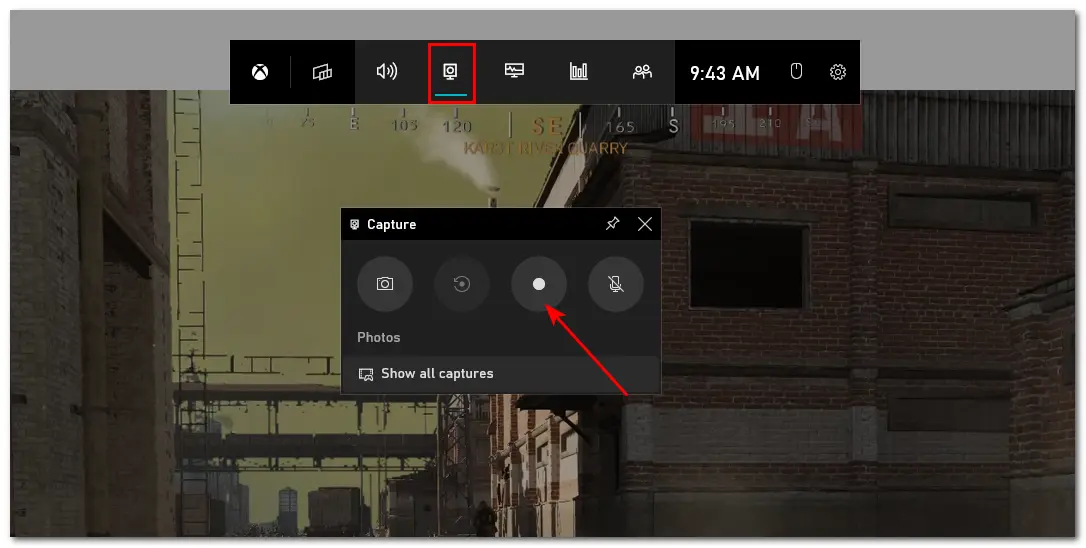
Step 3. Start the Warzone gameplay and press "Windows + G" on the keyboard to bring up the Xbox Game Bar. (If this is your first time opening it, you will receive a popup saying, "Do you want to open Game bar". Check the tickbox.)
Step 4. Switch to the "Capture" widget and click the third record button to start recording. You can also directly press "Windows + Alt + R" to start recording.
Step 5. Once finished recording, you can hit the "Windows + ALT + R" keys again to stop recording.

Though Xbox Game Bar is free, easy to use, and has no watermark, it still has some limitations:
Besides recording Warzone on a Windows PC, some users may also want to clip the Warzone gameplay on other devices. Then, give OBS Studio a try. It is a popular open-source screen recording and live-streaming tool that is compatible with Windows, MacOS, and Linux. Though free, you can use it to capture Warzone and any other screen activity without time limitations! It also supports 4K recording for high-quality output.
Let's see the tutorial for recording Warzone with OBS Studio.
Step 1. Download and install OBS Studio from its official website.
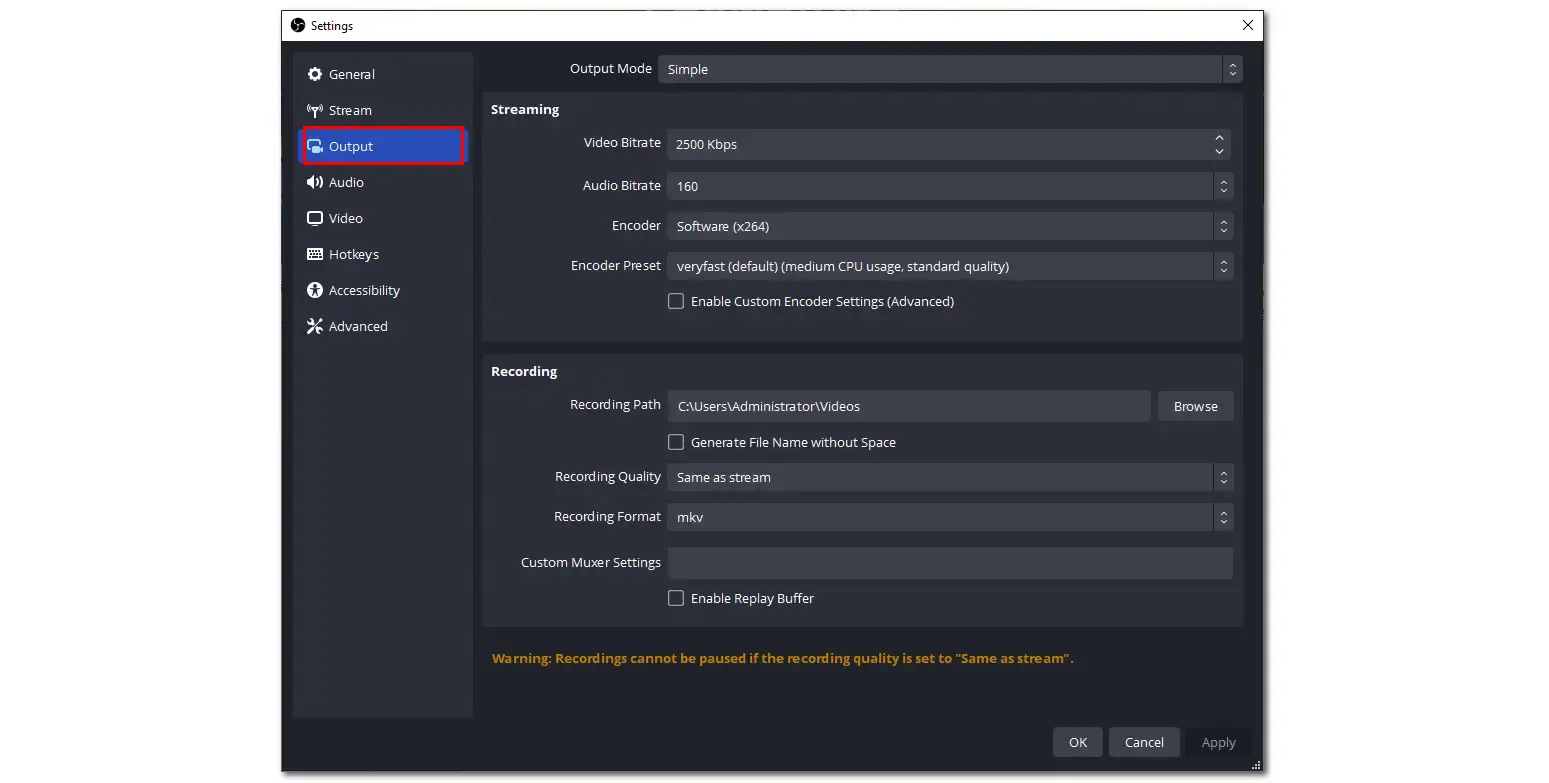
Step 2. Launch the Warzone gameplay on your computer. Then open the OBS Studio and head to the "Settings” > "Output" section to adjust the recording settings. Click "OK" to confirm the settings.
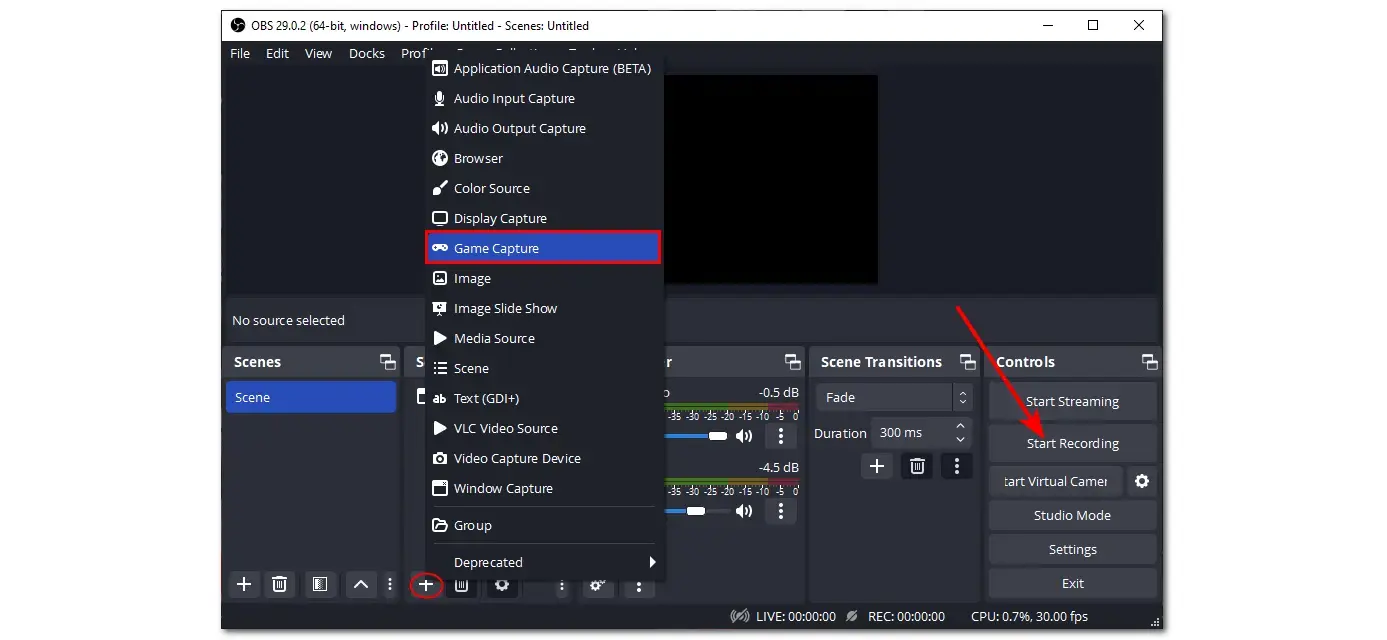
Step 3. Click the "+" button under the "Sources" tab and choose "Game Capture".
Step 4. Adjust the game capture mode from the drop-down list in the "Properties" window and click "OK" to save your change.
Step 5. Now, start the Warzone gameplay and click "Start Recording" to begin the recording process. Once finished, you can click "Stop Recording" to end the recording.
If your computer is configured with an Nvidia graphics card, then you can use Geforce Experience to clip the Warzone gameplay. Geforce Experience offers an integrated gameplay recording feature called ShadowPlay that can record your gameplay with minimal impact on performance. With it, you can record the gameplay, monitor FPS, take screenshots, and more.
The simple guide is also given in the following content:
Step 1. Press "Alt +Z" to open Geforce Experience and sign into your Nvidia account.
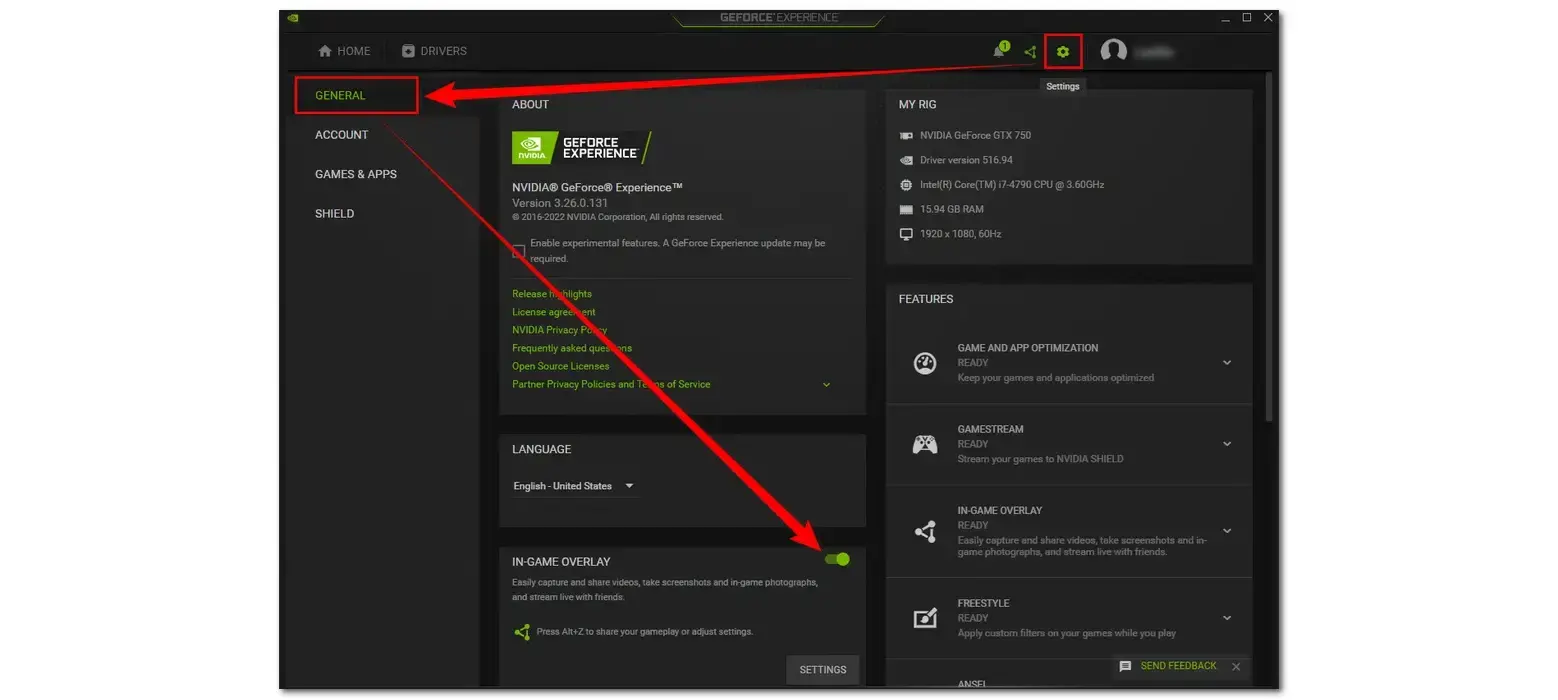
Step 2. Press the gear icon to open the "Settings" window.
Step 3. Go to the "GENERAL" tab and enable the "IN-GAME OVERLAY" option.
Step 4. Click the gear icon to modify the recording quality, length, resolution, frame rate, bit rate, and output path as you wish.
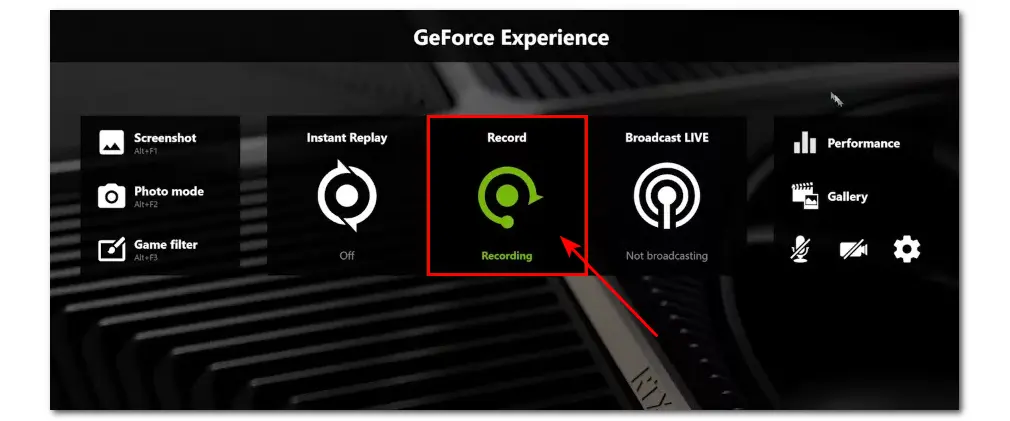
Step 5. Start the Warzone gameplay and press the hotkeys "Alt + Z" to open up the ShadowPlay overlay.
Step 6. Click "Record" > "Start" or press "Alt +F9" to start recording and re-press it to stop recording. You can also select the "Instant Replay" mode to record the gameplay in the background.
Want to clip Warzone gameplay on PC to share your game highlights? This post shares 4 detailed methods! You can choose WonderFox HD Video Converter Factory Pro, Windows Game Bar, OBS Studio, or Nvidia GeForce Experience to capture clips from Warzone and more PC games according to your actual needs.
That's all I want to share with you. Thanks for your reading. Have a nice day!
WonderFox
HD Video Converter Factory Pro


Terms and Conditions | Privacy Policy | License Agreement | Copyright © 2009-2025 WonderFox Soft, Inc. All Rights Reserved.
