Many users have reported issues with the Snipping Tool missing after an update. To help, this post shares the possible reasons and 10 solutions to help you quickly fix the problem.
Best Snipping Tool Alternative to Record Video
WonderFox HD Video Converter Factory Pro
The new Snipping Tool in Windows 11 combines the best features of the old Snip & Sketch and Snipping Tool. Additionally, Microsoft has added new functions, including the ability to screen record videos. However, many users have reported Windows 11 Snipping Tool missing errors after the update.
While this can be very frustrating, it is important to understand why the Windows 11 Snipping Tool is missing and how to get it back to work. In this article, we will provide a comprehensive guide to fix this Snipping Tool missing problem. Read on to learn more!
There could be several reasons why the Snipping Tool disappeared on your Windows 11 computer. Some causes include:
Below, I will share 10 solutions to solve the Windows 11 Snipping Tool Missing problem on your computer. Keep reading.
Here are 10 ways to recover or fix the lost Snipping Tool. I will start from simple to complex. Notice that before proceeding to solve the problem, it is recommended to back up your files and other important personal data.
When encountering any issue on your Windows PC, a simple restart sometimes quickly gets the issue solved. So, you can first try to restart your computer to fix the Snipping Tool disappeared error on Windows.
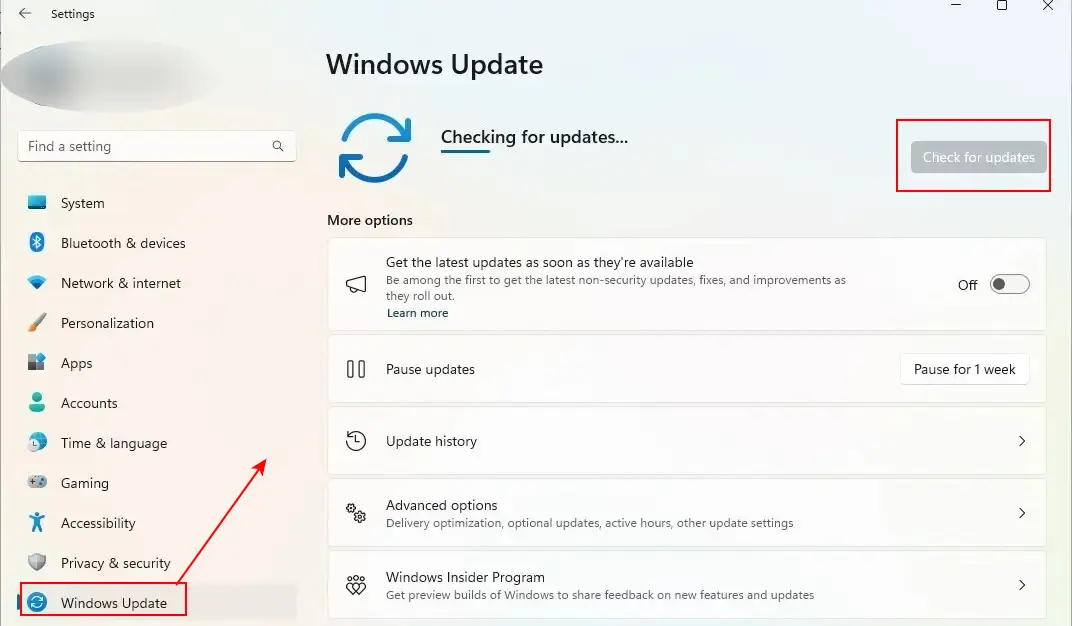
Ensure you have the latest updates installed, as system updates often fix bugs and restore missing features by reinstalling essential system components. Here is how to check all updates for Windows:
Step 1. Click ‘Start’ > ‘Settings’.
Step 2. Select ‘Update & Security’.
Step 3. Click the ‘Windows Update’ tab and click ‘Check for updates’.
Step 4. Download the new updates to your Windows.
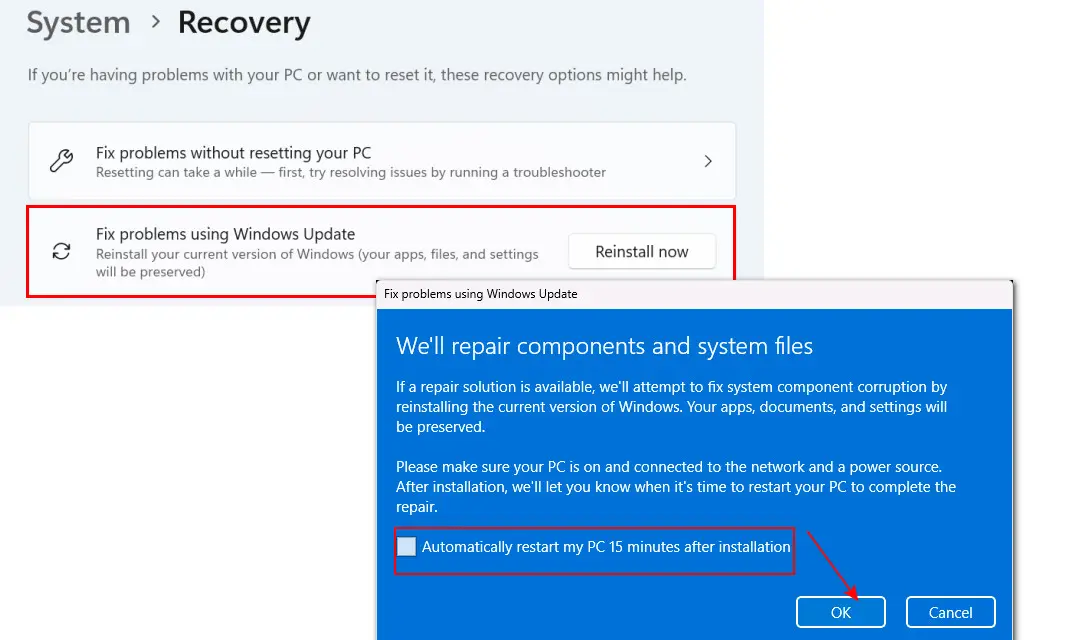
In addition to ‘Check for updates”, there is another easy repair solution built-in Windows 11, which has a straightforward name ‘Fix problems using Windows Update’. This handy tool works by reinstalling the current version of Windows and keeping all your apps, documents, and settings. However, it is only available in Windows 11 22H2 or newer.
Follow these steps to fix the Snipping Tool missing problem with your Windows 11 PC:
Step 1. Go to ‘Settings’ and click ‘System’ > ‘Recovery’.
Step 2. Locate the ‘Fix problems using Windows Update’ option and click ‘Reinstall now’.
Step 3. Then on the pop-up window, check if you allow your computer to automatically restart 15 minutes after the installation is complete.
Step 4. When you’re ready, select ‘OK’ to start the installation at once.
Step 5. The reinstall will lead you to the ‘Windows Update’ page in ‘Settings’. It will start downloading the repair version of the last OS update that was successfully installed on your PC.
Step 6. After installing the repair version of the update, restart your PC if you did not allow the automatic restart option.
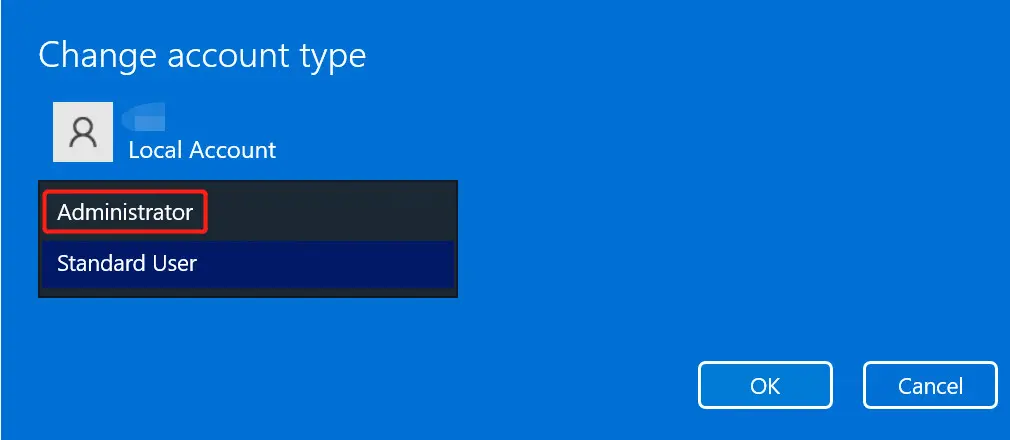
Limited access to system folders in Windows 11 can also make it difficult to find certain apps. This issue is often due to insufficient user permissions. For instance, if you’re not logged in with an administrator account, the Snipping Tool may not show up in the search results or may not function properly, especially when you attempt to launch it using a shortcut.
To fix this issue, check your account type to ensure that you are logged in with an administrator account. To check your account type:
Step 1. Open ‘Settings’.
Step 2. Select ‘Accounts’ in the left pane.
Step 3. Next, check the user profile section. You’ll see an ‘Administrator’ tag if the account has administrator rights.
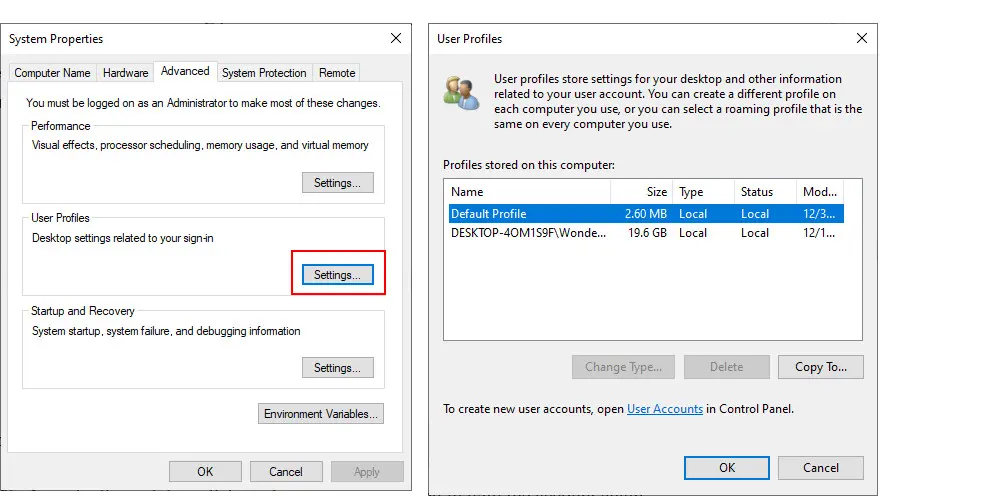
This method is shared by a Microsoft user who encountered the same missing apps issue in a wide-area network environment with Domain Joined Roaming profiles. Here are the steps:
Step 1. Log out of your user profile and log back in as a local administrator.
Step 2. Right-click on the ‘Start’ button and click ‘System’.
Step 3. Click on ‘Advanced System Settings’.
Step 4. Hit the ‘Settings’ tab under the ‘User Profiles’ section.
Step 5. Select the affected user profile from the list and then click ‘Delete’.
Step 6. Restart your computer and log in with the account again.
This is another simple solution to this problem. Here are the instructions:
Step 1. Search ‘PowerShell’ in the Start search box.
Step 2. In the search results, right-click on ‘Windows PowerShell’ and choose to run it as administrator. Choose ‘Yes’ when being asked if you allow the app to make changes to your device.
Step 3. You can run this command to check if the Snipping tool is installed on your PC:
get-appxpackage *ScreenSketch*
Step 4. Then copy and paste this command to uninstall it. Press ‘Enter’ to execute the command:
get-appxpackage Microsoft.ScreenSketch | remove-appxpackage
Step 3. To check if the Snipping has been uninstalled from the PC, use the command:
get-appxpackage *ScreenSketch*
If there is no information about the app, it means the snipping tool has been successfully removed from the computer.
Step 4. Now, visit the Microsoft Store to reinstall it.
Alternatively, you can type in this command to reinstall the Snipping Tool directly using PowerShell:
Get-AppxPackage -AllUsers *Microsoft.ScreenSketch* | Foreach {Add-AppxPackage -DisableDevelopmentMode -Register "$($_.InstallLocation)\AppXManifest.xml"}
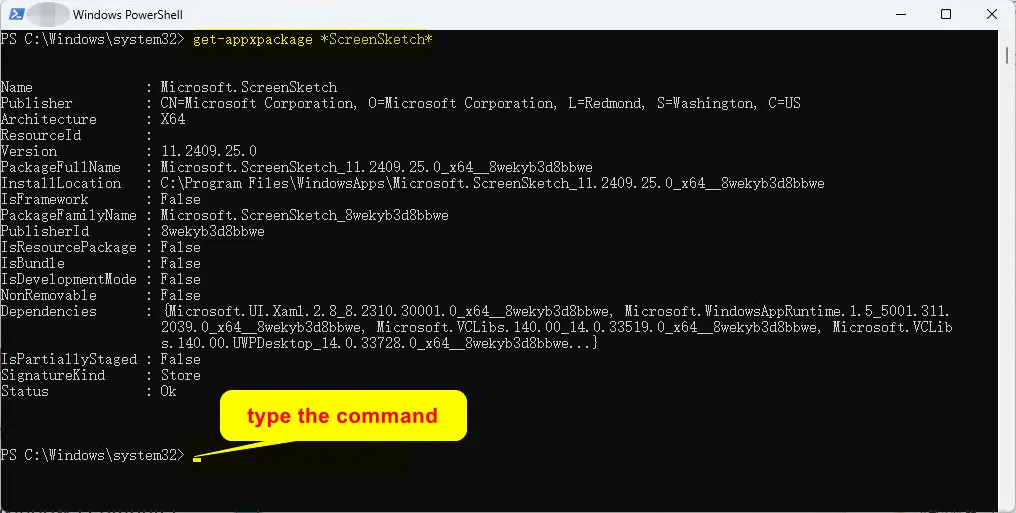
Once it’s done, search ‘Snipping Tool’ from the Start menu to see whether the app shows up in the results. If yes, then the installation worked.
Malware or viruses can corrupt essential system files, which may result in various issues, including the disappearance or improper function of your Windows applications.
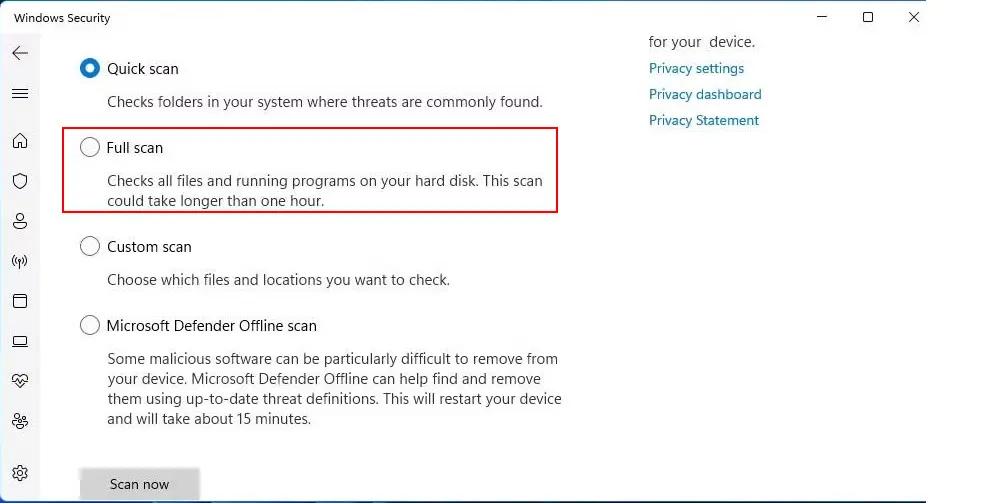
Windows Security is a native malware checker for Windows 11. You can use it to manually scan your system to detect malware and eliminate it. To make a comprehensive scan of your entire system, choose the ‘Full Scan’ mode. Here’s how to perform a full system scan using Windows Security:
Step 1. Type ‘Windows Security’ into the ‘Start’ menu search.
Alternatively, you can go to ‘Settings’ > ‘Privacy & Security’ > ‘Windows Security’.
Step 2. On the ‘Windows Security Center’ home screen, click ‘Virus & threat protection’.
Step 3. Find the ‘Scan options’ tab and click on it.
Step 4. From the given options, select ‘Full scan’.
Step 5. Then this tool will start a comprehensive scan of your entire Windows 11 operating system, including all files and folders. The duration of the scan primarily depends on the size of your hard drive and the number of files stored on your system.
Step 6. Once completed, Windows Defender will display detailed scan results. You can perform appropriate actions accordingly, such as removing or quarantining any detected threats.
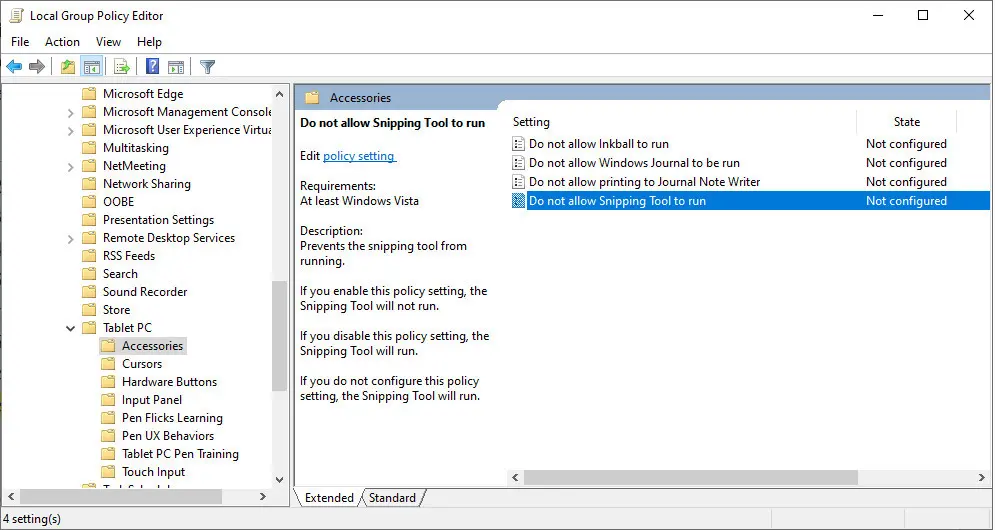
Misconfiguration of Group Policy settings related to the Snipping Tool can also render the tool inaccessible. Follow our instructions to resolve it:
Step 1. To open the Group Policy Editor, press ‘Win + R’, enter ‘gpedit.msc’, and hit ‘OK.’
Step 2. On the left pane, head to ‘User Configuration’ and expand ‘Administrative Templates’
Step 3. From the list, click ‘Windows Components’ and you’ll see a range of settings on the right.
Step 4. Scroll down and locate the ‘Tablet PC’ option. Double-click it and choose ‘Accessories’.
Step 5. Expand its menu and double-click the last option “No not all Snipping Tool to run’ to open its configuration window.
Step 6. Within this window, tick off the upper-left ‘Disabled’ checkbox and click ‘OK’ to confirm your change.
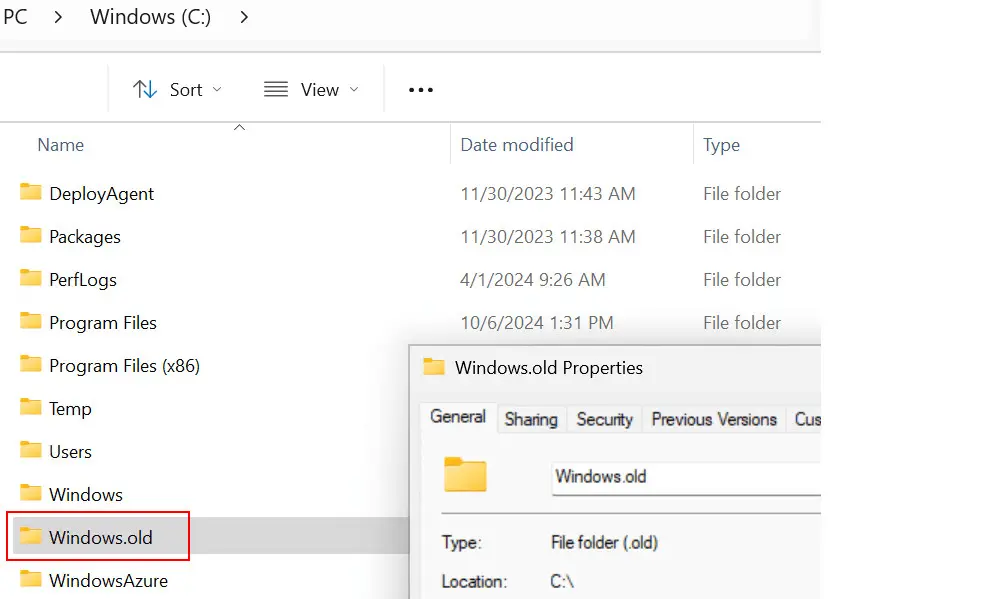
Windows.old folder contains all of the operating system files and personal data files of your previous version. If the Snipping Tool is missing in your Windows 11 after an update, try to restore the old version of it with the following simple steps:
Step 1. Open your File Explorer and locate the C drive.
Step 2. Find the Windows.old folder and open it.
Step 3. Then search for ‘SnippingTool.exe’ within the System32 folder.
Step 4. Then, launch the Snipping Tool program from this directory.
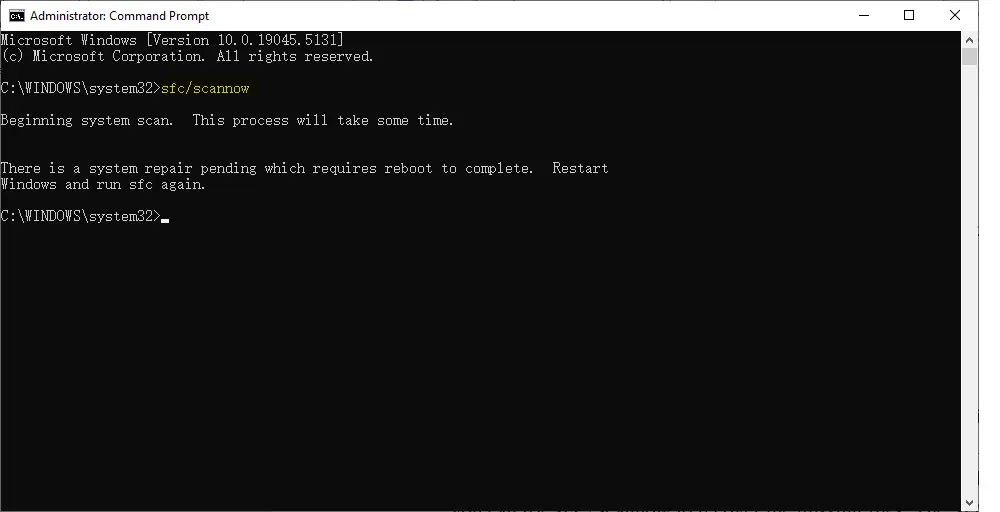
One user also reported another missing case where the Snipping Tool still worked through the shortcuts, but he couldn’t find the Snipping Tool installer file. If you’re having the same problem, you can try SFC/Scannow to recover the missing files. The SFC/Scannow command can help scan all corrupted or missing system files and automatically repair them:
Step 1. Type ‘Command Prompt’ in the search bar and run it as an administrator.
Step 2. Enter the following command and press ‘Enter’ to activate it:
sfc/scannow
Step 3. The utility will start checking the integrity of your Windows system files and fix them if necessary. Once completed, reboot your computer and check if the Windows 11 Snipping Tool problem has gone away.
If none of these methods work, then consider using an alternate like WonderFox HD Video Converter Factory Pro. This program can capture any screen activity, either the entire screen or a specific portion. It allows you to record voice from your device and microphone at the same time. No watermark or frame drops. Additionally, it offers extra features to edit and convert your recordings with desired size, parameters, and quality. Try it now!
*Security Verified. Try before you buy! Click the DOWNLOAD for free button to get the unregistered version for a free trial.
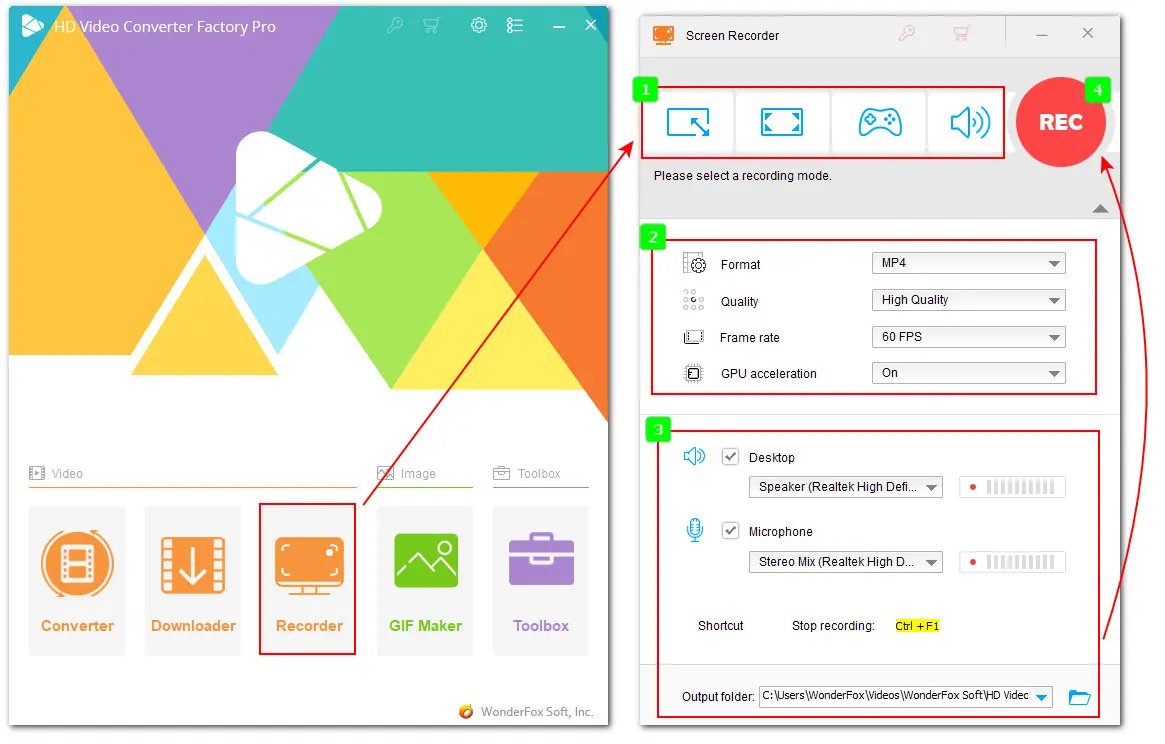
There are quite a few reasons why the Snipping Tool is gone on Windows 11, and we hope the 10 fixes can be helpful in resolving this issue in no time. If the issue persists, you can use the recommended WonderFox HD Video Converter Factory Pro to record videos of your screen without limits.
If you’re looking for Snipping Tool alternatives for taking screenshots, you can try options like Lightshot, ShareX, PicPick, FastStone, etc.
Thanks for reading till the end. Have a nice day!
This problem may be caused by a variety of reasons, such as operating system errors, damaged/incomplete system files, incorrect Snipping Tool policy settings, conflicts with other software, etc.
You can restore the Snipping Tool either from the Microsoft Store or by using PowerShell commands. To recover the Snipping Tool executable files, you can rrun the SFC /scannow command or other Windows security checker utilities. This article provides detailed steps to guide you through the process. In addition to the above solutions, here are some other methods:
Option 1. Change the date and time of your computer before October 30, 2021.
This is done because a Microsoft digital certificate expired on October 31, 2021. This expired digital certificate disrupted the Snipping Tool
Option 2. Toggle on notifications for the Snipping Tool
Option 3. Change the permissions of the C:\Program Files\WindowsApps folder where the Windows 11 SnipingTool.exe file is located.
The default location is C:\Users\%username%\Pictures\Screenshots. You can change it by launching it and going to ‘Settings’ to choose a new location for your screenshots.
WonderFox
DVD Ripper Pro - Powerful DVD Ripper for Windows
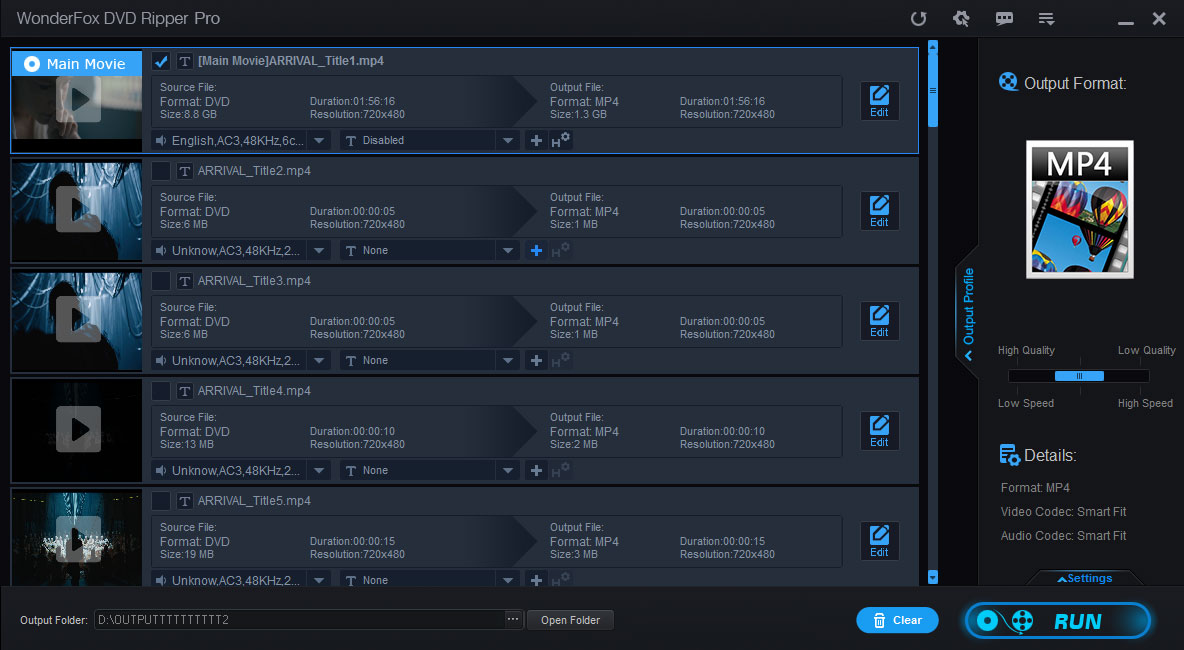
WonderFox DVD Ripper Pro can easily rip any DVD (whether homemade or commercial) to MP4, MKV, MP3, WAV, H264, H265, Android, iPhone, and so on. It also lets you edit and compress DVD-Video, offering a seamless DVD ripping experience.
* Please DO NOT use it to rip any copy-protected DVDs for commercial use.
Terms and Conditions | Privacy Policy | License Agreement | Copyright @ 2009-2025 WonderFox Soft, Inc. All Rights Reserved.