WonderFox HD Video Converter Factory Pro
Platform: Windows
Price: Free
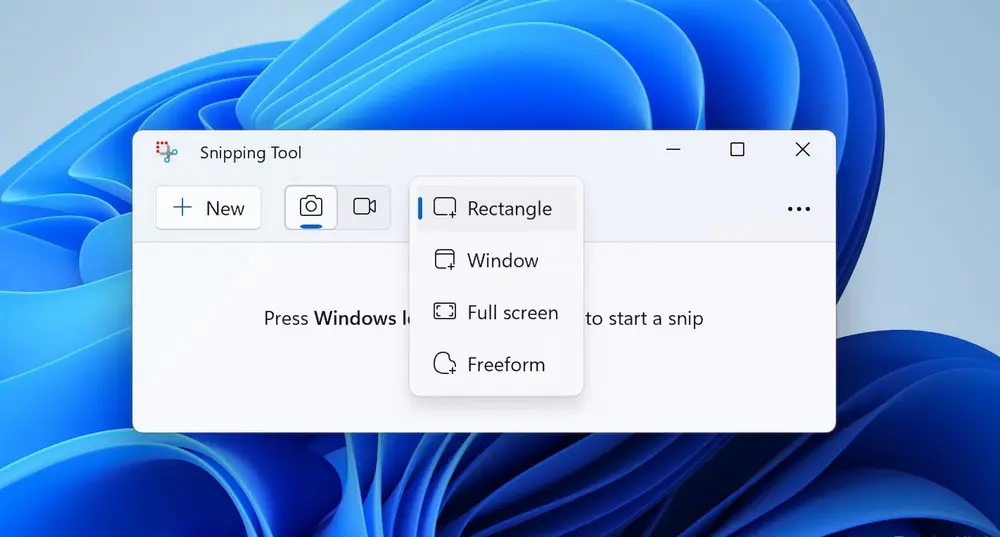
The new Snipping Tool app on Windows 11 has gone through a major update and combines the best features of the old version of Snip & Sketch and Snipping Tool. Not only does it allow you to take screenshots in various shapes and edit them, but you can also record videos of your screen with or without audio now.
Key Features:
Cons:
How-to guide:
Step 1. Search the app from your start menu and launch it. Or press ‘Windows logo + Shift + S’ to bring it up.
Step 2. Click the camera icon and select a snip style based on your needs.
Step 3. You can use the ‘Delay option’ to delay the capture for up to 10 seconds.
Step 4. Click on the ‘+ New’ button to take a snip quickly in the mode you just selected.
Step 5. Once done, the screenshot will open in the Snipping Tool, where you can edit, save, or share it as you wish.
Platform: Windows 11/10/8.1/8/7…
Price: Unregistered version (5 times for free)
$29.95 for a one-year license
$34.95 for a lifetime license (buy one get one gift)
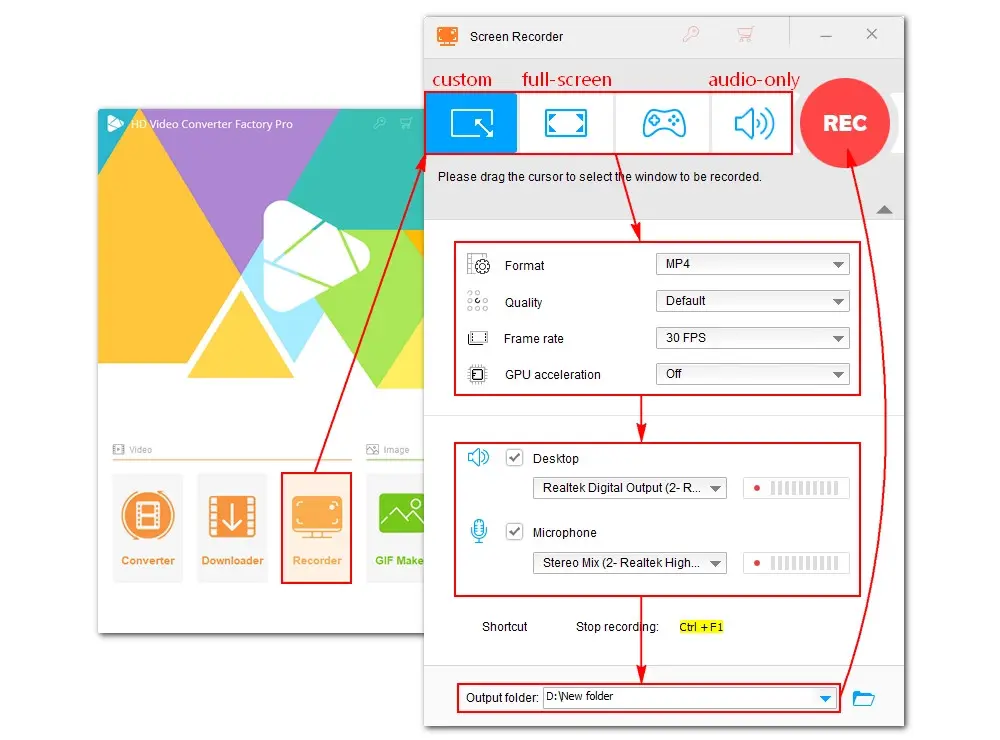
WonderFox HD Video Converter Factory Pro is an all-in-one screen capture tool that allows you to easily create screencasts using different modes and then tailor them with built-in editing tools. It also can turn the recordings into GIFs or save preferred frame images as JPEG image files. All features are easy to master.
Key Features
Cons
How-to guide:
Step 1. Download and install the versatile capture tool on your Windows to give it a shot.
Step 2. Run it and open the ‘Recorder’.
Step 3. Click the first two modes to specify the recording area.
Step 4. Choose the desired recording format, quality, frame rate, audio source, and file destination.
Step 5. Finally, hit the red ‘REC’ button to start capturing your screen and press ‘Ctrl + F1’ to end it.
Step 6. This step is optional. If you want to turn your recordings into GIFs or save a JPEG file from videos, import your video into ‘GIF Maker’ > ‘Convert Video to GIF’ to process it.
Platform: Windows 10/11
Price: Free
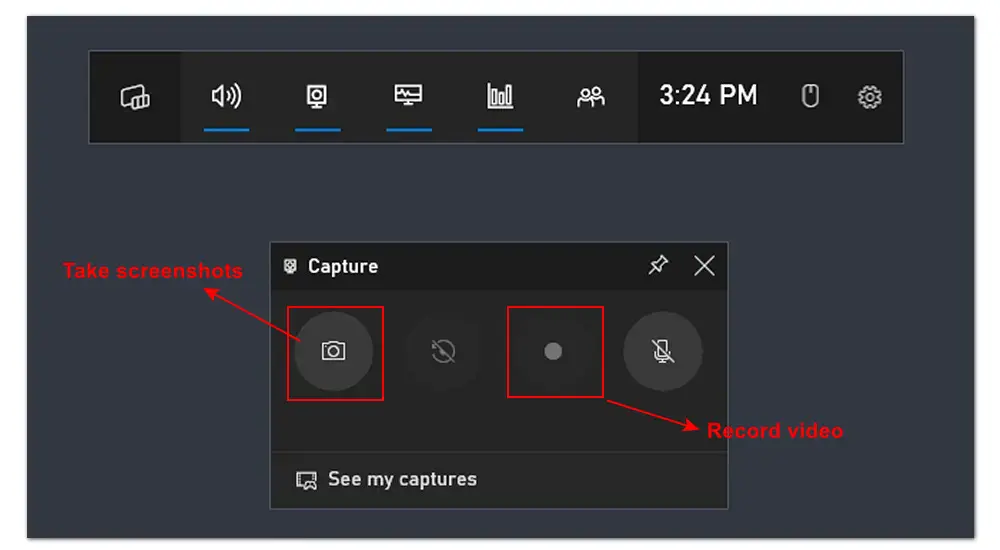
Xbox Game Bar is another best free snipping tool natively installed on Windows 10 and Windows 11. It was designed specifically for gamers and enables you to record and share game videos without leaving the game. Game Bar also includes a screenshot button to take a snip and save it to your computer automatically.
Key Features
Cons
How-to guide:
Step 1. Use the keyboard shortcuts ‘Windows + G’ to call up the Game Bar overlay.
Step 2. If the overlay doesn’t appear, head to ‘Settings’ > ‘Gaming’ > ‘Xbox Game Bar’ to enable the Xbox Game Bar feature first.
Step 3. Then hit the buttons on the ‘Capture’ widget to start taking a snip or recording a video.
Step 4. Once the process is completed, click ‘See my captures’ to preview the grabbed file.
Platform: Windows 10/11
Price: Free
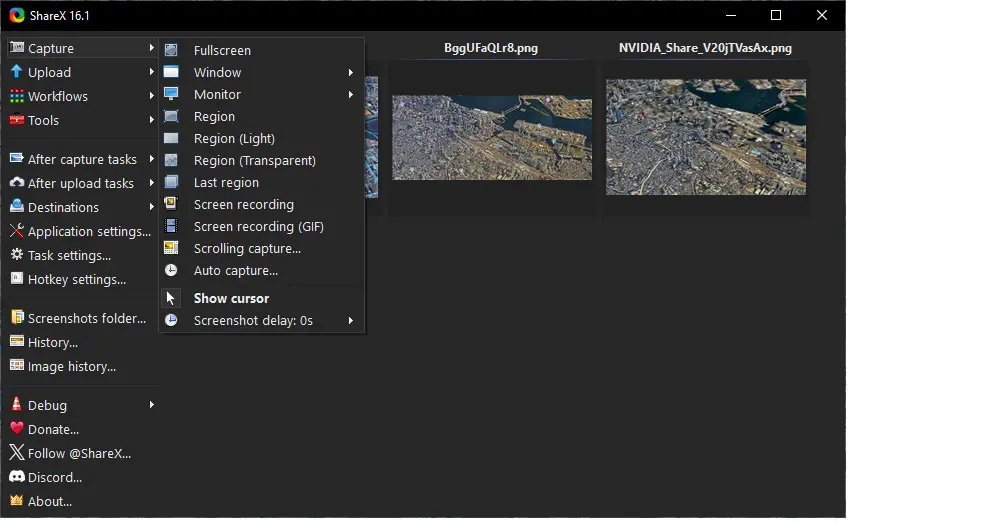
ShareX is a free, open-source program used for snipping a screenshot or recording any area of your screen and it will be automatically saved to your computer. You can also directly share it via Email, X, Facebook, Pinterest, LinkedIn, etc. More than that, it enables you to edit images with texts, images, stickers, arrows, and more, making it the best free snipping tool with editing.
Key Features
Cons
How-to guide:
Step 1. Download and install this lightweight screen snipping tool on your computer to get ready.
Step 2. Open ShareX and expand the ‘Capture’ menu to choose a capture method, such as ‘Region’.
Step 3. Then hold down the left mouse to make a region selection to define the area you want to capture.
Step 4. Release the mouse to confirm the selection and the capture will automatically start.
Step 5. Finally, ShareX will display the result snip. Right-click on it to choose further edit it or upload it on social platforms.
Platform: Windows
Price: For home users: Free version
For professionals: $24/Yearly
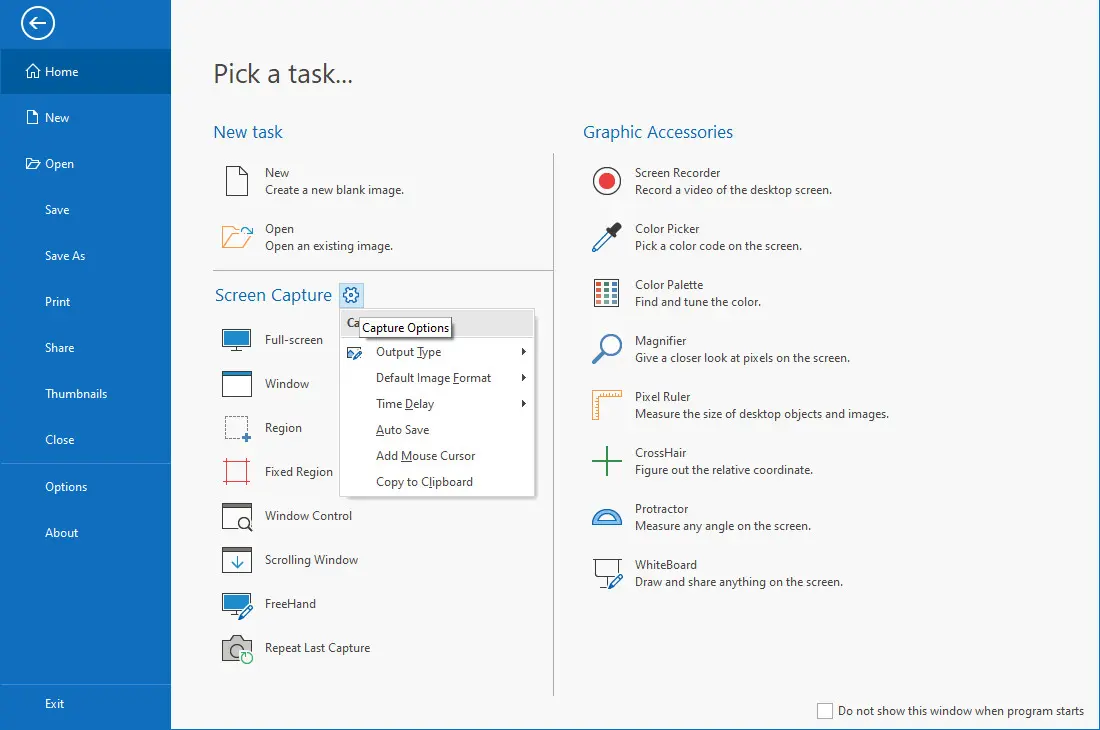
PicPick offers an all-in-one solution to take a snip and then edit it to your preference. It allows you to take screenshots of an entire screen or a selected region. After that, you can enhance the captures with effects, annotation tools (incl. text, arrows, highlight tools, hue, etc.), and more with its built-in image editor.
Key Features
Cons
How-to guide:
Step 1. Download and install the free version of PicPick on your Windows.
Step 2. Launch the free snipping tool and you may notice that PicPick’s interface closely resembles the layout of Microsoft Office applications.
Step 3. Hit the gear-shaped icon next to the ‘Screen Capture’ tab. From the pop-up ‘Capture Options’ menu, you can preset the output destination, image format, time delay, etc.
Step 4. To take a snip, choose a ‘Screen Capture’ mode first.
Step 5. Then select the needed portion of your screen.
Step 6. When the selection is done, the snipped picture will open automatically in the image editor. Then you can personalize it as you wish and save or share it.
Platform: Windows, Mac, Linux
Price: Free version (user must register)
Pro Plan: $59/Yearly
Premium Plan: $587/Yearly
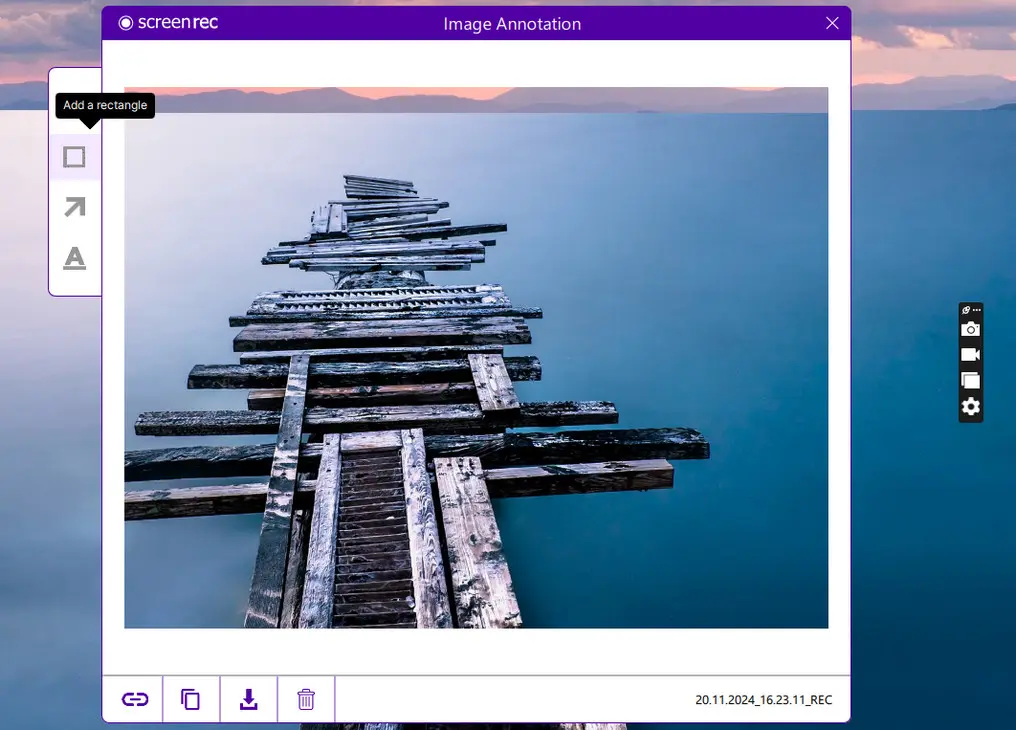
ScreenRec is a popular tool for screen recording and snipping screenshots, featured with full-screen mode, custom mode, or active window mode. The tool also provides essential annotation features, including shapes, arrows, comments, and text. Additionally, ScreenRec offers auto-save functionality and the option for instant sharing.
Key Features
Cons
How-to guide:
Step 1. Download and install ScreenRec on your computer.
Step 2. Start the program and you’ll see a floating control bar appear, generally on the right side of your display. Create a free account.
Step 3. Then, click on the top ‘Photo Camera’ button to activate the free snipping tool.
Step 4. Drag your mouse to take a screenshot.
Step 5. When you get a screenshot, you will see the annotation tools next to the snipped image. Use them to add notes, arrows, or other markings to your screenshot if needed.
Step 6. Finally, hit the ‘Save’ button at the bottom to save it to your folder.
Online snipping tools are convenient for those who want quick screen captures without the need to install software. These tools are particularly suited for casual capturing needs. Here are 3 of the best free snipping tools, which include both web services and browser extensions.
Platform: Chrome, Firefox, IE, Opera
Price: Free

I’ve been using Lightshot for half a year now, and this free snipping extension makes screenshots a breeze. With it, you can capture the full webpage or just the selected region and fine-tune the highlighted area after the initial selection. You can also annotate the captures with pen, text, lines, arrows, and rectangles.
Key Features
Cons
How-to guide:
Step 1. To use this free snipping tool on Chrome, visit the Chrome Web Store to add the extension.
Step 2. Click the puzzle piece icon to locate the added Lightshot extension. For easier access, you can pin it to your browser’s top toolbar.
Step 3. Hit the extension and left-click & drag to select the area you want to capture.
Step 4. Drag the black dots to resize the selection if needed.
Step 5. When you get the capture, use the annotation tools to highlight the info you want to emphasize.
Step 6. At last, hit the save button to save it locally or share it over social platforms.
Platform: Chrome, Windows, Mac, and Linux
Price: Free version: No sign-up required
Hero Plan: Free but need a free account
Super Hero Plan: $5/Monthly
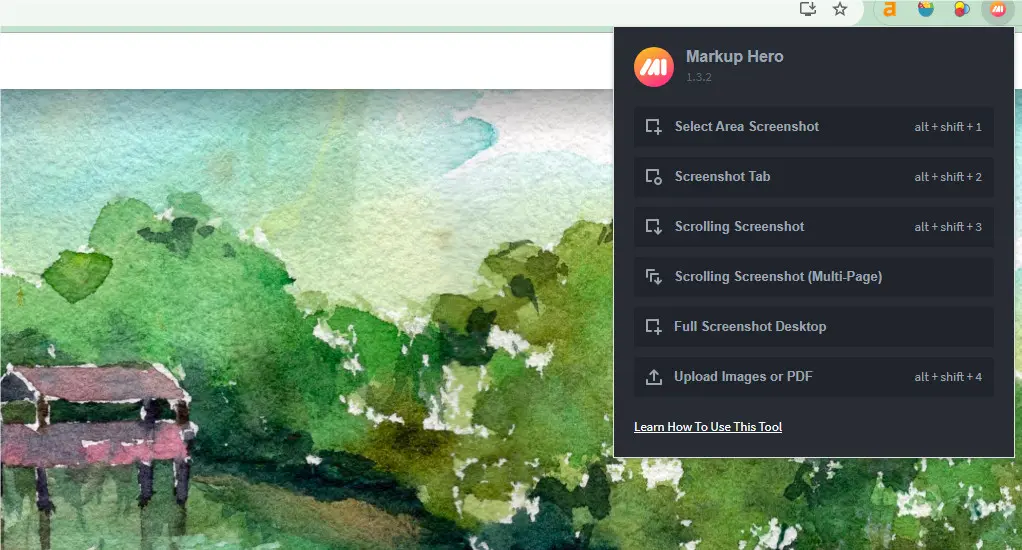
Markup Hero is a free snipping tool that offers Chrome extension and also desktop applications for Windows, Mac, and Linux, allowing you to take a snip across different platforms seamlessly. It comes with a variety of features for screenshotting, image editing, and file sharing.
Key Features
Cons
How-to guide:
Step 1. Visit the Chrome Web Store to add the free snipping tool add-on to your Chrome.
Step 2. Don’t forget to allow the permission for the extension to function.
Step 3. Open the Chrome Extensions menu, locate the snipping tool, and click it to access the screen capture options.
Step 4. Choose your preferred capture mode, then click and drag to take a screenshot instantly.
Step 5. Your screenshot will automatically open in Markup Hero’s web editor, where you can annotate, share, or download it.
Platform: Web-based
Price: Free
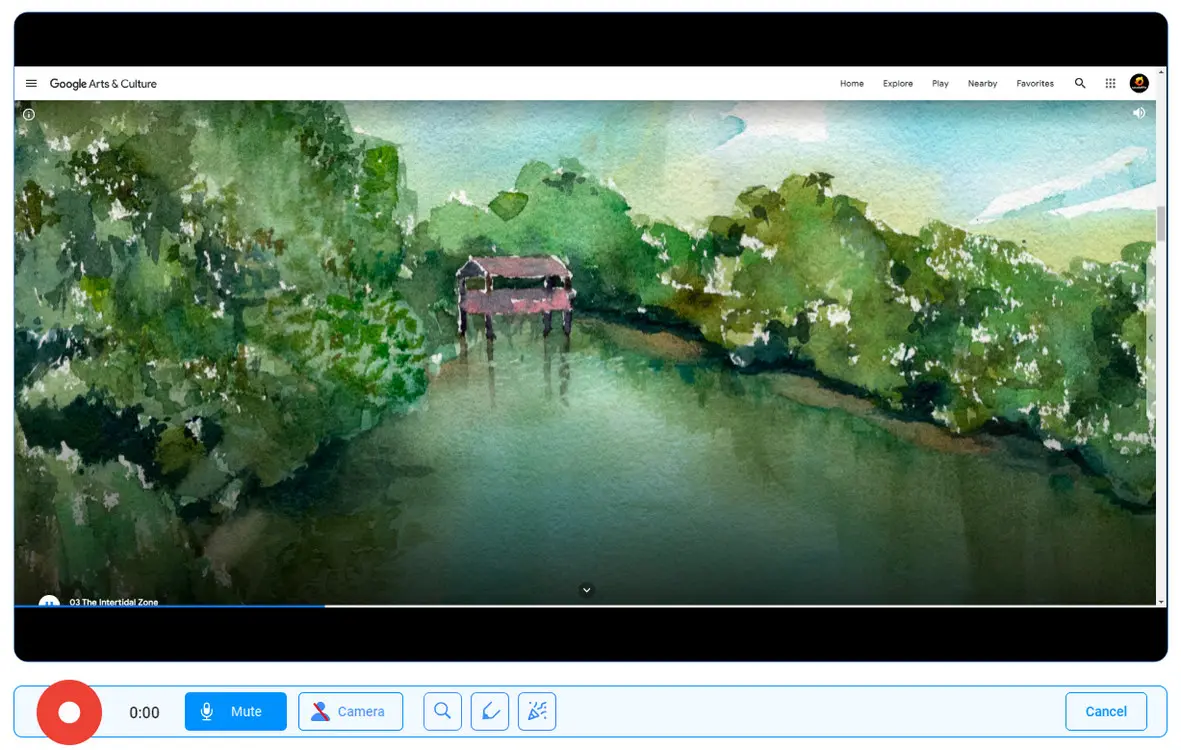
This free online screen recorder enables you to capture an MP4 video of your screen directly from Google Chrome, Edge, and Firefox. You can record a browser tab, a specific window, or the entire screen. In addition, it does not require sign-up and the output videos have no watermarks.
Key Features
Cons
How-to guide:
Step 1. Visit the free snipping tool here: https://screen-recorder.com/
Step 2. Click ‘Start Recorder’.
Step 3. Select the recording target, either a browser tab, a specific window, or the entire screen.
Step 4. Click on ‘Share’ and then the red button to start recording after a 3-second countdown.
Step 5. Use the buttons below the preview window to pause or stop the recording.
We have shared 9 of the best free snipping tools for Windows that you can use to capture screenshots or record videos. Each option comes with unique features as well as some drawbacks.
If you’re looking for a free tool that includes essential features like screenshot capture, video recording, or both, consider Snipping Tool (Windows 11), Xbox Game Bar, or ShareX. All of these are great choices.
If you are open to upgrading for more advanced functions and the premium version fits within your budget, you might want to try WonderFox HD Video Converter Factory Pro, PicPick, or ScreenRec.
For the best free online snipping tool for Windows, Lightshot comes highly recommended.
If you have other suggestions, feel free to reach out to us via X or Facebook. You can also follow us on Medium for more tips on processing video, audio, or images.
The ‘best’ criterion varies from your actual needs and requirements. In this article, we list some of the best options including:
Yes. There are many better snipping tools with more advanced features or simpler interfaces than the default Microsoft Snipping Tool. Apart from our recommendations above, tools like Snagit or PostImage are also great alternatives.
Yes. The Snipping Tool pre-installed on Windows is 100% free to use.
Windows 11 features an updated version of the Snipping Tool that integrates the best functionalities from both the old Snipping Tool and Snip & Sketch. This new tool offers various snipping modes and annotation options, while also presenting a cleaner interface. Additionally, it introduces a new feature that allows users to record their screen with or without audio.
To snip part of your screen, you can use the local Snipping Tool on Windows:
You can press ‘Windows Key + Print Screen (PrtScn)’ to capture your entire screen and save it to your Pictures folder, usually in a subfolder called ‘Screenshots’.
WonderFox
DVD Ripper Pro - Powerful DVD Ripper for Windows
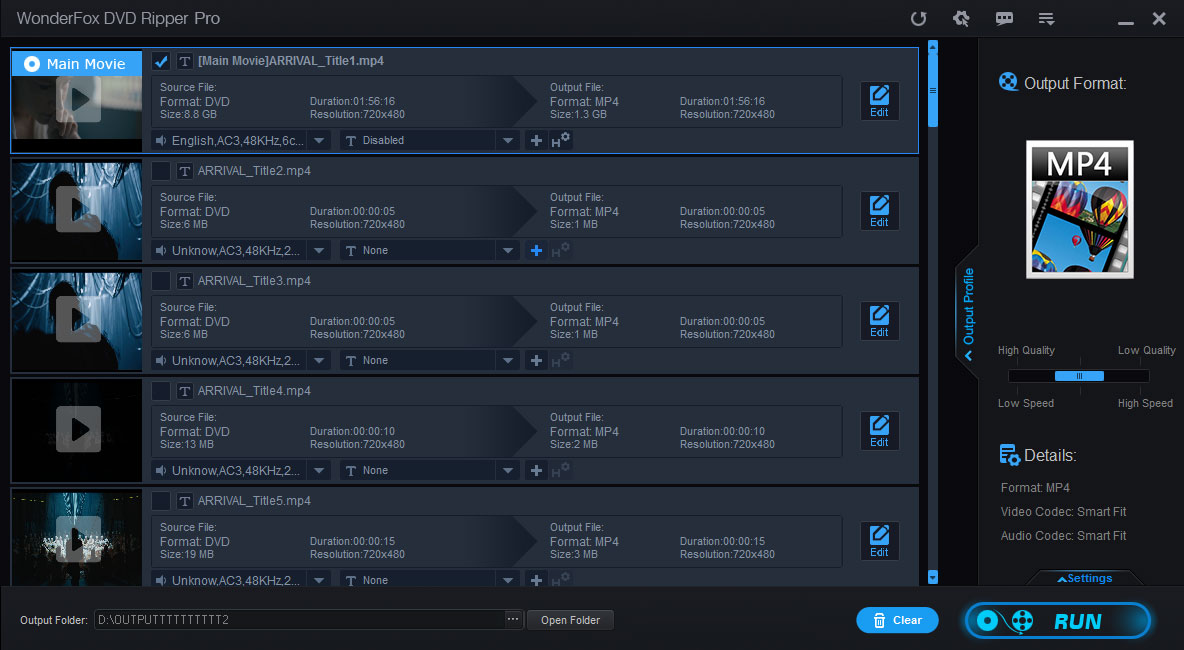
WonderFox DVD Ripper Pro is a professional DVD ripping program that can easily rip any DVD (whether homemade or commercial) to all popular formats including MP4, MKV, MP3, WAV, H264, H265, Android, iPhone, and so on. It also lets you edit and compress DVD-Video efficiently. Download it to enjoy a fast and trouble-free DVD ripping experience.
* Please DO NOT use it to rip any copy-protected DVDs for commercial use.
Terms and Conditions | Privacy Policy | License Agreement | Copyright © 2009-2025 WonderFox Soft, Inc. All Rights Reserved.