Try the following methods to fix the issue of DaVinci Resolve can't import MP3 and enjoy a smooth editing process now!
WonderFox Free HD Video Converter Factory - Convert MP3 Files for Importing into DaVinci Resolve
Yes. As a professional video editing program, DaVinci Resolve supports many video and audio formats, including MP3. You should be able to easily import an MP3 audio file into DaVinci Resolve for editing with video files. However, you may encounter a frustrating "file import failure" error when importing certain MP3 files into Resolve. No worries! This post covers the possible reasons for this error and explains 5 actionable solutions to troubleshoot the DaVinci Resolve MP3 import issue.
The following are several possible reasons that may cause you to fail to import MP3 files into DaVinci Resolve. You can have a look at them and avoid the issue in later MP3 importing tasks.
Now, let's check the five ways shared below to fix the MP3 importing problem within DaVinci Resolve.
Before importing an MP3 file into DaVinci Resolve, you should check if the file name contains any emoji or other characters that cannot be identified by DaVinci Resolve.
If yes, right-click your MP3 file and select “Rename” to remove the unidentified characters.
Then, import the MP3 file again to see if it works properly.
When encountering issues with the MP3 import, you can try to convert your MP3 file to an MP4 file that only contains audio, and then import the MP4 file into DaVinci Resolve. DaVinci Resolve may be able to import the file and still recognize the MP4 file as an audio file.
To start the conversion, you can give WonderFox Free HD Video Converter Factory a try. It is a free video converter that supports almost all file formats for conversion without the file size, length, or any other limitations! The simple steps are:
Step 1. DownloadDownload and install this free video converter on your desktop. Then launch it.
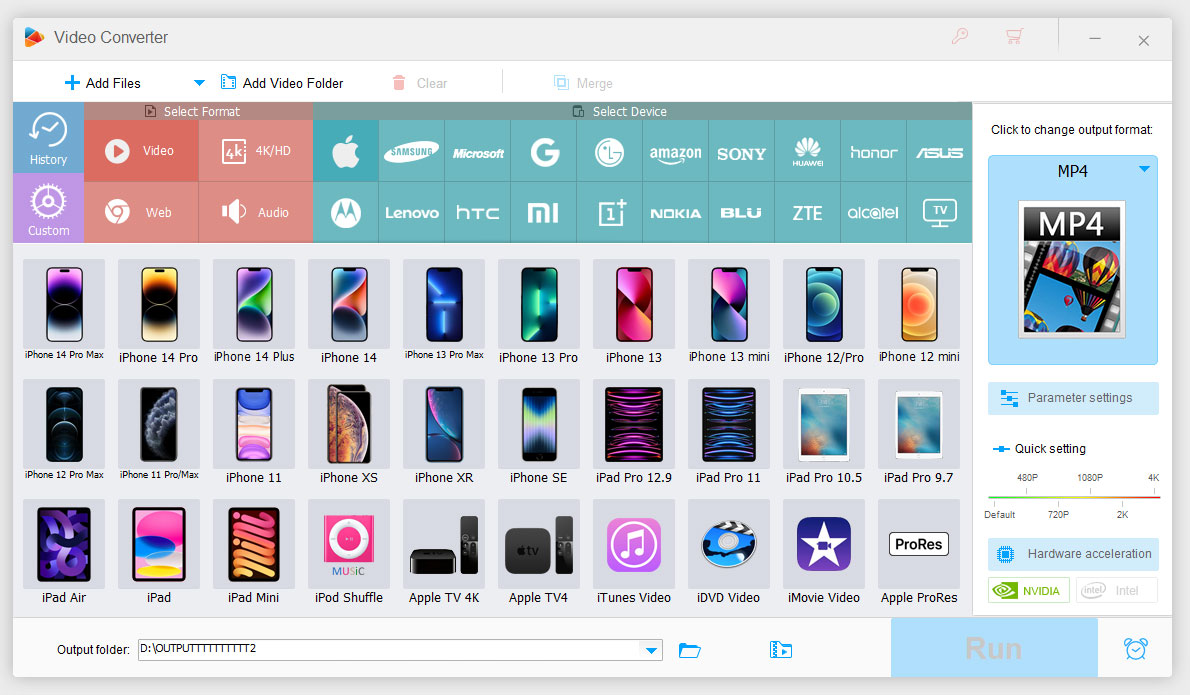
Step 2. Open the "Converter" module, drag and drop the unsupported MP3 files into the interface.
Step 3. Click the right-side format image and then select "MP4" from the "Video" tab.
Step 4. Specify an output path and click "Run" to start the conversion.
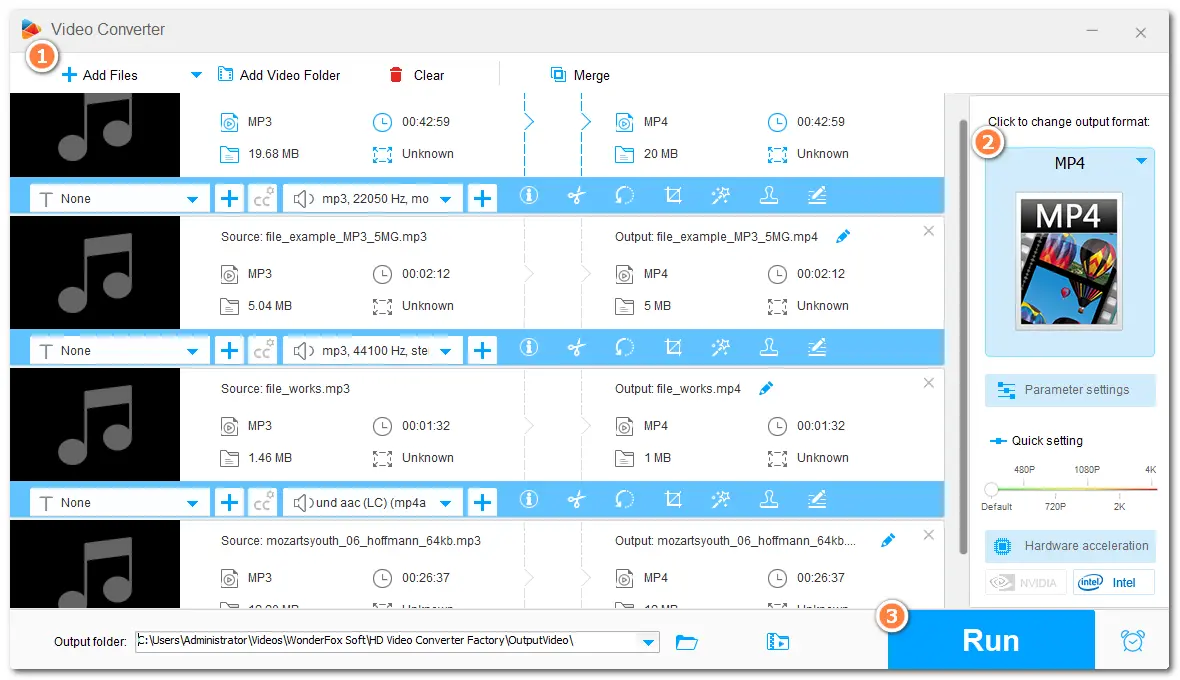
Once finished, drag the converted MP4 file into the "Media Pool" section of DaVinci Resolve. Then, add the file to the timeline and start editing.
As stated previously, DaVinci Resolve cannot handle an MP3 file with a variable bit rate or an unsupported audio sample rate. So you can check your MP3 file information with MediaInfo and then change the parameters with WonderFox Free HD Video Converter Factory.
* How to Check the MP3 File Information
Step 1. Install MediaInfo to your computer from the official website.
Step 2. Launch it and click "File" > "Open" > "File" to import your MP3 audio file.
Step 3. Click "View" > "Tree" and you can see the MP3 file information under the "General" > "Audio" tab. It will show you the bit rate mode, sample rate, and more information.
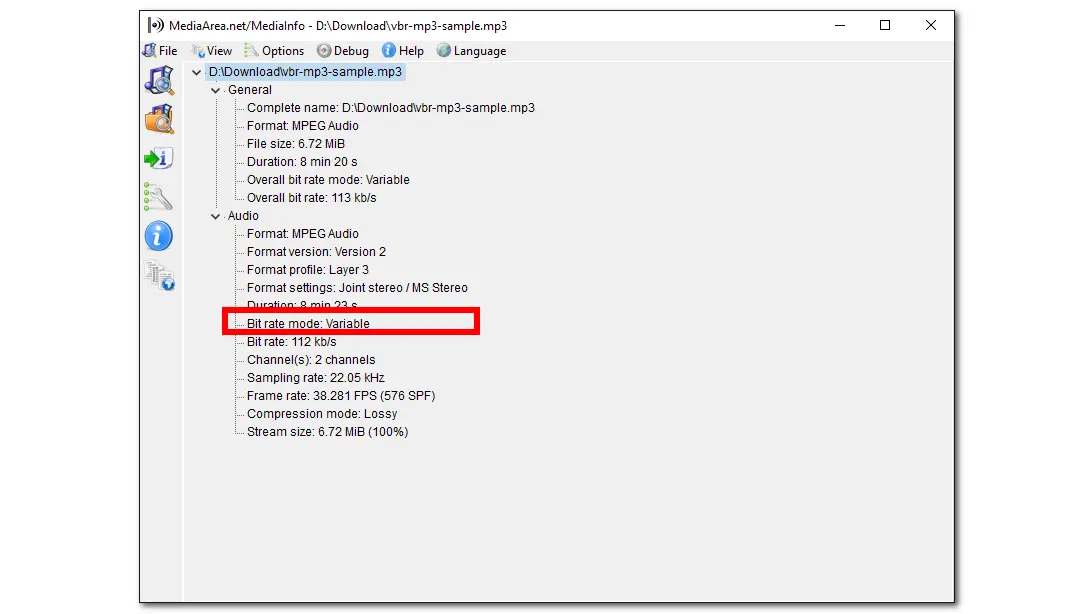
If you find the bit rate mode and sample rate are not supported in DaVinci Resolve, then move on to the conversion steps.
* How to Change MP3 Parameters:
Step 1. Launch Free HD Video Converter Factory and open the "Converter" module. Then add the unsupported MP3 files to the converter.
Step 2. Go to the output format library to select an output audio format or you can still choose MP3.
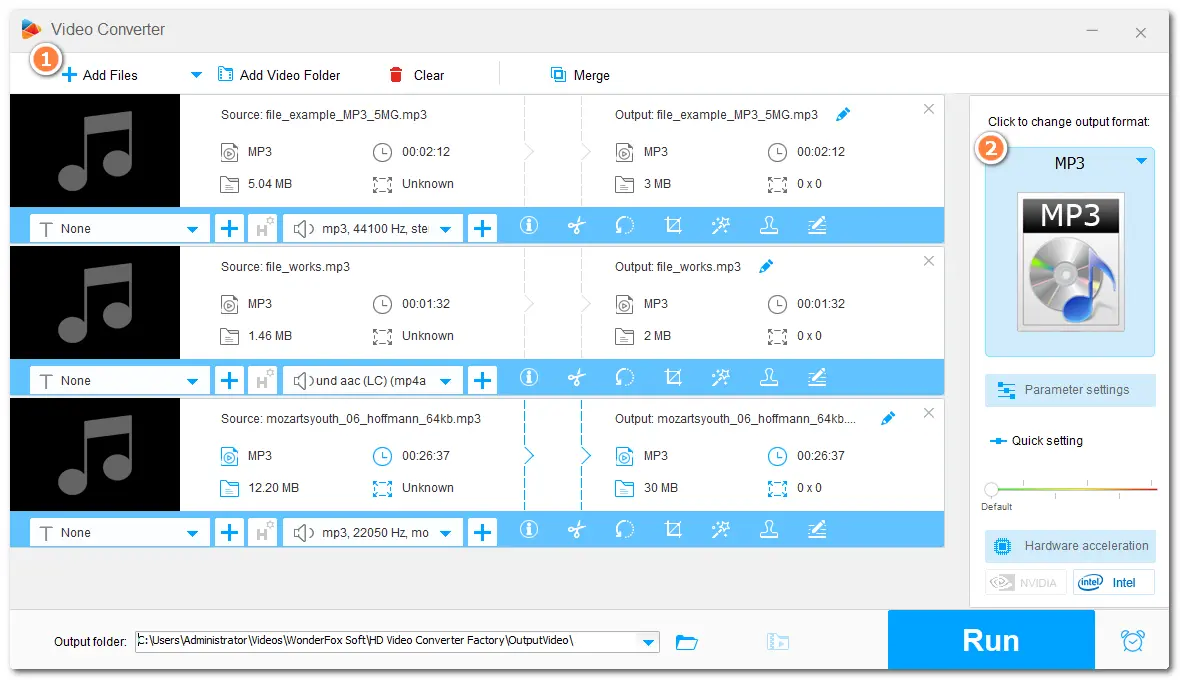
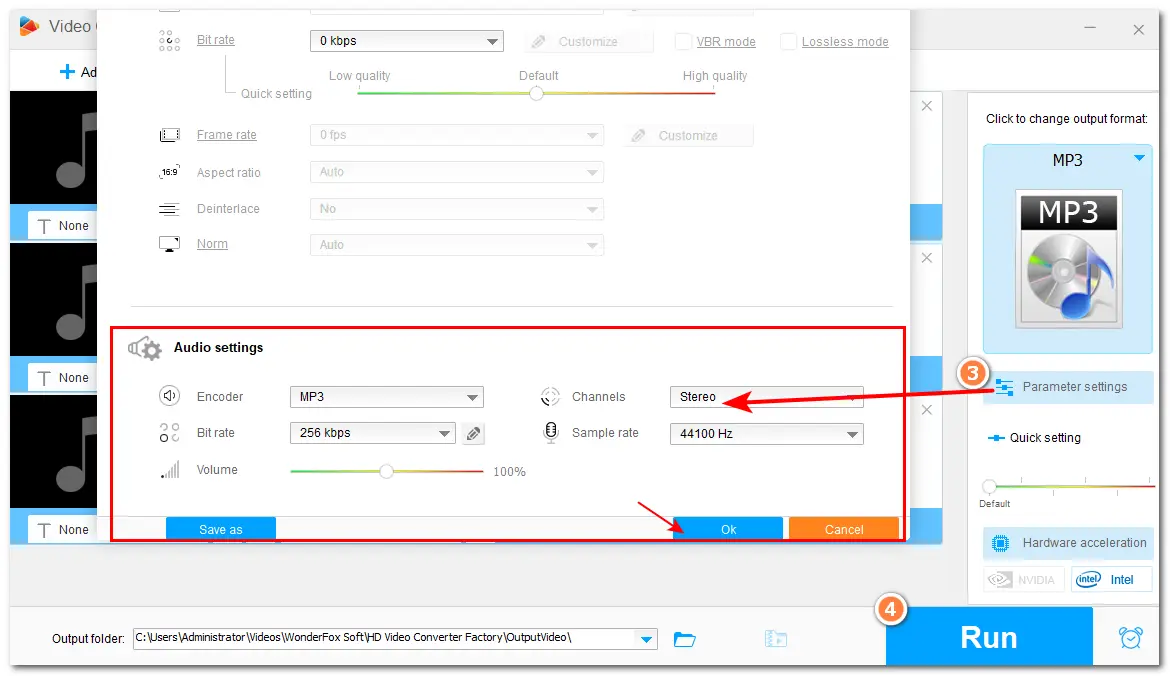
Step 3. Open the "Parameter settings" window and go to the "Audio settings" section. Here, you can select a suitable audio bit rate and sample rate. Then click "OK" to save your change.
Step 4. Specify an output path and click "Run" to start the conversion.

Then you can import the converted MP3 files to DaVinci Resolve for editing.
Besides converting MP3 to MP4 and changing the file settings, you can also try to convert MP3 to WAV, a format that provides a smoother audio processing experience. The audio conversion can also be finished within Free HD Video Converter Factory.
The simple steps are:
Step 1. Launch Free HD Video Converter Factory. Open the "Converter" module and click "Add Files" to import your MP3 files.
Step 2. Go to the output format library and switch to the "Audio" tab to select "WAV" or other formats as the output format.
Step 3. If needed, you can also adjust the audio bitrate and sample rate in the "Parameter settings" window.
Step 3. Choose an output folder and click "Run" to start the conversion.
Now, import the converted files to DaVinci Resolve for editing.
Not being able to import MP3 into DaVinci Resolve can be frustrating when you need to edit with it. However, you can try the above methods to solve the MP3 not importing problem. With WonderFox Free HD Video Converter Factory, you can solve more format incompatibility issues with software and devices.
That’s all I want to share in this post. I hope it’s useful to you. Thanks for reading. Have a nice day!
WonderFox
HD Video Converter Factory Pro
Terms and Conditions | Privacy Policy | License Agreement | Copyright © 2009-2026 WonderFox Soft, Inc. All Rights Reserved.