Did you know that even professional content creators can’t record a perfect video? We may unconsciously include long pauses, mistakes, and repeated information. In reviewing, these should be removed to make concise and engaging content that your audience will like. So, how can you cut out these unwanted parts in the middle of your video? 🤔
The answer lies in a suitable video editor.
But we don’t need to use professional video editing software like pros. For beginners, there are easy and free methods that work just fine.
Below, you can find three effective methods to cut video from the middle on your Windows PC with ease. Read on!
Before we dive into the steps, let’s first clear some doubts.
You should know that cutting the middle of a video is an easy task. To be honest, it can be a fast and lossless process with the right tool, like the second method I’m going to introduce to you later.
But sometimes or with some other tools, you may experience quality drop and long processing time, especially if you’re dealing with high-res videos. This is because re-encoding is involved. To accelerate the process, make sure you close any unnecessary applications in the background and enable hardware acceleration whenever possible.
Now, follow the next part to learn more details.
The good news for Windows users is that Clipchamp, the native editing application that comes with Windows 11, is capable of trimming the middle part of a video with ease.
It has a timeline that you can use to accurately cut out the parts that you don’t want, and then you can place the rest clips together. When exporting, you can also select a quality as high as 1080p, no watermark is added. The whole process takes only a couple of clicks.
Note, however, that while Clipchamp supports a variety of videos, it only exports to MP4 format (with H264 video and AAC audio for enhanced playback). That means it will re-encode the video no matter what and the process will be long most of the time.
* Clipchamp is also available as an online service. If you’re not running Windows 11, you can still access the Clipchamp website.
Now, follow these steps to see how to edit out the middle of a video using Clipchamp.
Step 1: Search ‘Microsoft Clipchamp’ on your Windows 11 search bar and launch it.
Step 2: Sign in with your Microsoft account. If you’re using the web version, you can also sign in with Google or email.
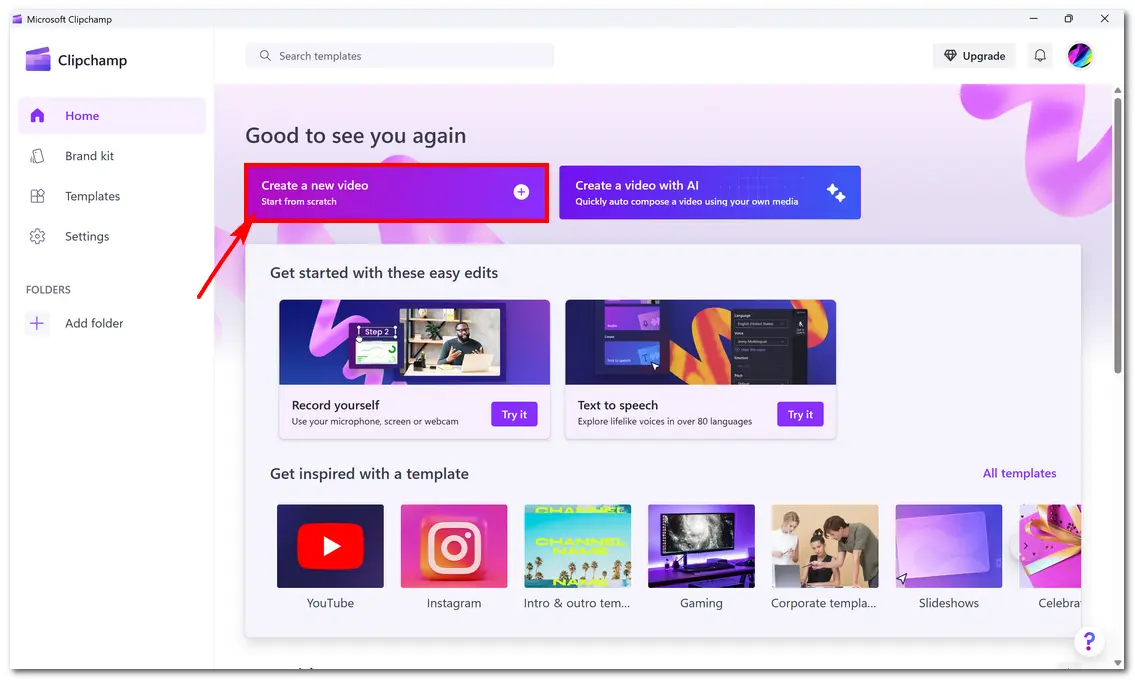
Step 3: Click Create a new video on the home interface.
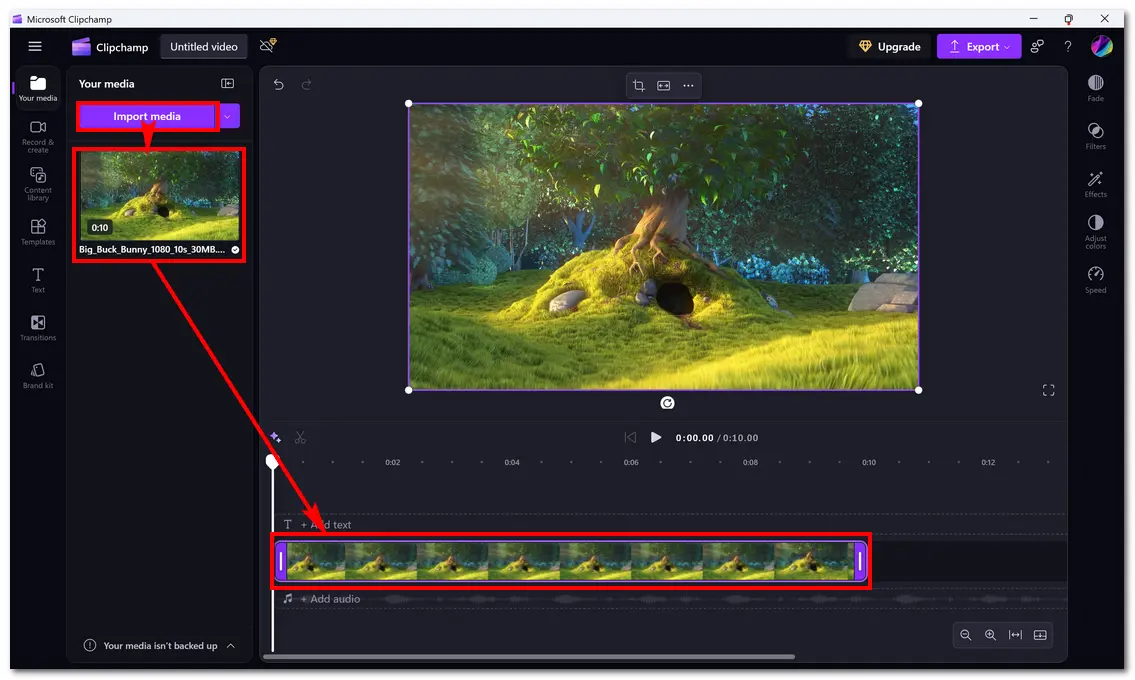
Step 4: Click Import media to load the video you want to edit into the application. Or you can simply drop to import.
Step 5: Next, drag and drop the media onto the timeline.
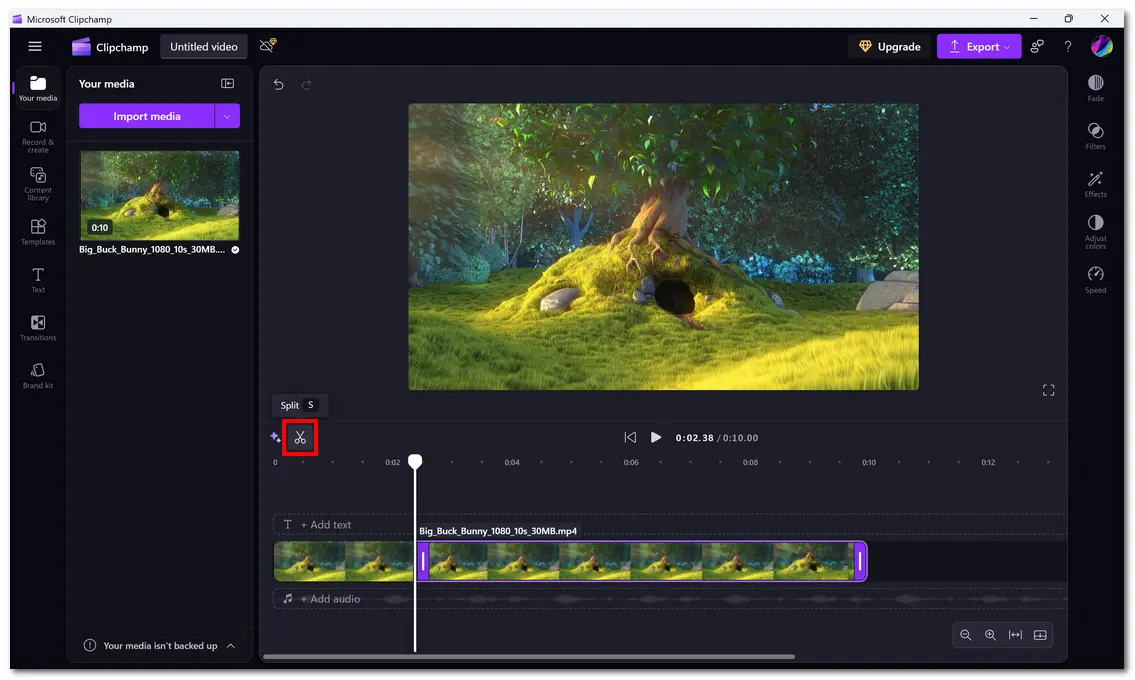
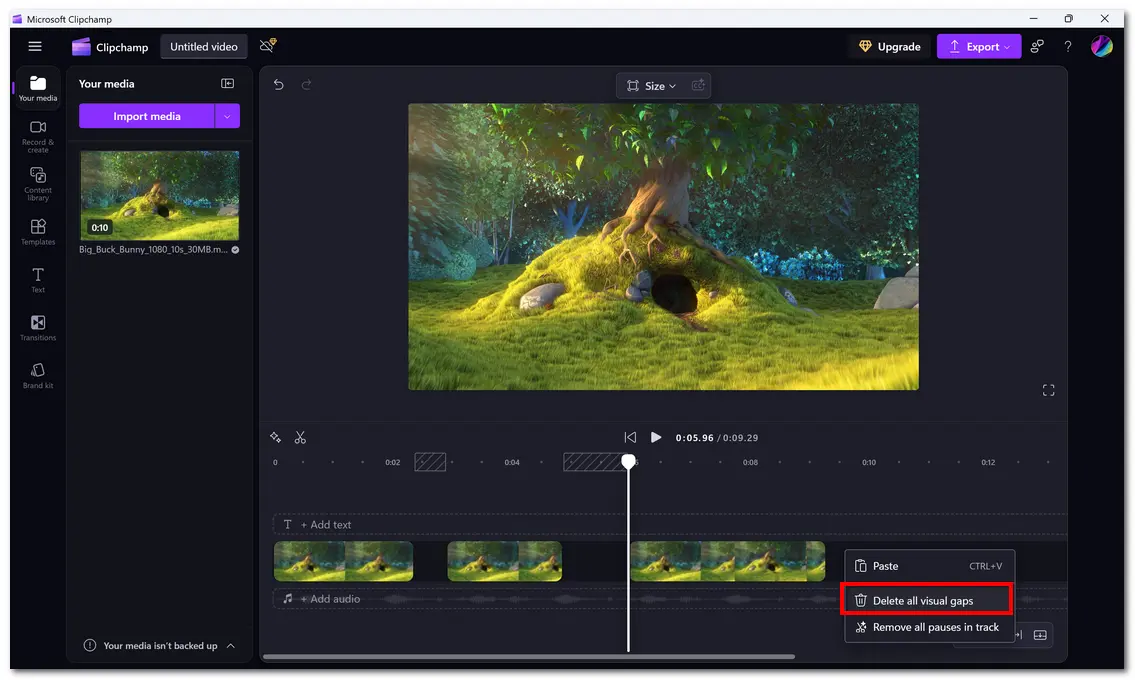
Step 6: Move the marker to the beginning of the part you want to delete, then click the Split icon (scissors-shaped). Then move the marker to the end of the unwanted part, and click Split again. Right-click the unwanted part and select Delete.
You can do this multiple times to delete multiple parts from the video.
Step 7: Right-click on the blank area of the timeline and select Delete all visual gaps to combine the rest clips.
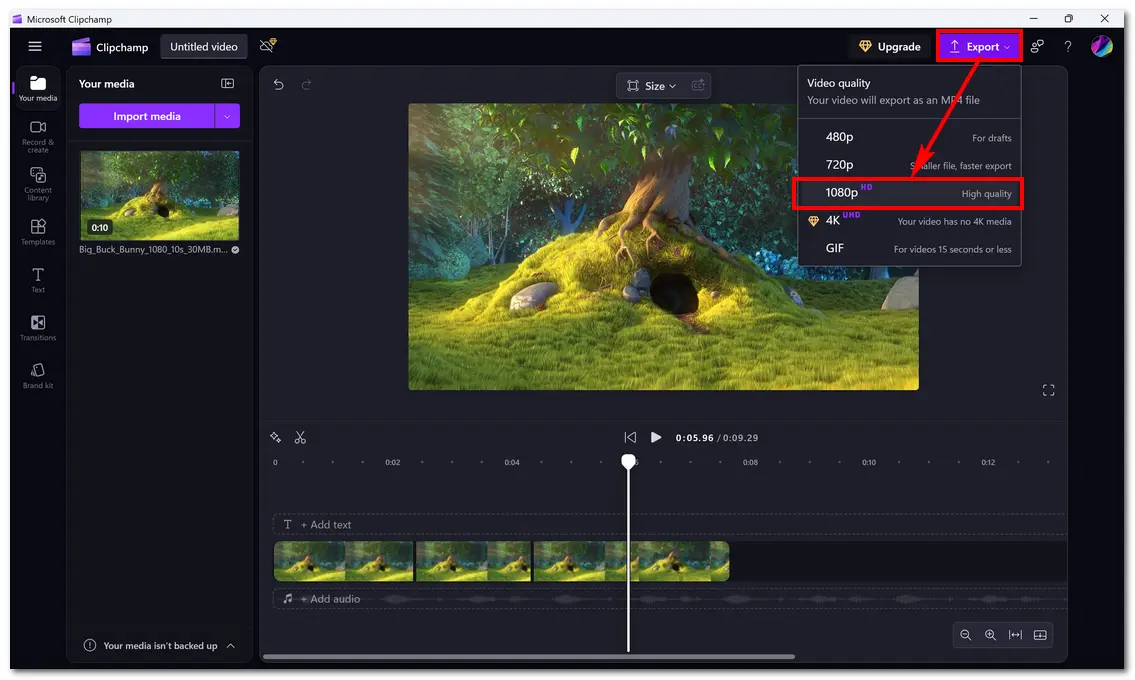
Step 8: Finally, click Export and choose a quality. For free users, you can only export up to 1080p. If you want to export higher quality like 4K, you need to upgrade to Clipchamp Premium.
💡 It’s recommended to choose a quality that’s close to the original to minimize quality loss.
Your video will be exported to your computer automatically.
🔔 NOTE: You may notice the file size increases after exporting. This may be because Clipchamp uses less efficient encoding settings than your original video.
For Windows users looking for faster, higher-quality exports, the third-party program WonderFox HD Video Converter Factory Pro is also recommended.
This is a feature-rich program that includes a set of editing tools, such as a video trimmer and a video joiner. You can use these two tools to edit out the undesired parts from the middle of any video, leaving only the important parts.
As a reminder, these tools can only be used separately, which means that you must first trim out the unwanted parts of the video in the video trimmer, export the remaining clips, and then merge these clips in the video merger. This involves extra steps. But the good thing is that this program can cut and merge videos without re-encoding, so the process is still fast, and the output will be lossless.
If you don't mind a few more steps, try starting the process with this program as follows:
* The unregistered version will limit you to processing only five minutes of each file.
Step 1: Download and install Download and install WonderFox HD Video Converter Factory Pro on your PC. Then launch it.
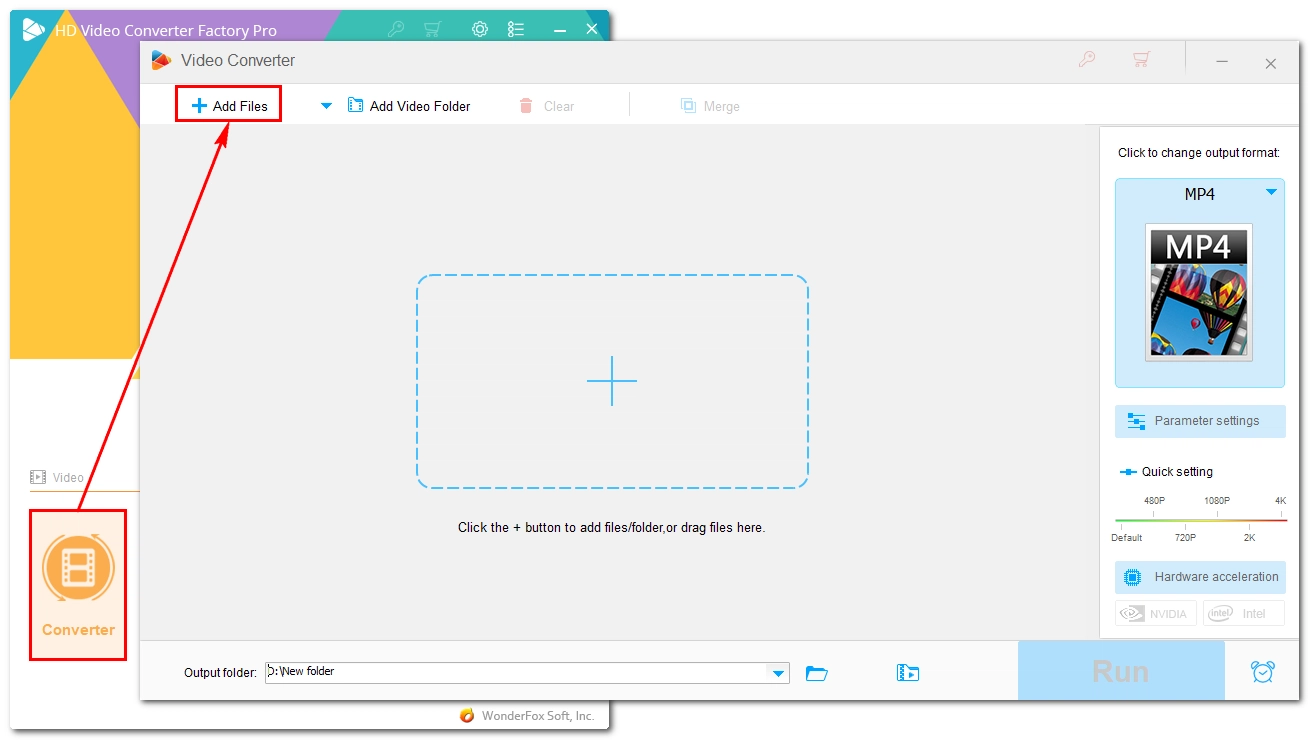
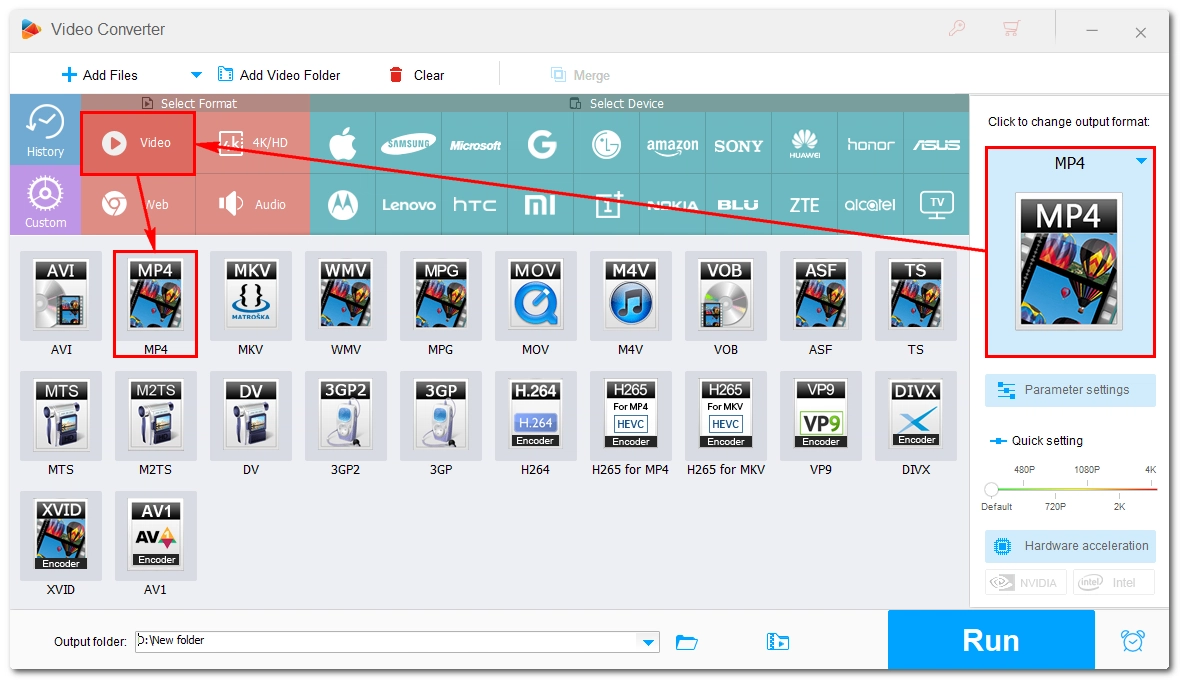
Step 2: Click Converter on the home page. In the Converter window, click + Add Files to import the source video. Or you can directly drag it into the interface.
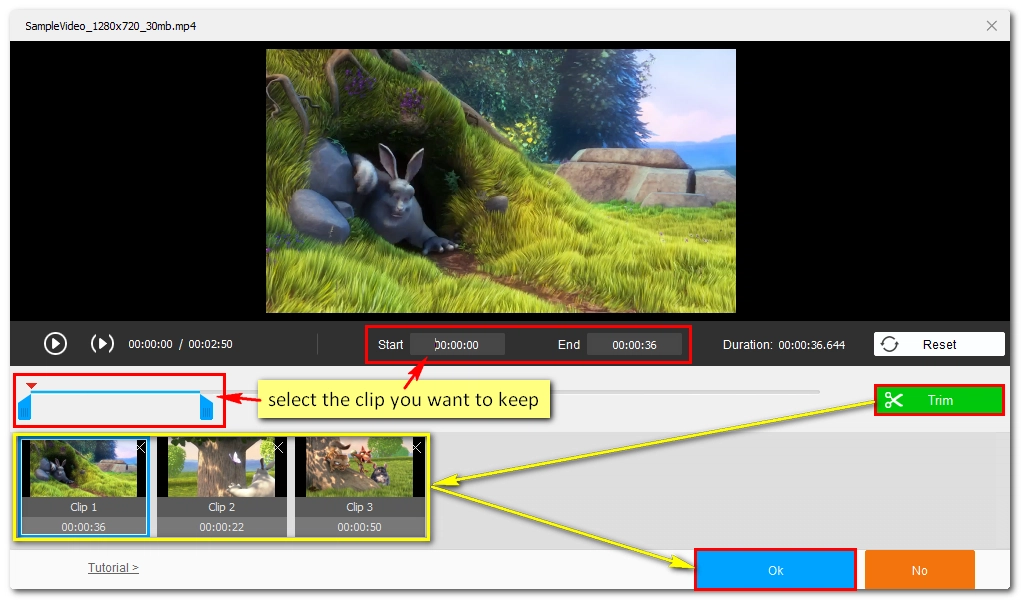
Step 3: Click the Trim icon under the video to open the video trimmer.
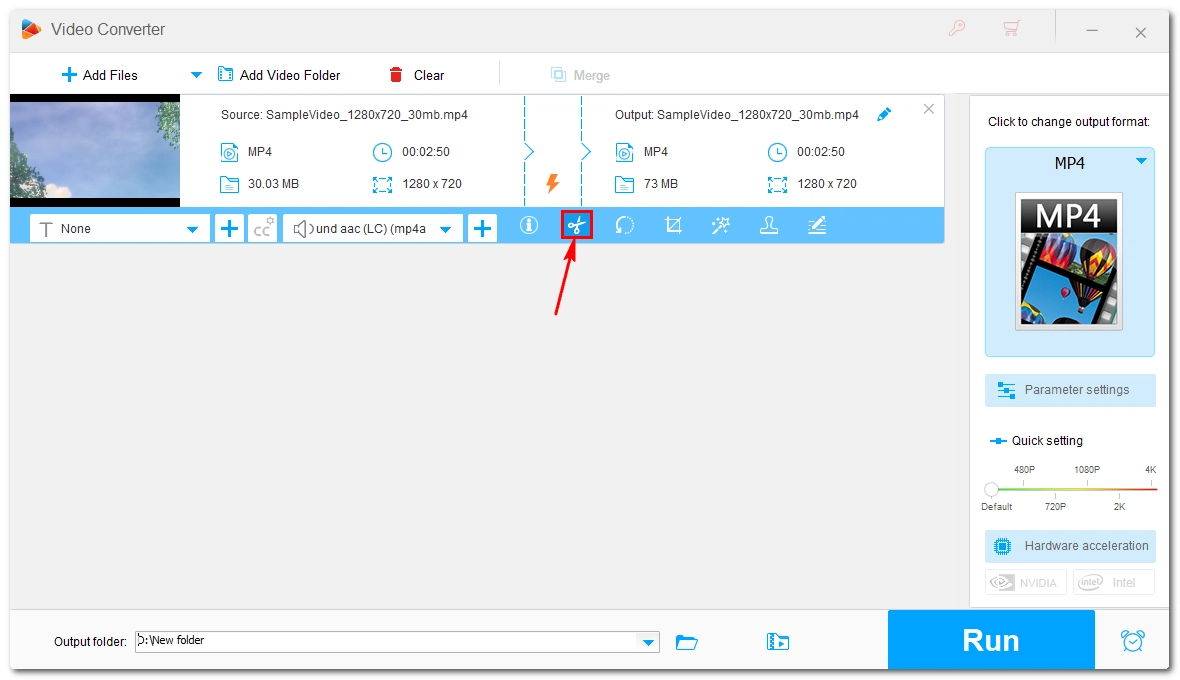
Step 4: Use the sliders or enter the start and end times to select the part you want to keep, then click Trim to create Clip 1. Repeat this step multiple times and you can get multiple clips. Then click OK to save the editing.
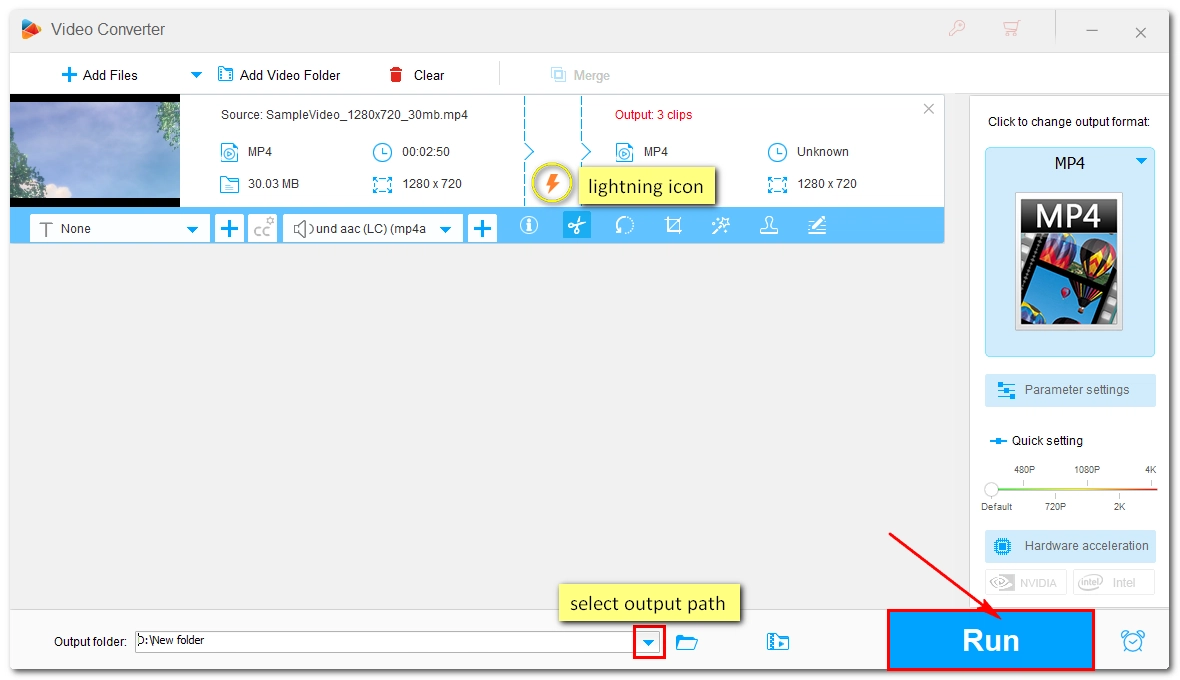
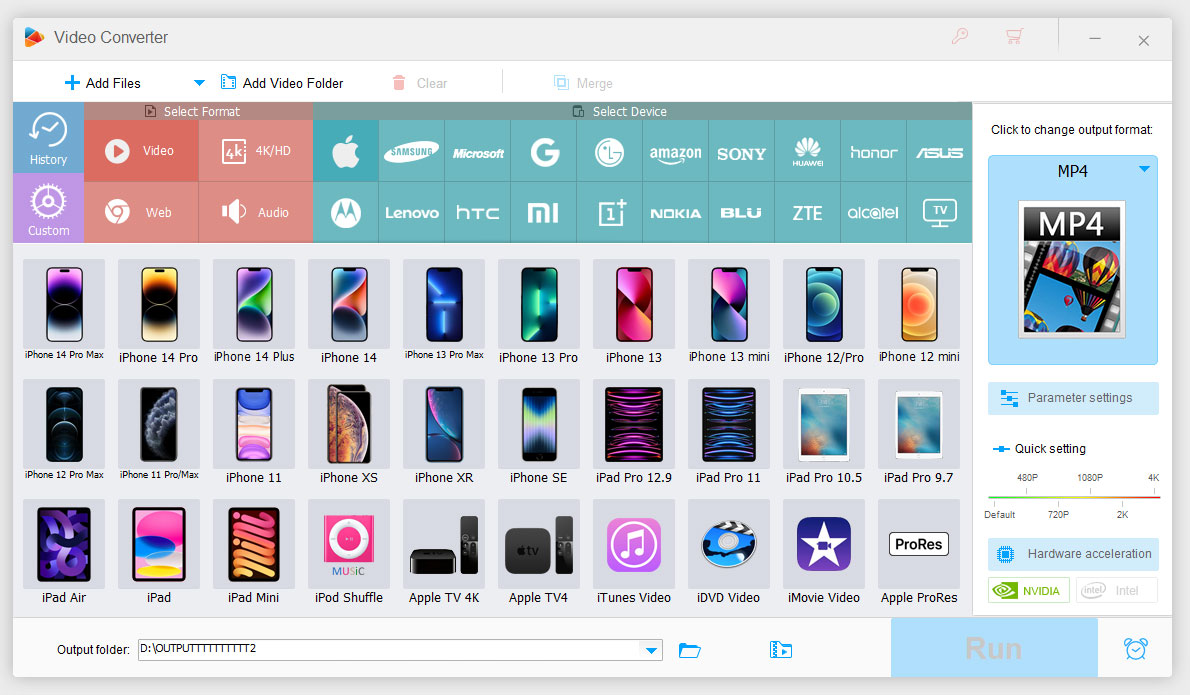
Step 5: Expand the format page on the right and select the same video format as the original. This will ensure the video settings are kept the same so that no re-encoding will happen. You’ll see a lightning icon ⚡ appear in the middle of the task list.
Step 6: Click the▼ icon at the bottom to specify an output path. Then click Run to quickly export these clips.
Step 7: After the process, clear the video in the conversion list.
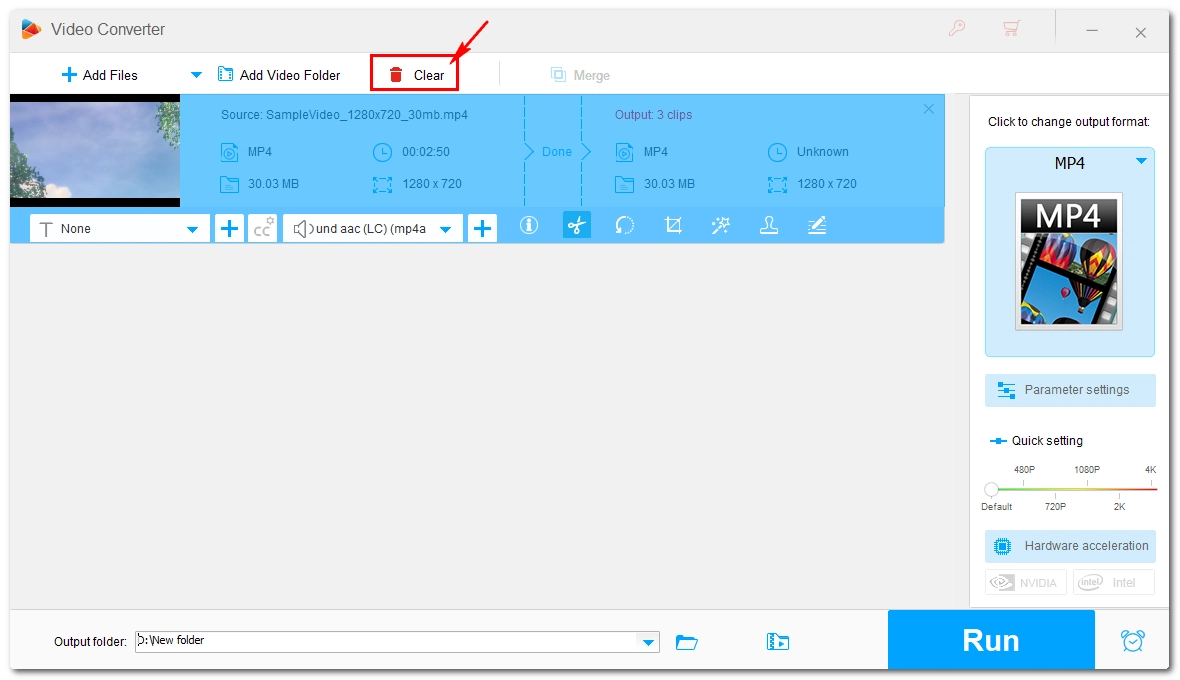
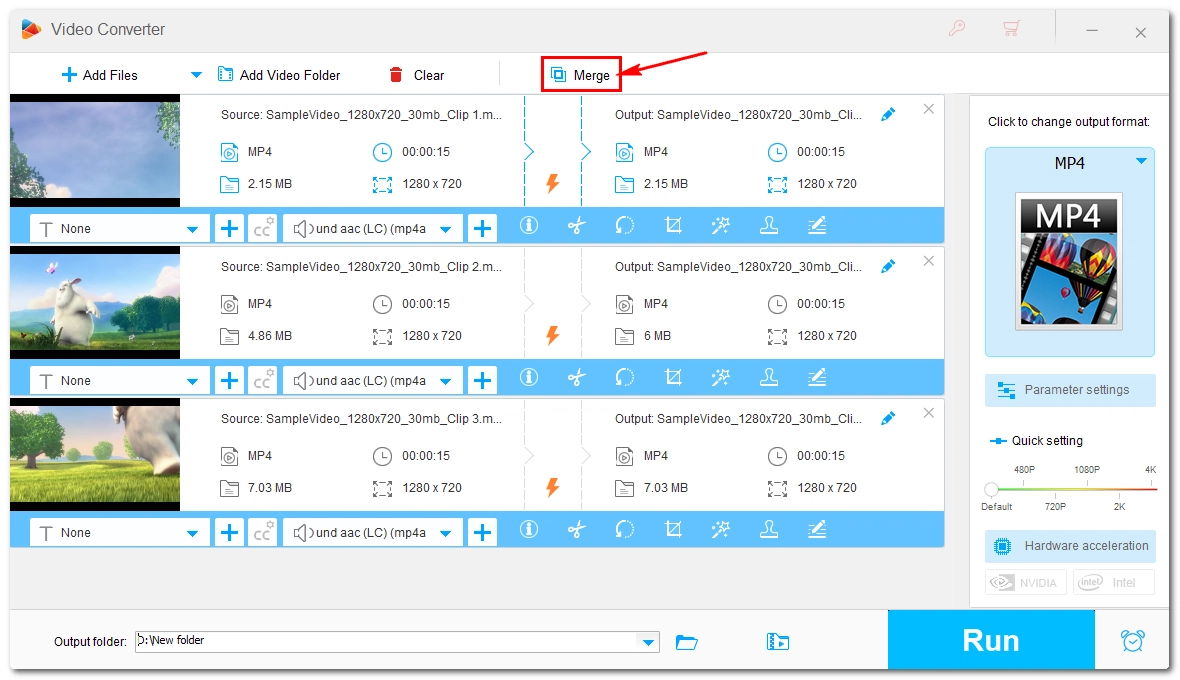
Step 8: Then open the output folder and drag these exported clips back into the converter. Click the Merge button at the top.
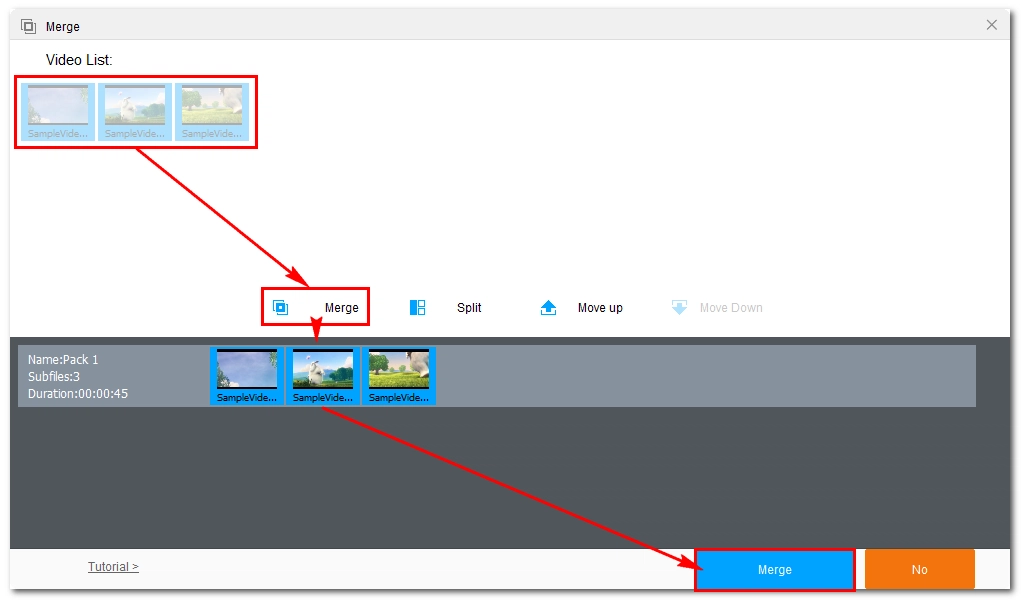
Step 9: Select these clips and click Merge in the middle of the screen to add them to Pack 1. You can drag to change the order of these files in the pack according to the filename. Click Merge at the bottom to return to the main workspace.
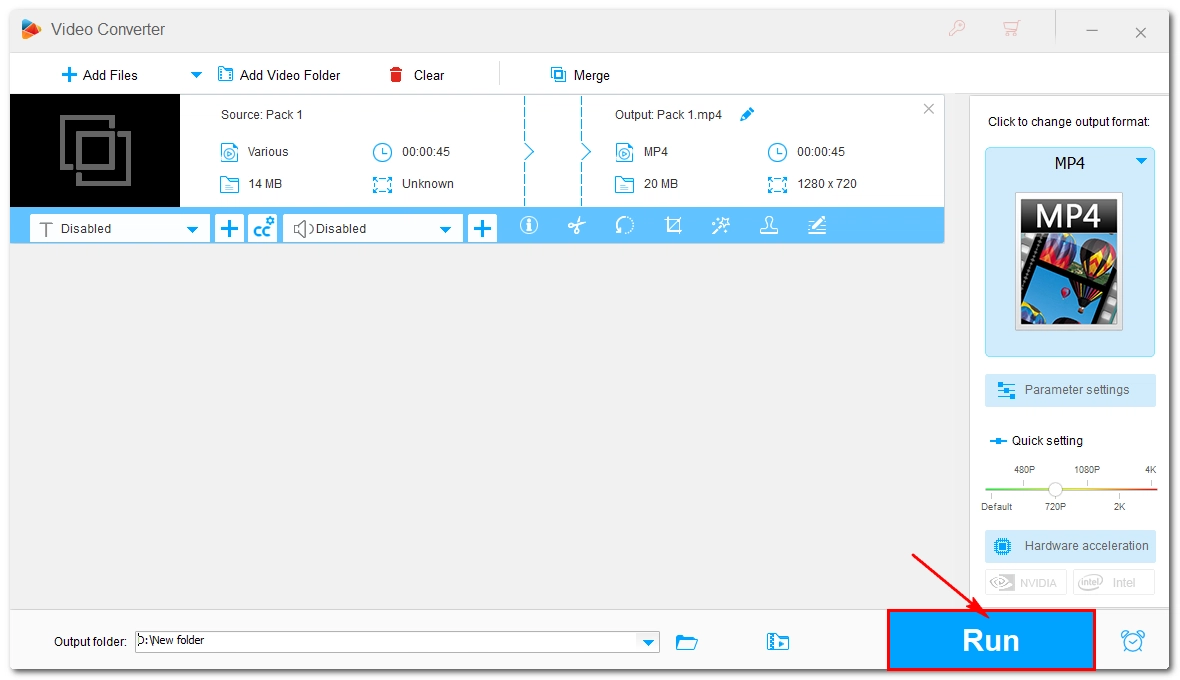
Step 10: Finally, click Run to export the final product.
If you’re looking for a very flexible online approach, you can try Canva.
This is an online design platform that not only allows you to make basic edits, such as trimming videos, but also allows you to create and use graphics, presentations, and other visuals to take your video aesthetic to the next level.
It’s free to use as long as you don’t use its premium content. And it doesn’t have a watermark either. But like Clipchamp, Canva allows you to export to MP4 at up to 1080P resolution.
While it has a wide range of features, it’s still very easy to use to crop the unwanted middle part of a video.
Step 1: Go to Canva and create an account.
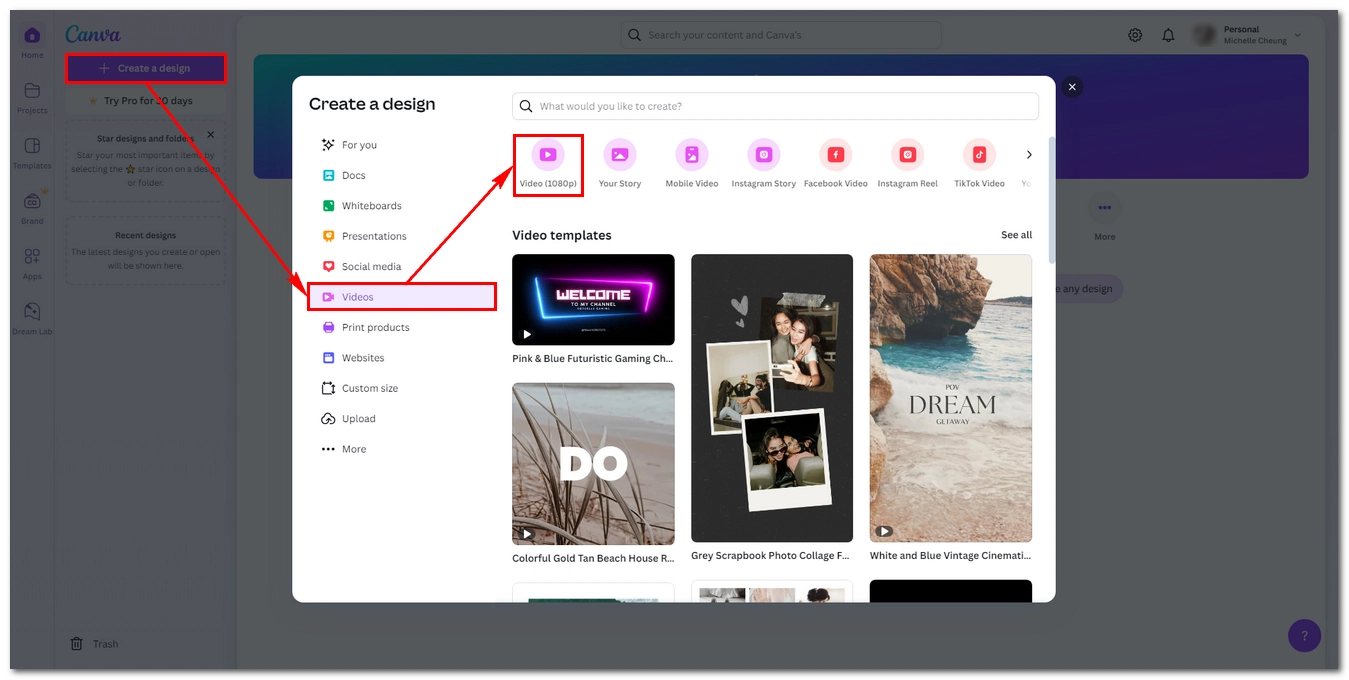
Step 2: In the Canva home interface, click + Create a design.
Step 3: Then click the Videos tab and select a template that suits your purpose. In my case, I selected Video (1080p).
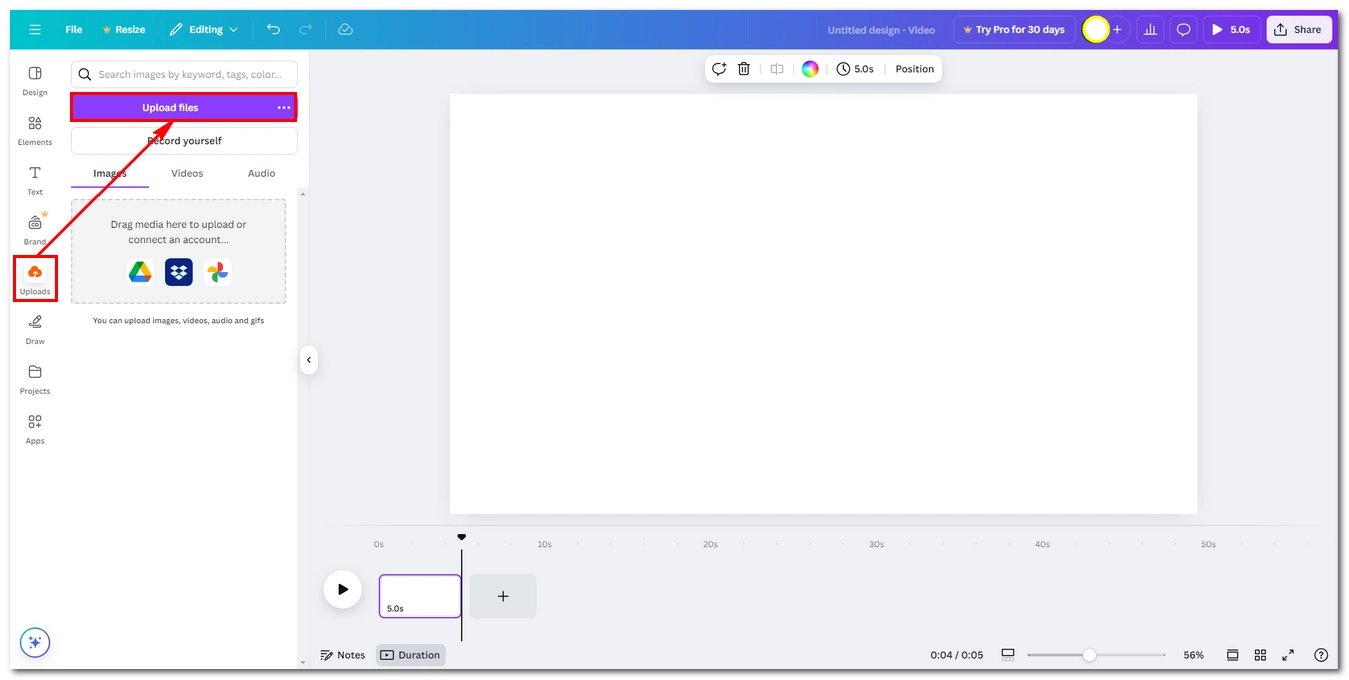
Step 4: Now, you’ll redirected to the editing page. Click Uploads on the left panel, and then click Upload files to upload the video you want to edit to the platform.
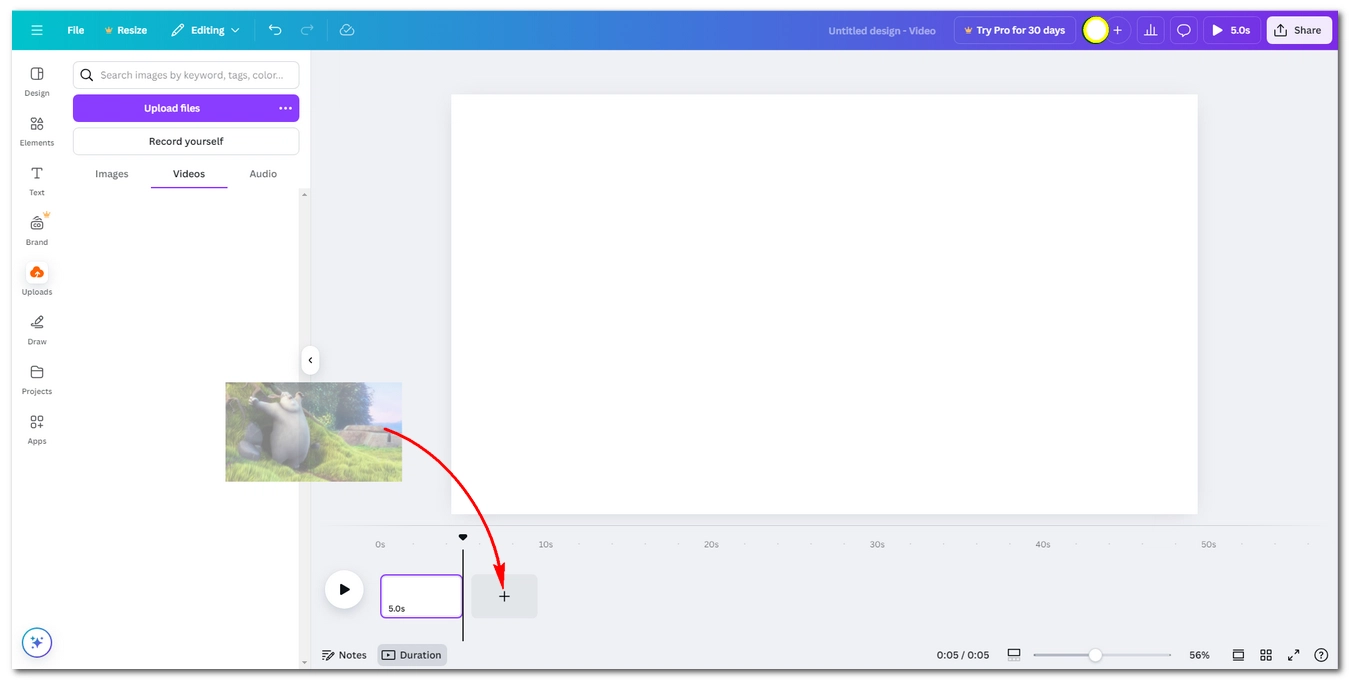
Step 5: Drag the uploaded video to the plus button at the bottom.
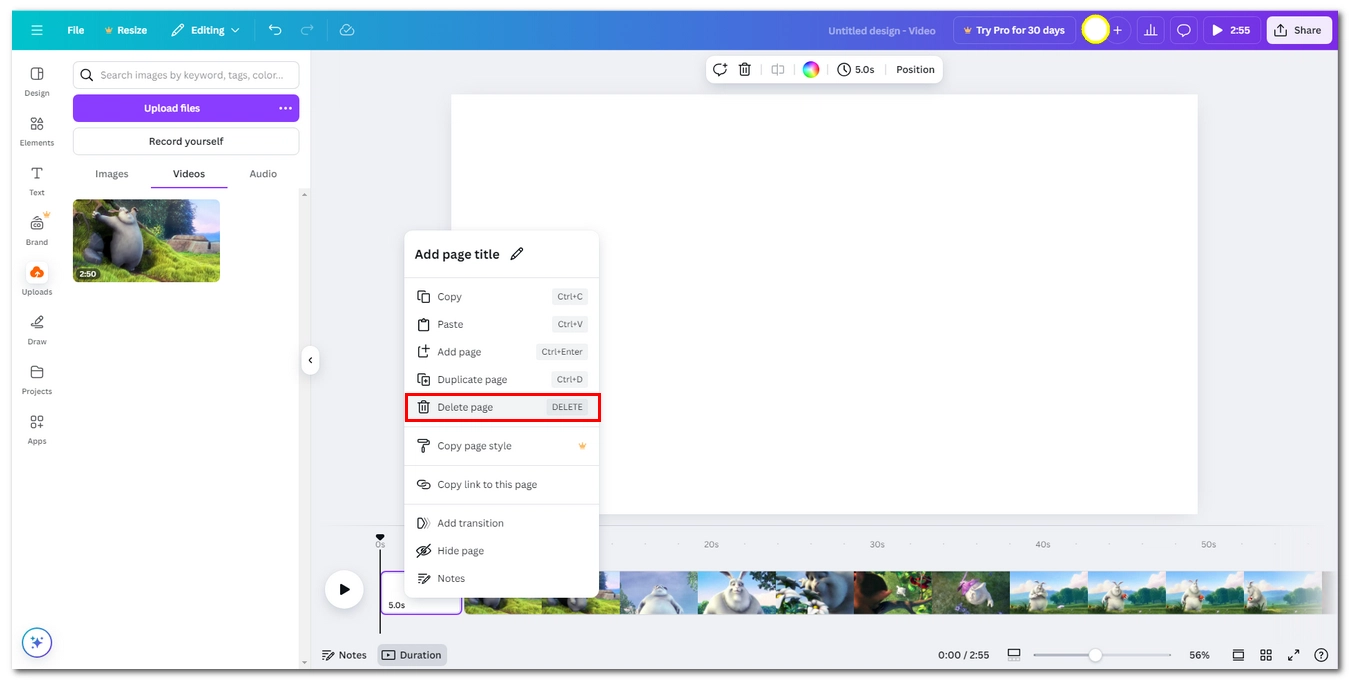
Step 6: Right-click on the first blank page and select Delete page.
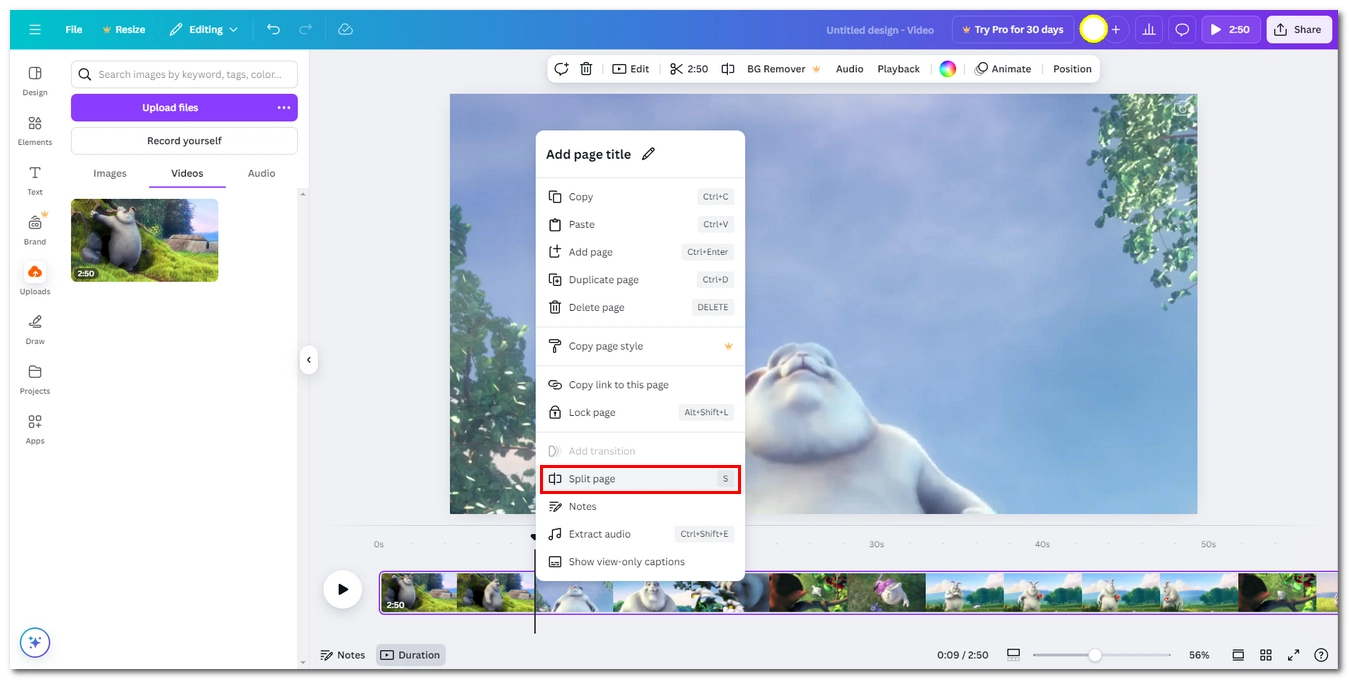
Step 7: Now, you can start editing out the middle parts of the video. Drag the marker to the beginning point of the unwanted part and right-click on it, select Split page. Then move the marker to the end point of it and split. After segmenting the unwanted clip, right-click on it and select Delete page. The other clips will automatically merge to remove gaps.
Step 8: When you’re done with editing, click Share at the top-right corner and click Download.
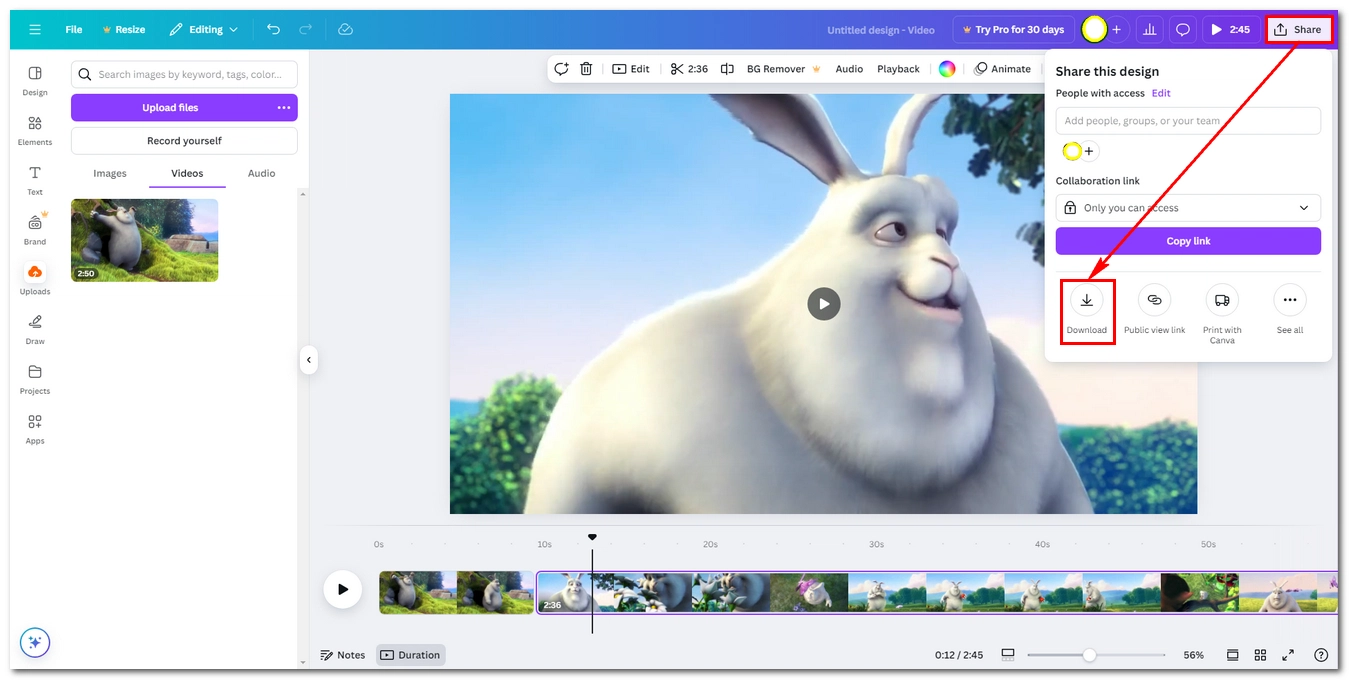
Step 9: Adjust the file type and quality as needed. Then click Download to export the final result.

| Clipchamp | WonderFox HD Video Converter Factory Pro | Canva | |
|---|---|---|---|
| Cost | Free | Free trial (5-minute file output) | Free |
| Supported Format | - Input: Various - Output: MP4 |
- Input: Almost all - Output: Over 600 options |
- Input: Various - Output: MP4 |
| Max. Quality | 1080p | 4K | 1080p |
| Speed | Slow | Fast | Slow |
| Pros | ✅ Native to Windows 11 ✅ Simple, few-click process ✅ No watermark on exports |
✅ Maintains original video quality ✅ Ideal for high-res videos ✅ Fast, lossless editing |
✅ Highly flexible for adding creative design elements ✅ No watermark |
| Cons | ❌ Limited to MP4 output ❌ Re-encoding video ❌ Free version restricts export to 1080p |
❌ Extra steps ❌ Free trial is limited to shorter videos ❌ Not as straightforward for quick edits |
❌ Limited to MP4 output and 1080p resolution ❌ Re-encoding video |
| Try it now>> | Try it now>> Try it now>> | Try it now>> |
Cutting video from the middle is essential for removing unwanted parts. In this article, I’ve shared three methods to help you with the task on your Windows computer. You can pick your favorite tool to start your work now.
I hope this article is useful to you. Thanks for reading. Have a nice day!
You can use any of the three tools here to remove one or multiple parts in the middle of a video. Choose a tool that interests you and follow the steps outlined above to try it out.
It depends on the method. Clipchamp and Canva re-encode the video, which might slightly affect quality, while WonderFox can perform lossless editing if you keep the original format.
WonderFox HD Video Converter Factory Pro is ideal for fast, lossless editing since it can cut and merge videos without re-encoding, provided you follow the proper steps as shown above.
WonderFox
HD Video Converter Factory Pro
Enjoy More Features

Terms and Conditions | Privacy Policy | License Agreement | Copyright © 2009-2025 WonderFox Soft, Inc. All Rights Reserved.
