An Easier Tool to Change Sample Rate – WonderFox HD Video Converter Factory Pro
Sample rate refers to the number of audio samples recorded per second, measured in Hertz (Hz). It has a significant impact on the fidelity and size of the audio. Common sample rates are 44.1 and 48 kHz. However, sometimes you may need to change the sample rate to support a specific device or for other purposes. In this case, this post explains how to change the sample rate using the open-source tool - Audacity. Just read and follow.
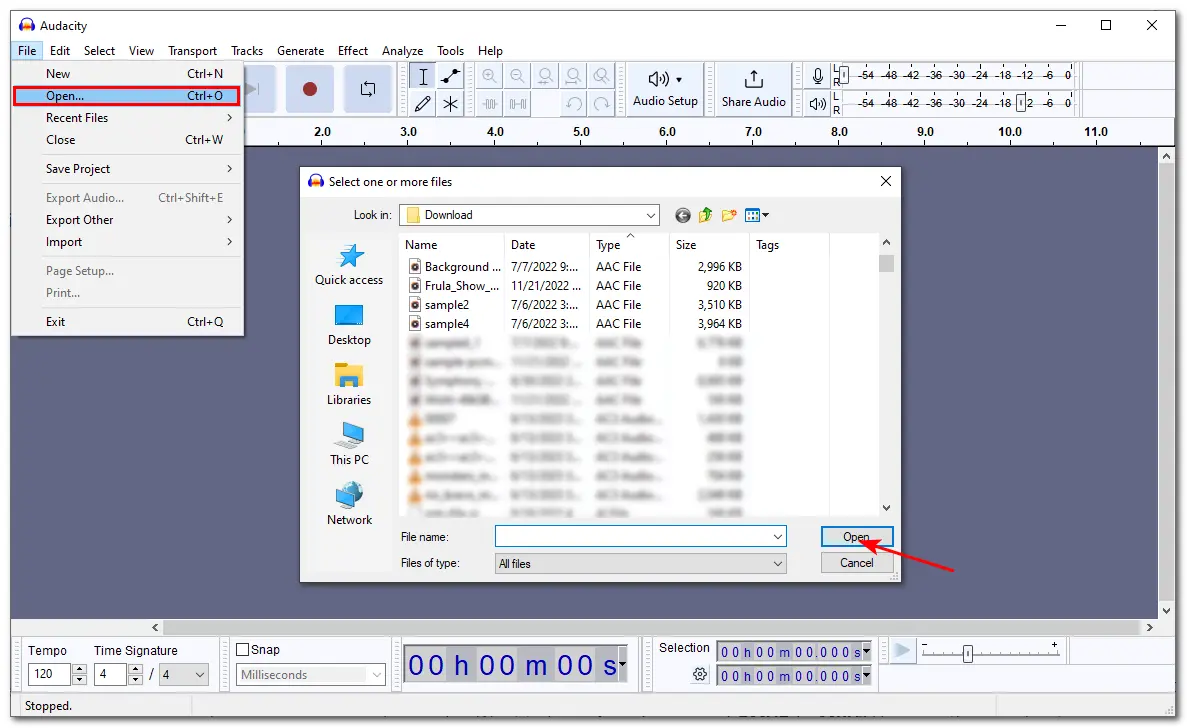
Download and install Audacity from its official website. Launch it and click "File" > "Open" in the top menu bar to import the audio file you want to change.
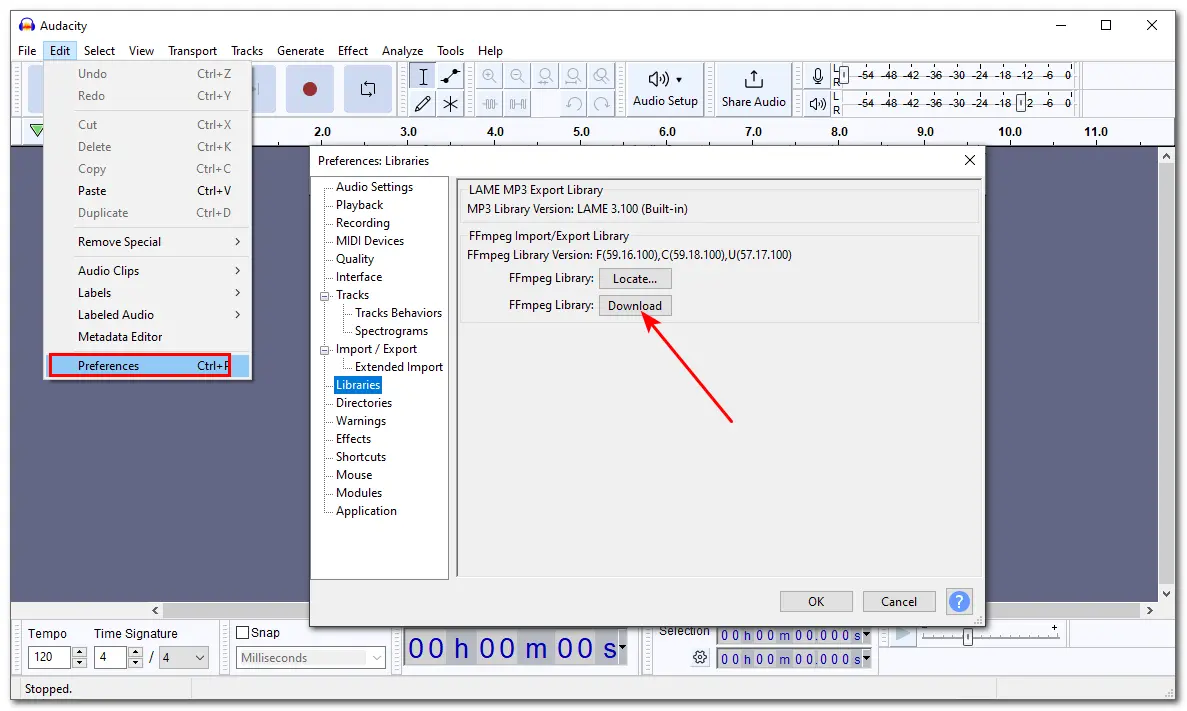
Tips: If your audio file cannot be imported into Audacity, you can install the FFmpeg library for Audacity, which allows you to import a much larger range of audio formats, including AC3, M4A, MP4, WMA, etc.
How to install the FFmpeg library for Audacity:
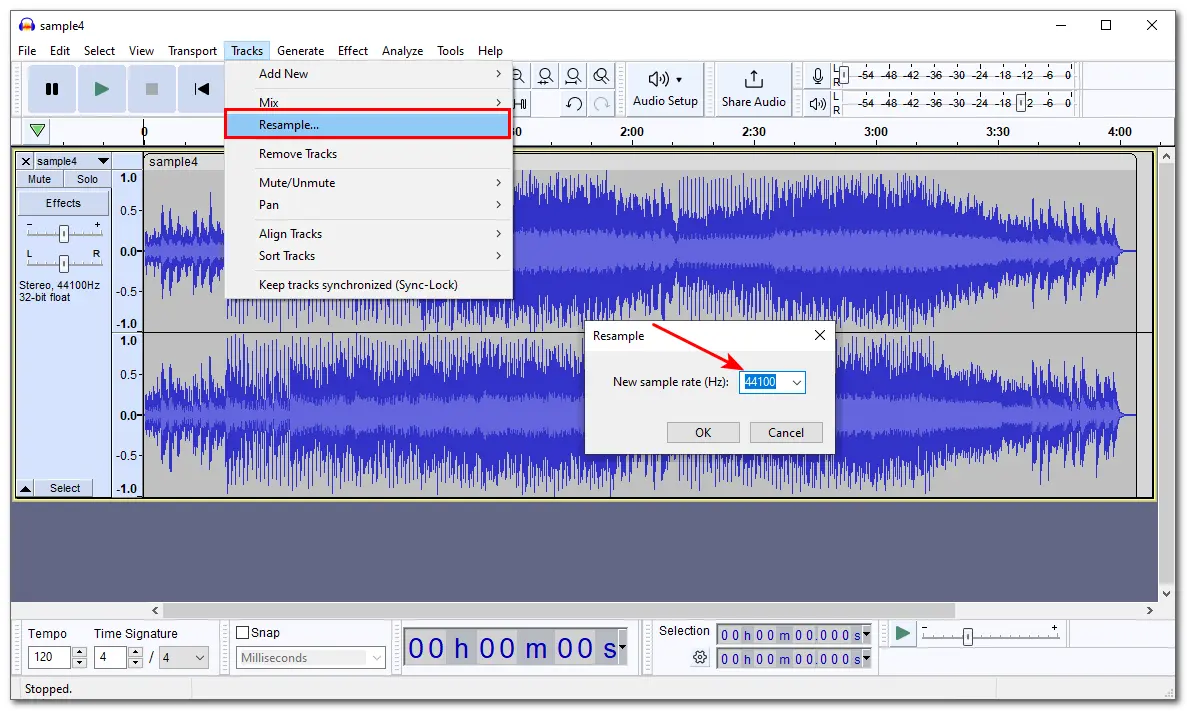
Click "Tracks" in the top menu bar and select "Resample". Then you can select a desired sample rate from the "New sample rate (Hz)" drop-down list. Click "OK" to confirm the selection.
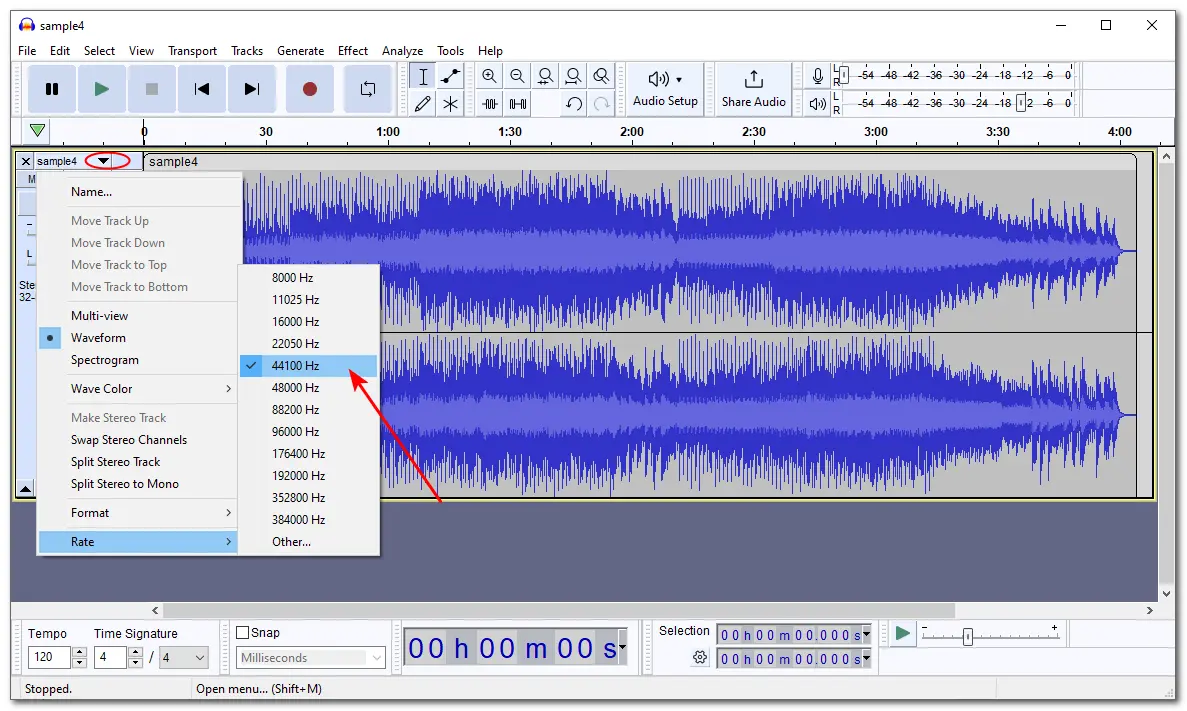
You can also change the sample rate by clicking the down arrow icon of the track and selecting "Rate" to choose a preferable sample rate.
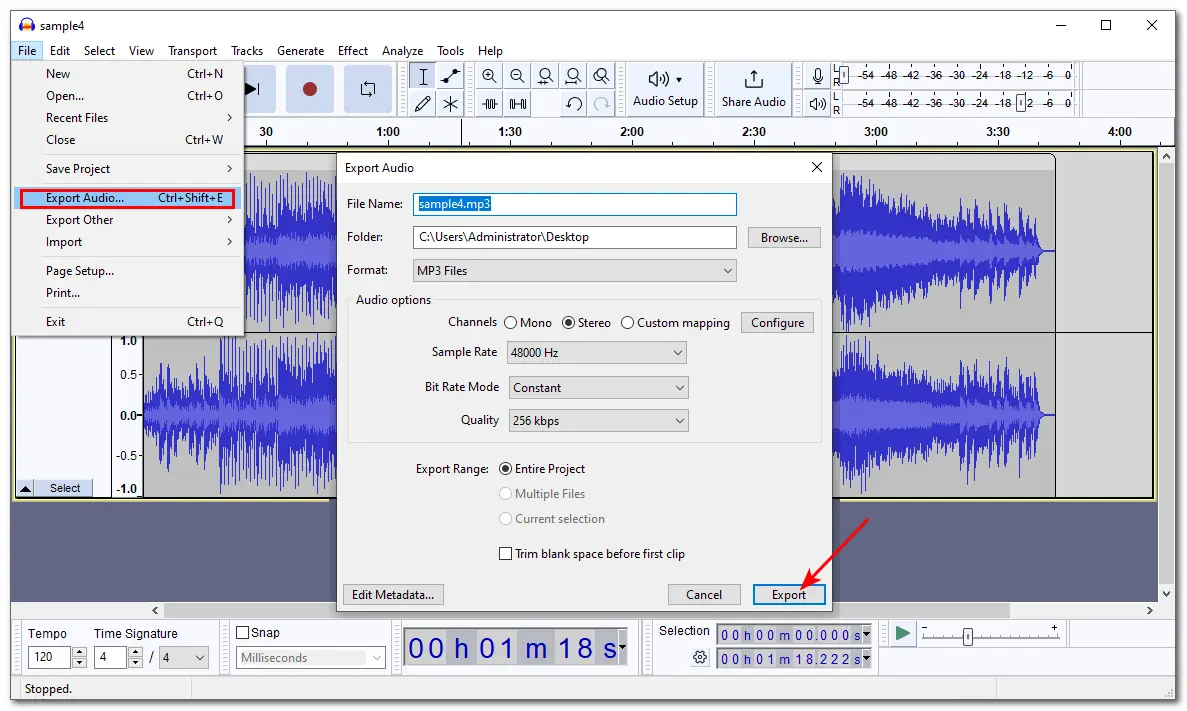
Go to the top menu bar and select "File" again, then choose "Export Audio". In the pop-up window, you can specify the file name, output path, format, and other audio settings. Then click "Export" to output the audio file to your device.
Though Audacity can change the sample rate, the steps may be a little complicated, especially for downloading and installing the FFmpeg library if your file formats are not supported. Want to change the audio sample rate more easily? Read the following part.
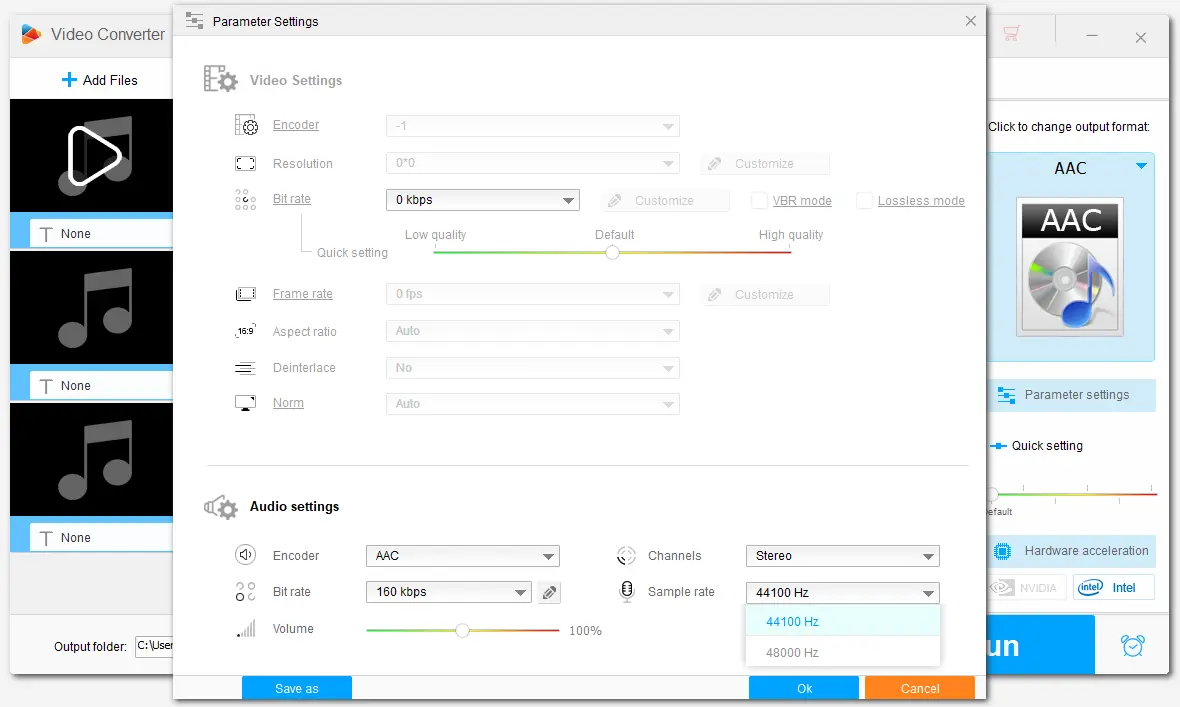
WonderFox HD Video Converter Factory Pro is a professional video/audio processing tool that supports almost all video and audio formats. With it, you can change the sample rate to 48000 Hz or 44100 Hz. Besides that, you can also change the audio format and modify other audio settings like codec, channels, bit rate, and volume. Moreover, the batch processing mode allows you to add multiple files to change the sample rate simultaneously.
Simple, efficient, and batch-processing supported. Download the software and follow the steps below to start the conversion.
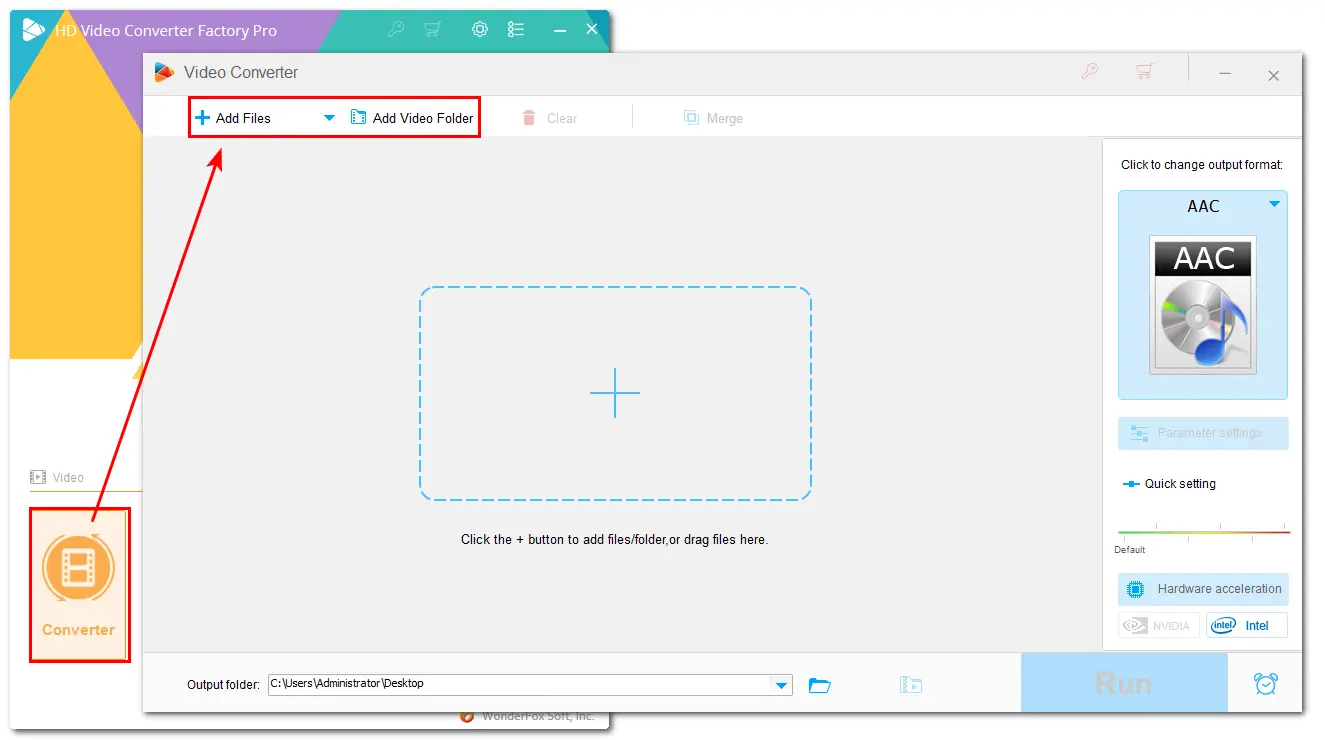
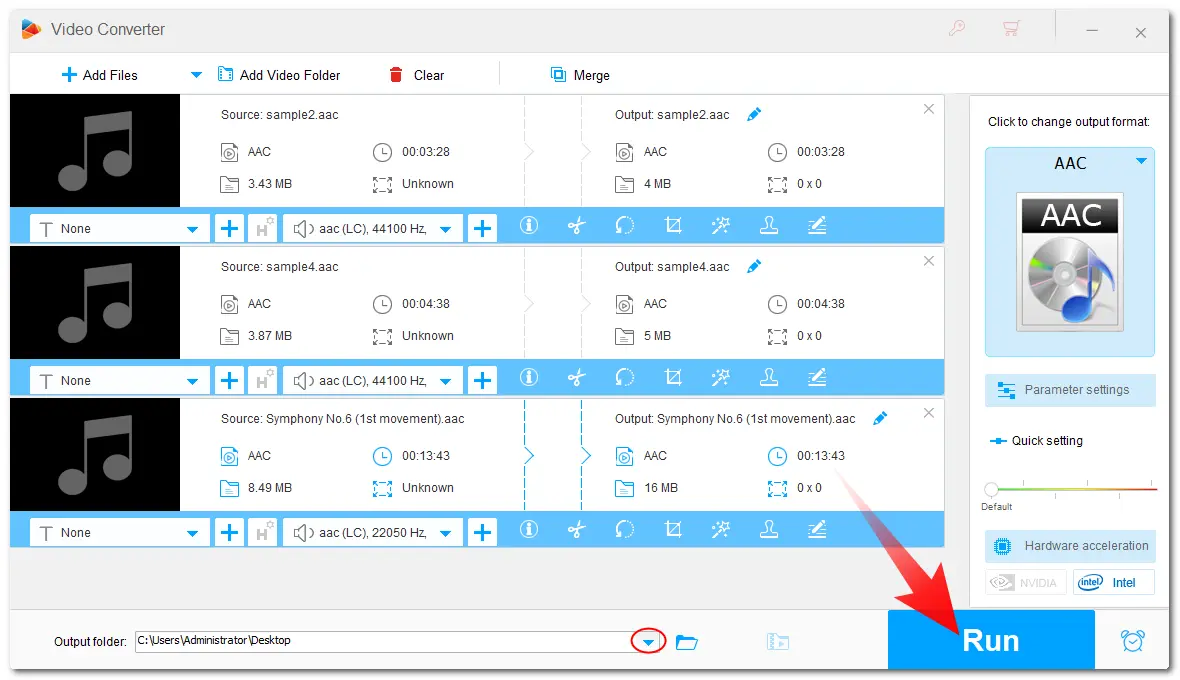
Launch WonderFox HD Video Converter Factory and open the "Converter" module. Click "Add Files" / "Add Video Folder" to add the source files.
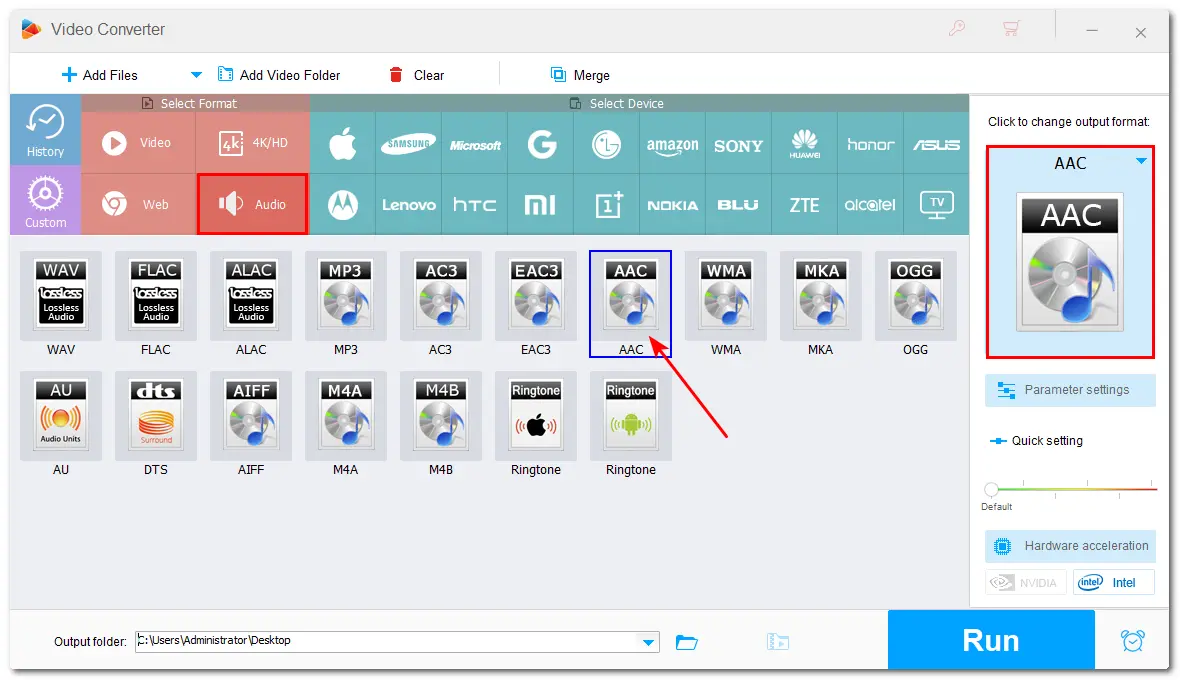
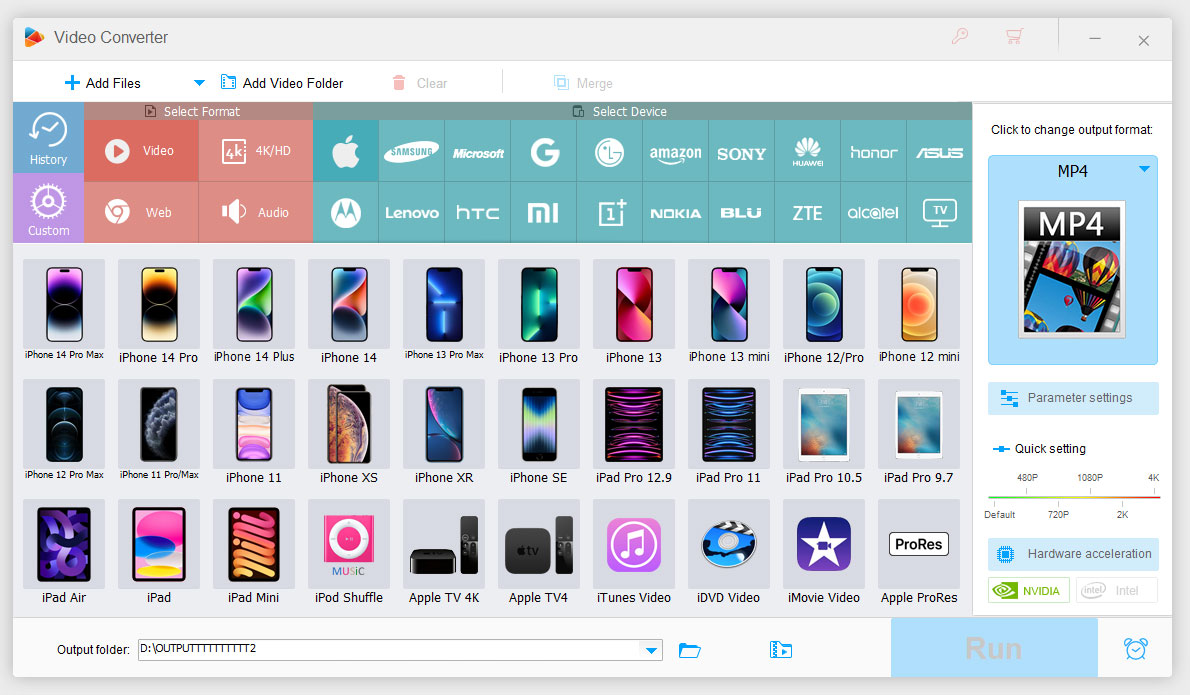
Click the right-side format image to expand the full list of output presets. Switch to the "Audio" tab and choose your preferred audio format. (Keeping the original format is suggested.)
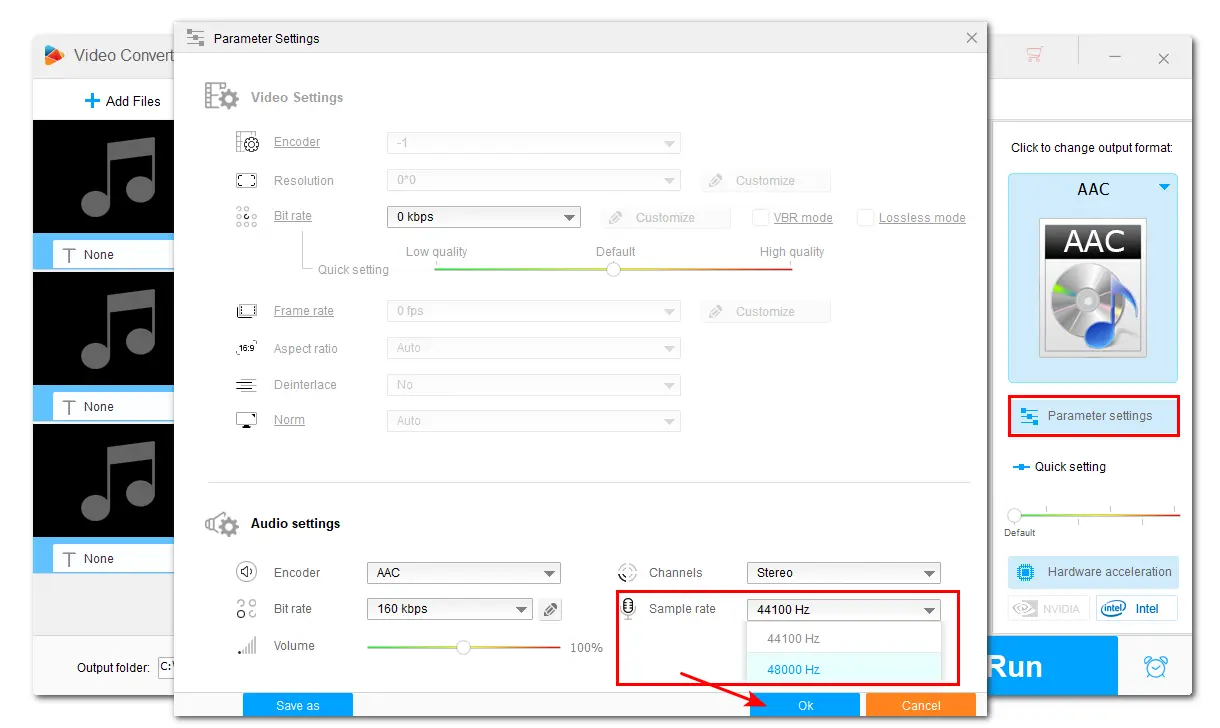
Open the "Parameter settings" window and go to the Audio settings section. Then you can choose a needed sample rate from the "Sample rate" drop-down options. Click "OK" to save your change.
Click the bottom ▼ button to set the output destination. Hit the “Run” button to export the final files.
Audacity is an open-source audio editor that can change sample rate and other audio settings. If you're wondering how to change sample rate in Audacity, follow the guide in this post. Also, WonderFox HD Video Converter Factory Pro is a great tool that can also help you change sample rate to 44100 hz or 48000 hz without any issue.
That's all for this post. I hope this post is helpful to you. Thanks for reading. Have a nice day!
WonderFox
HD Video Converter Factory Pro


Terms and Conditions | Privacy Policy | License Agreement | Copyright © 2009-2025 WonderFox Soft, Inc. All Rights Reserved.
