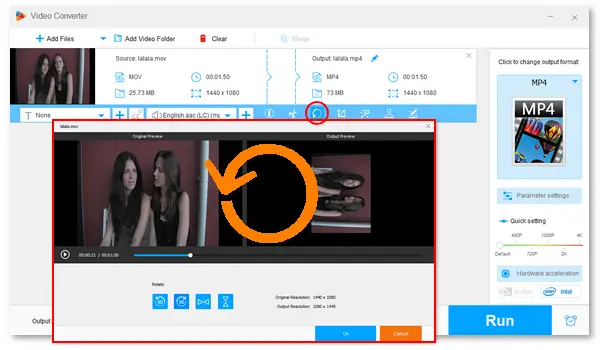
Below are specific guides on rotating a video 90/180 degrees on Mac and how to rotate a QuickTime video on Windows. All four methods used in this article are free and easy to handle. Please keep reading and follow the instructions.
Compared with other third-party video editors on Mac, QuickTime offers an easier way to rotate videos. Here is how to rotate a video file in QuickTime 10 on a Mac computer:
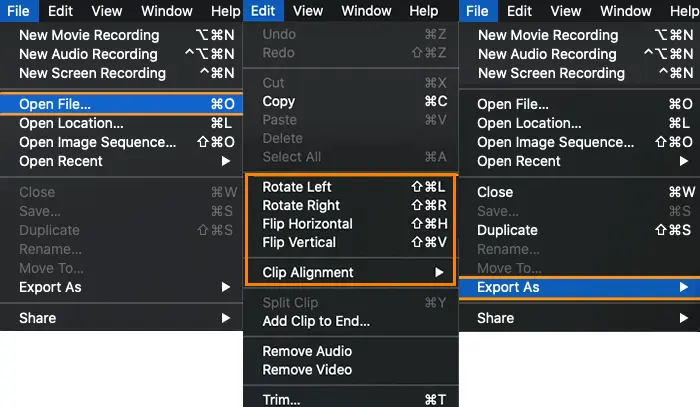
Step 1. Open QuickTime Player. Click File from the top menu bar and select Open File to open the video you want to rotate using QuickTime.
Step 2. Choose View > Show Clips and select the clip (outlined in yellow).
Step 3. Click the Edit menu. Then, you can select Rotate Left (counterclockwise), Rotate Right (clockwise), Flip Horizontal, or Flip Vertical. Hotkeys are also available for rotating QuickTime videos 90 or 180 degrees.
Step 4. Now, you can watch the video in the altered angle or save it via File > Export As > Save.
Note: QuickTime Player does not export movies as MP4 videos but MOV files (using the H.264 or H.265/HEVC codec).
Another way to rotate QuickTime videos on Mac is iMovie. This application is a free video editor developed to help Apple users rotate, crop, trim, and add music and effects to videos. Let’s see how to rotate a QuickTime video 90 degrees with iMovie:
Step 1. Open iMovie and click Import Media to add your QuickTime video file.
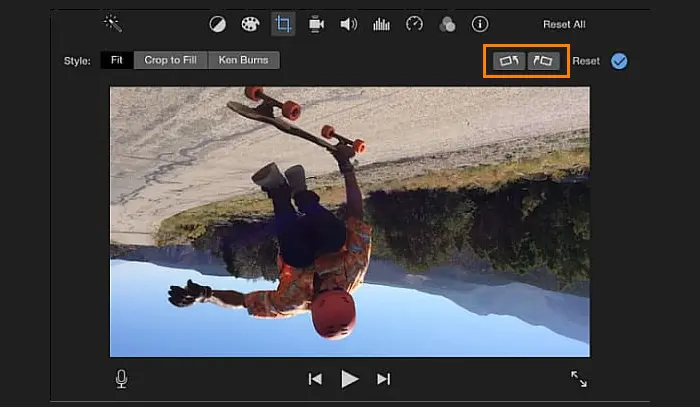
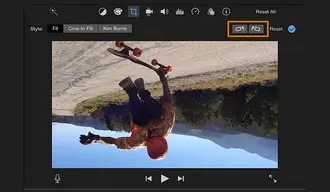
Step 2. Click the Crop icon. The clockwise and counterclockwise rotation buttons will be in the upper right corner. Select the rotating option to adjust the video orientation based on your needs.
Step 3. Once done, click the Apply button and go to Share > Export Movie to export the video.
Note: iMovie automatically saves videos in MOV format. Learn how to export iMovie to MP4 >>
If your QuickTime movies are stored on a Windows computer, you can rotate and flip them using WonderFox Free HD Video Converter Factory. The software is a professional video converter that integrates a simple video editor to rotate, trim, crop, remove audio, add subtitles, etc. With support for more than 300 output formats, it allows you to export videos in MOV, MP4, MKV, WMV, AVI, WebM...
Now, download and install this excellent video rotator for PC. See how to rotate a QuickTime video on PC below.
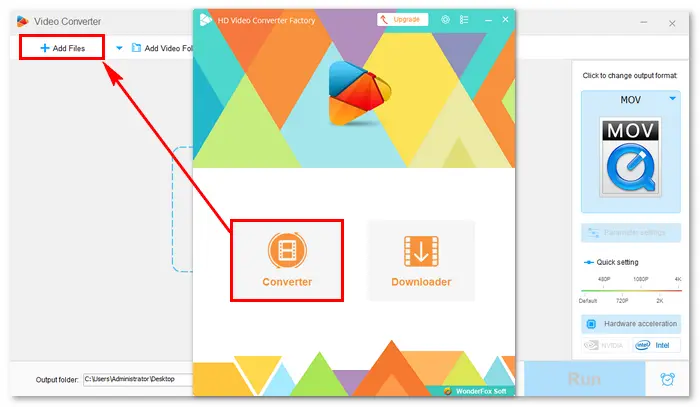
Step 1. Launch Free HD Video Converter Factory. Open Converter and click Add Files to import the video you want to rotate.
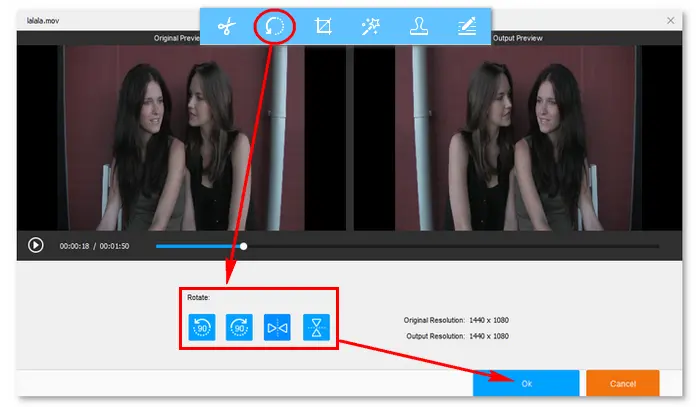
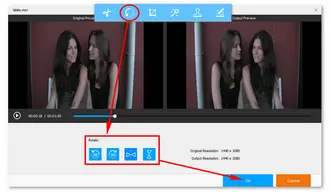
Step 2. Click the Rotate button below the source file, and you will see four options to rotate the video. Change the video orientation as desired. Then, press OK to save the change.
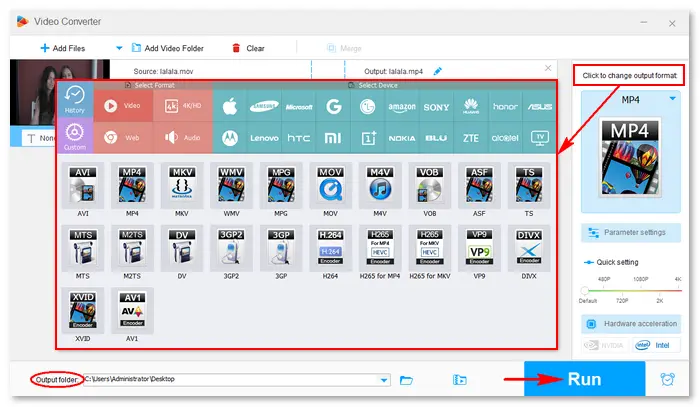
Step 3. Click the format image on the right side and choose an output format. Finally, click Run to export the video file.
If you want to utilize a free tool or service to rotate the QuickTime video directly from the web, visit 123APPS video rotator via this URL:
https://online-video-cutter.com/rotate-video
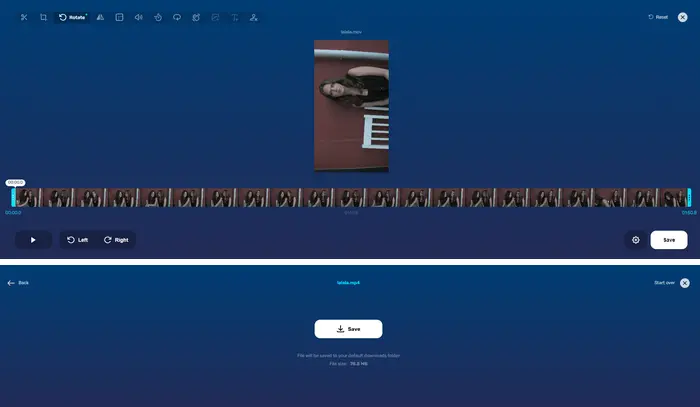
Step 1. Click the Open file button to upload your QuickTime video file.
Step 2. Under the Rotate tab, you can choose ⟲ Left to rotate the video 90° anti-clockwise or ⟳ Right to rotate it 90° clockwise. You can also flip the video horizontally or vertically.
Step 3. Tap the ⚙ icon to select an output format. Then, click Save to start the process.
Step 4. Once done, download the resulting file to your computer.

Tips: To rotate a video by any degree online, you can try the VEED.IO video rotator:
https://www.veed.io/tools/rotate-video
Also Learn: Online Video Rotator for Large Files
The above article shows how to rotate a QuickTime video on Mac, Windows, and online. With the help of these functional rotating tools and detailed tutorials, you can successfully rotate your QuickTime movie fuss-free!
Terms and Conditions | Privacy Policy | License Agreement | Copyright © 2009-2025 WonderFox Soft, Inc.All Rights Reserved