HD Video Converter Factory Pro - Trim videos on Windows 10/11 without any limitation>>
After recording a video on your Windows PC, you may want to trim off the unwanted parts from the video. Then, a video editor is needed. Luckily, the Windows 10 Photos app offers a built-in video editor that allows you to trim one or multiple clips of a video. The following shares a detailed guide to help you cut videos with the Photos app. If you encounter issues when trimming a video using the Photos app, this post also explains some possible solutions. Keep reading for more details.
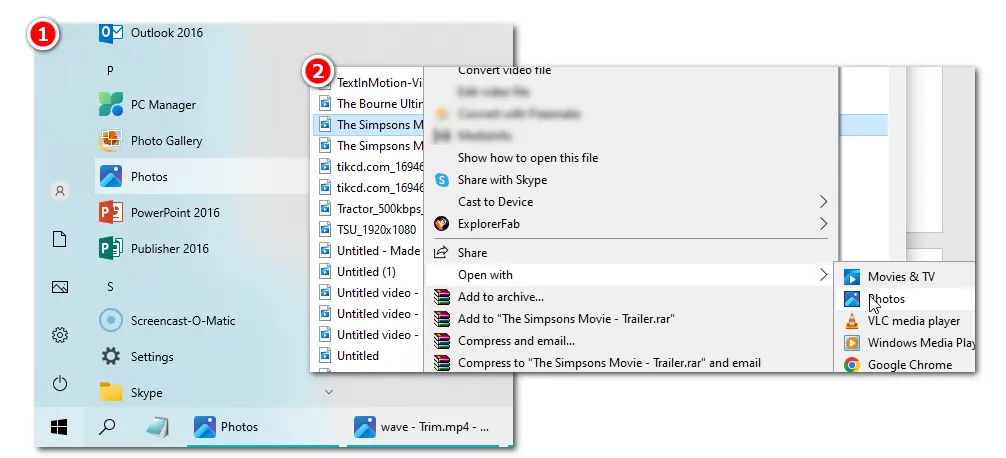
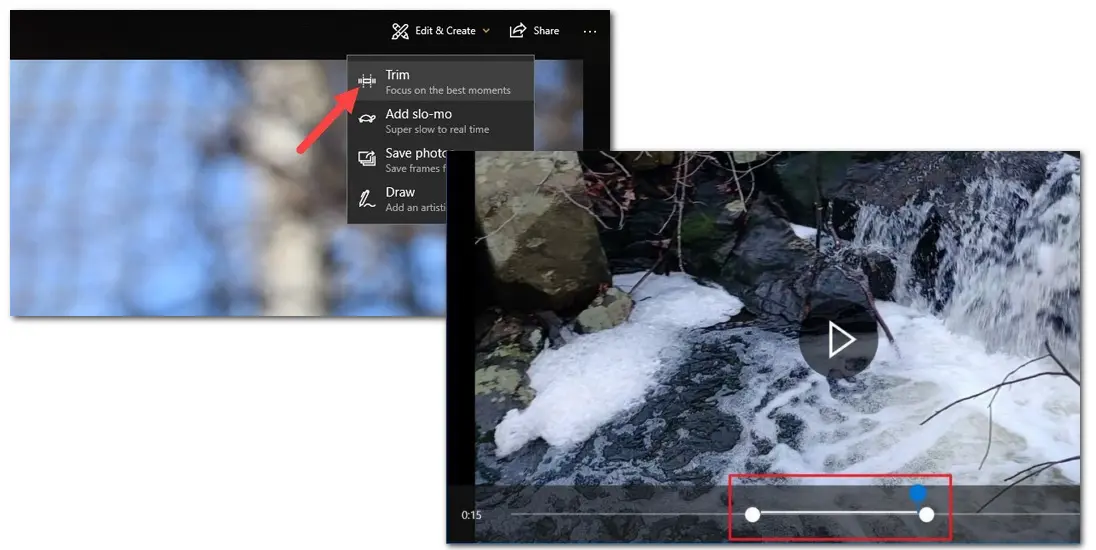
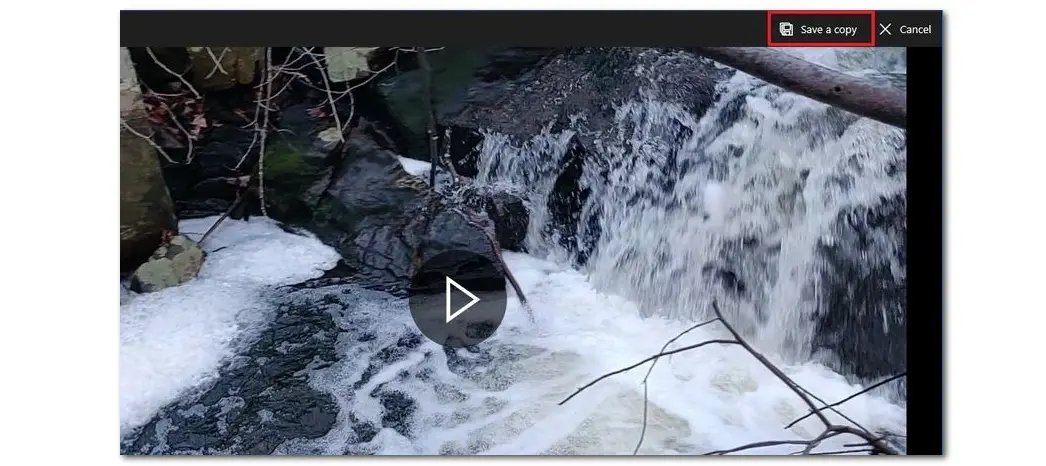
(The trimmed video will be saved to the same destination as the original video, adding the suffix "_Trim". You can also specify an output path by yourself.)

Although Windows 10 Photos can easily trim a video, there are some limitations when it comes to format support and the quality of the output. Furthermore, users claimed that Photos would not allow them to trim the video or the option was not available in the Photos app. No worry! This post also shares some solutions to help you fix the possible issue.
If you import your video with Photos but cannot open the "Trim" window or any other problems arise after having added the video to Photos, first close the application. Open the video again with the Photos application and start trimming.
If reopening the Photos app doesn't work, it may be the version of your Photos app is outdated. Although you can set your OS for auto-updating, sometimes not all apps update automatically. Therefore, when you find the "Trim" function is greyed out in the Photos app, you can check if a new update for the app is available.
Follow the steps below:
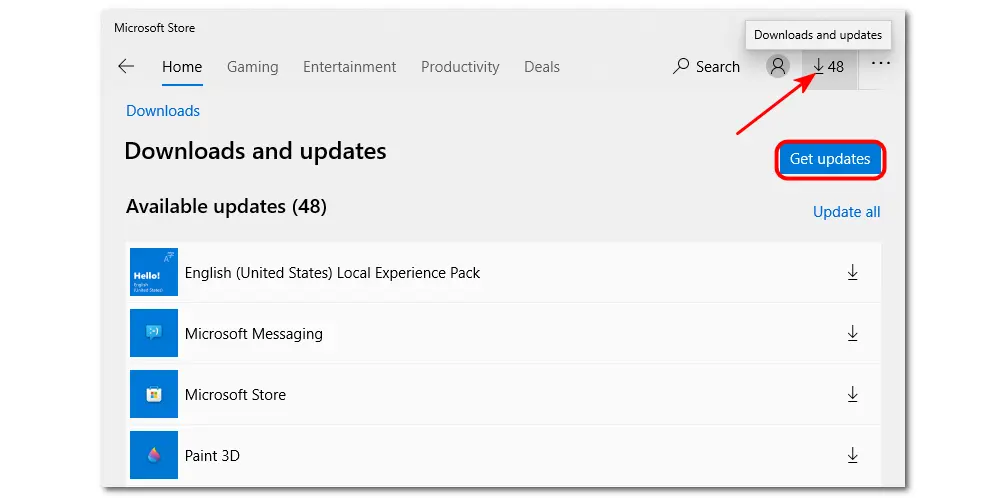

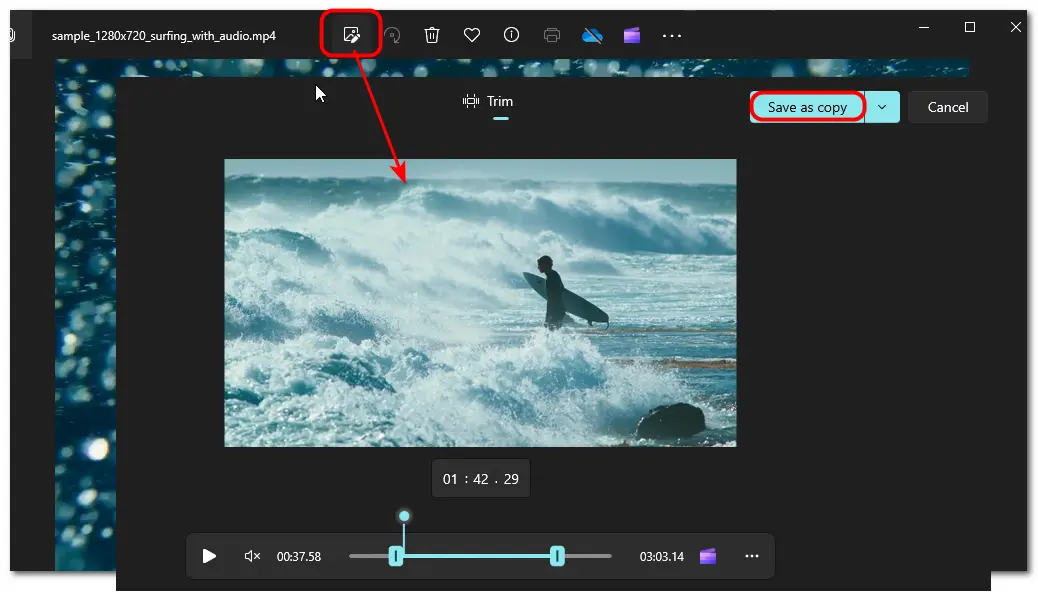
Note: updating the Photos app to the new version will remove the built-in Video Editor function. But you can still trim video in the Photos app.In the new version of the Photos app, you can double-click the video to play it. Then, click the "Video trim" button at the top toolbar to open the trim window. Drag the start and end points to trim the video and click "Save as copy" to export the trimmed video.
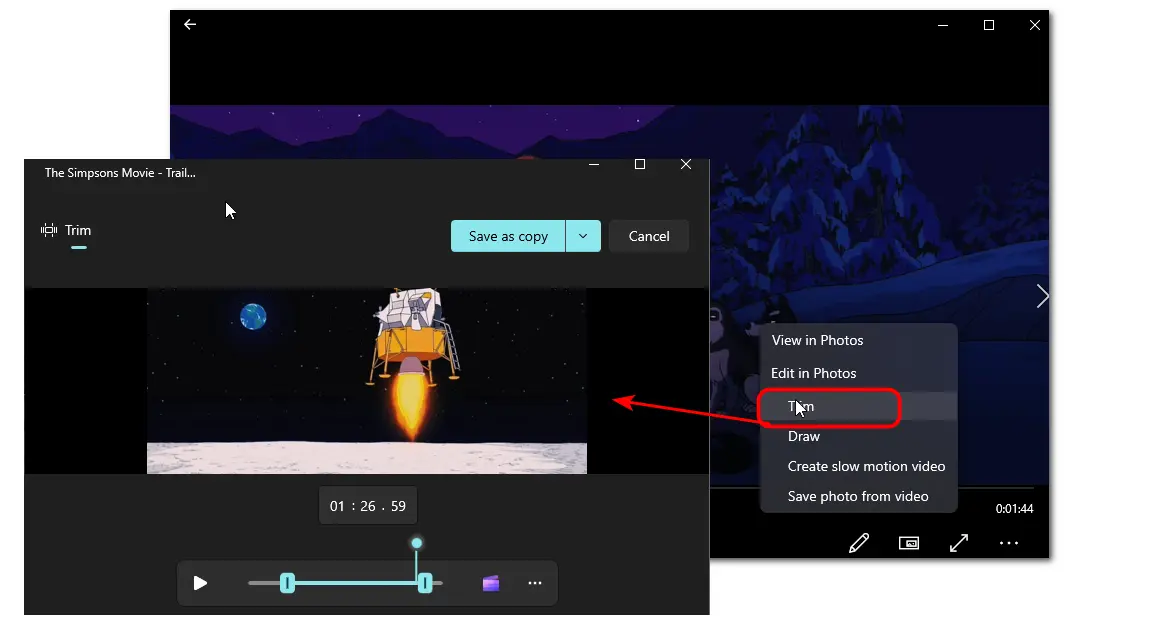
The Movies & TV app is the application set as the default to access all the video files on your Windows PC. In case you have some problems when using the "Trim" features in the Photos app, you can also open the video with the Movies & TV application and bring it forward to the "Trim" window.
The detailed steps are:
You will also fail to trim the video in the Photos app when some other third-party tools, like Clipchamp, are accessing the file or running in the background. Try to close or uninstall the possible applications temporarily to check if the issue is fixed.
You can open the "Task Manager" to end the conflicting software task.
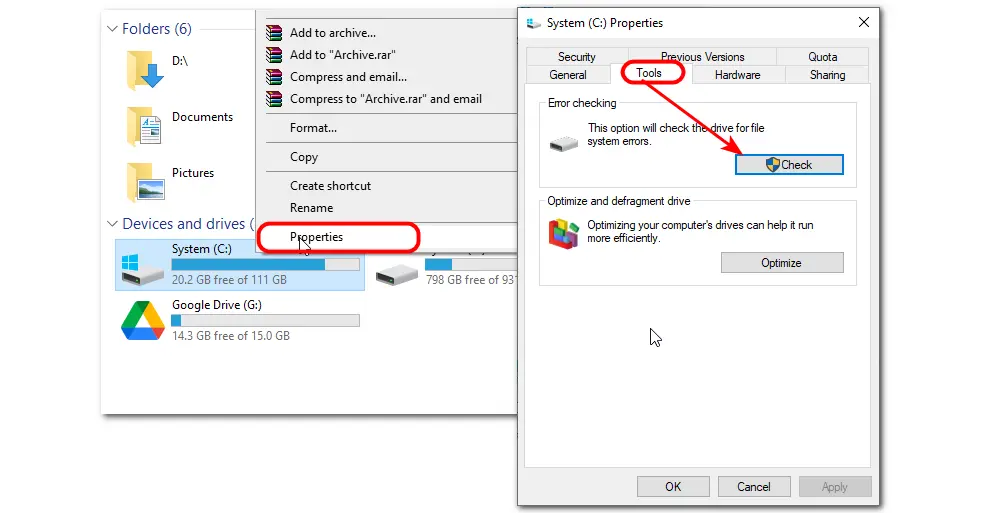
Of course, sufficient disk space is very important for the correct operation of any application. Therefore, make sure to leave enough space on the C: drive to let the Photos app trim videos properly. In addition, some file system errors could bring in issues with editing, among others. You can run a disk check to check those errors.
How to run a disk check:
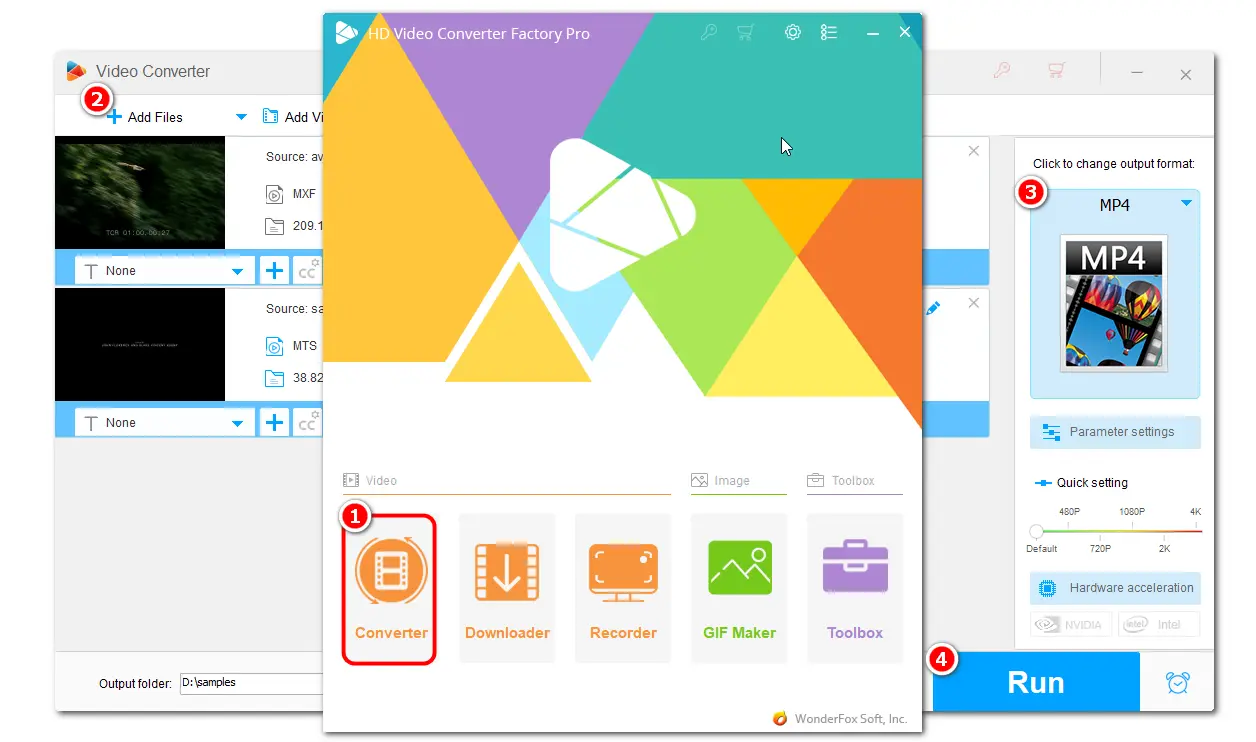
Though the Windows 10 Photos app supports many formats like MP4, MOV, MKV, AVI, etc., you will fail to open or edit some files encoded with H.265, vp9, etc. encoders. Moreover, other videos like MTS, MXF, etc. are not supported by Photos. So, if you want to trim these unsupported files using Photos, you have to first change the file formats/codec.
How to change the file format/codec:
WonderFox HD Video Converter Factory Pro is a professional video format changer. With it, you can easily convert all videos to be supported by Photos in batches without losing quality.
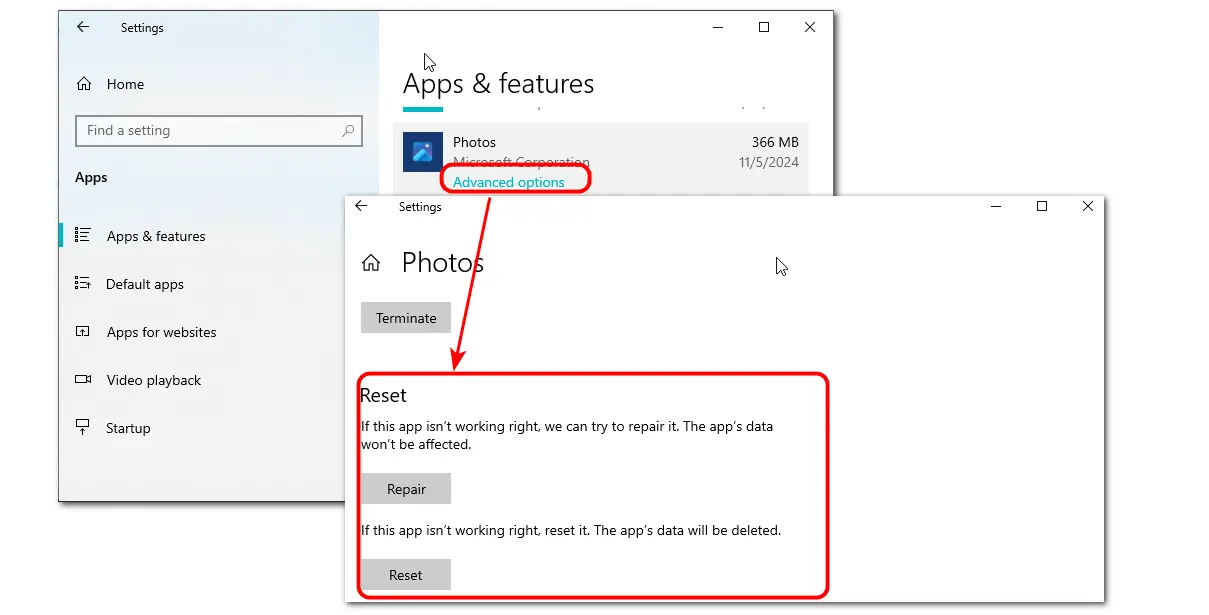
If the above solutions still cannot solve the issue or the Photos app is the latest version, you can first try to repair or reset the Photos app. If it still doesn't work, then reinstall the app.
The detailed steps are:
If you need to reinstall the Photos app, open Windows PowerShell as administrator and enter the following command: "Get-AppxPackage -allusers Microsoft.Windows.Photos | Foreach {Add-AppxPackage -DisableDevelopmentMode -Register "$($_.InstallLocation)\AppXManifest.xml"}", click "Enter" to run the command.
Then, restart the computer and check the Photos app. It should work fine now!
However, it is not recommended to reinstall the Microsoft Photos app since any wrong step may cause issues to your computer.
Besides the Photos app, it is now recommended to use Clipchamp, the default video editing program for Windows 11/10, to trim and edit your video on Windows.
However, Clipchamp may be too complicated for a simple video trimming task. It also has format, quality, and other limitations. In this case, give WonderFox HD Video Converter Factory Pro a try. Apart from being a video converter, it can also trim, split, crop, rotate, merge videos, and more without losing quality.
Download this app here and let's see how to trim video in HD Video Converter Factory Pro.
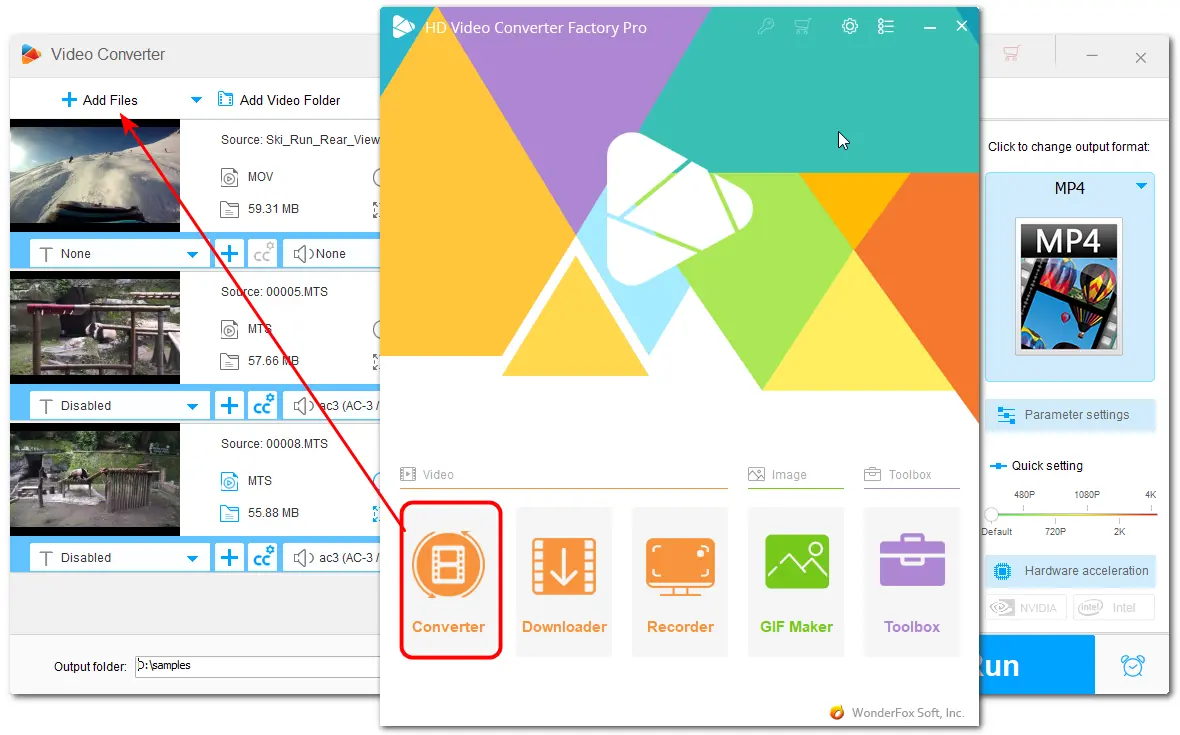
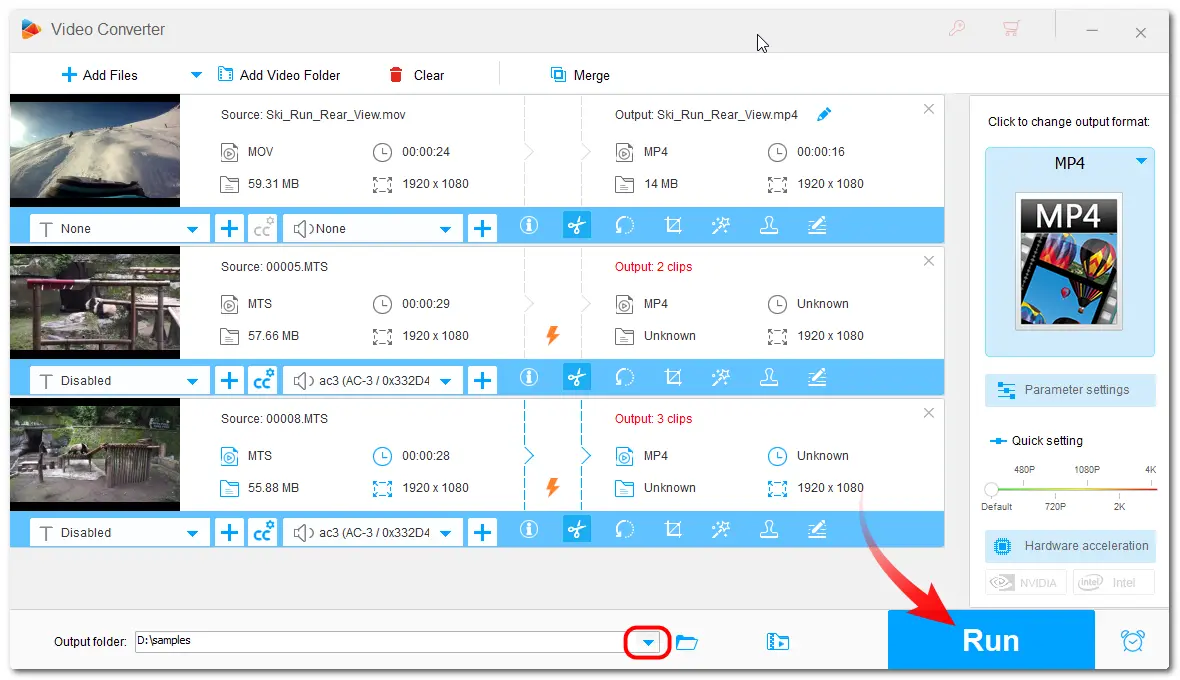
Step 1. Launch the app and open the "Converter" module. Then, drag the file you want to trim into the program.
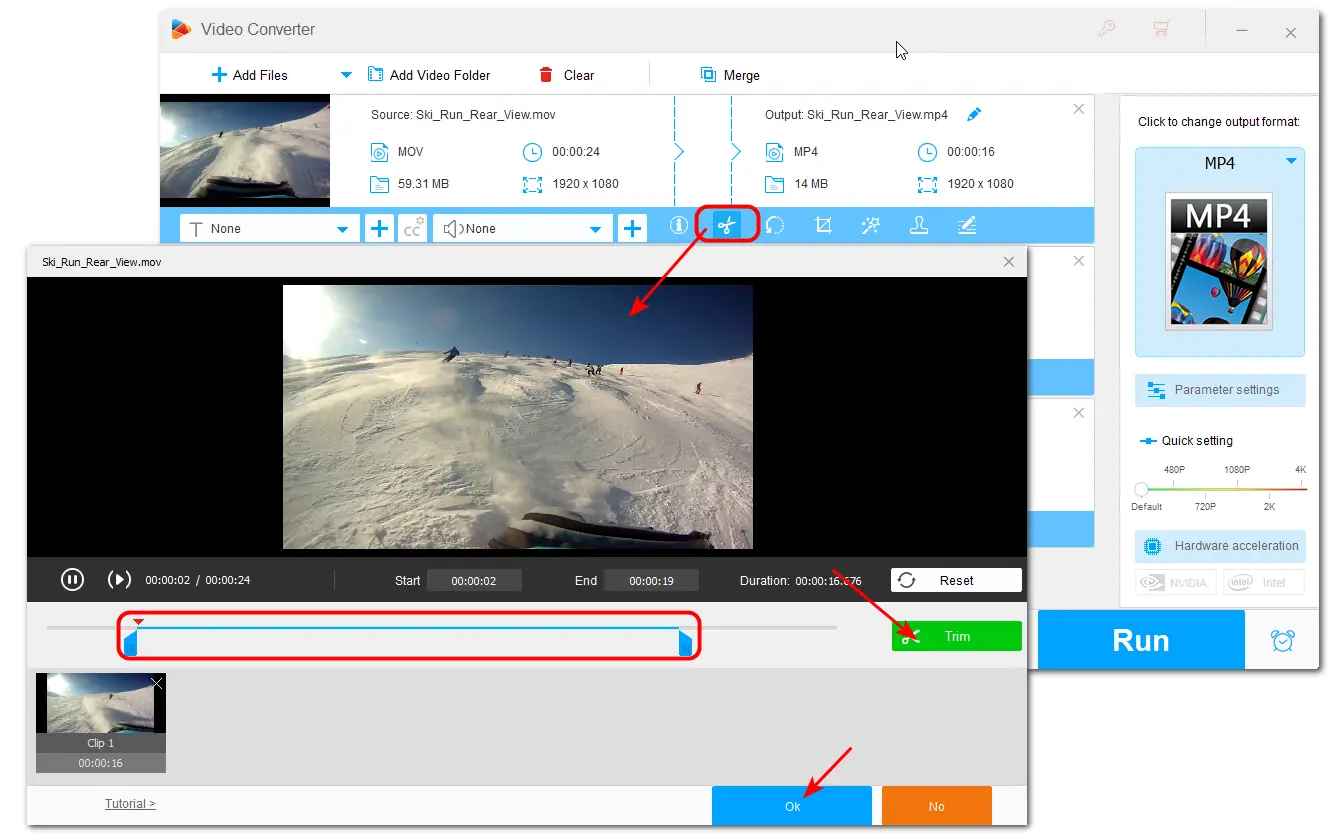
Step 2. Click the scissors icon to open the trim window. Drag the sliders on the start and end sides to select the part you want to trim. Click "Trim" to cut the video clip. You can repeat the step if you want to split the video into multiple clips. Once finished trimming, click "OK" to save the change.
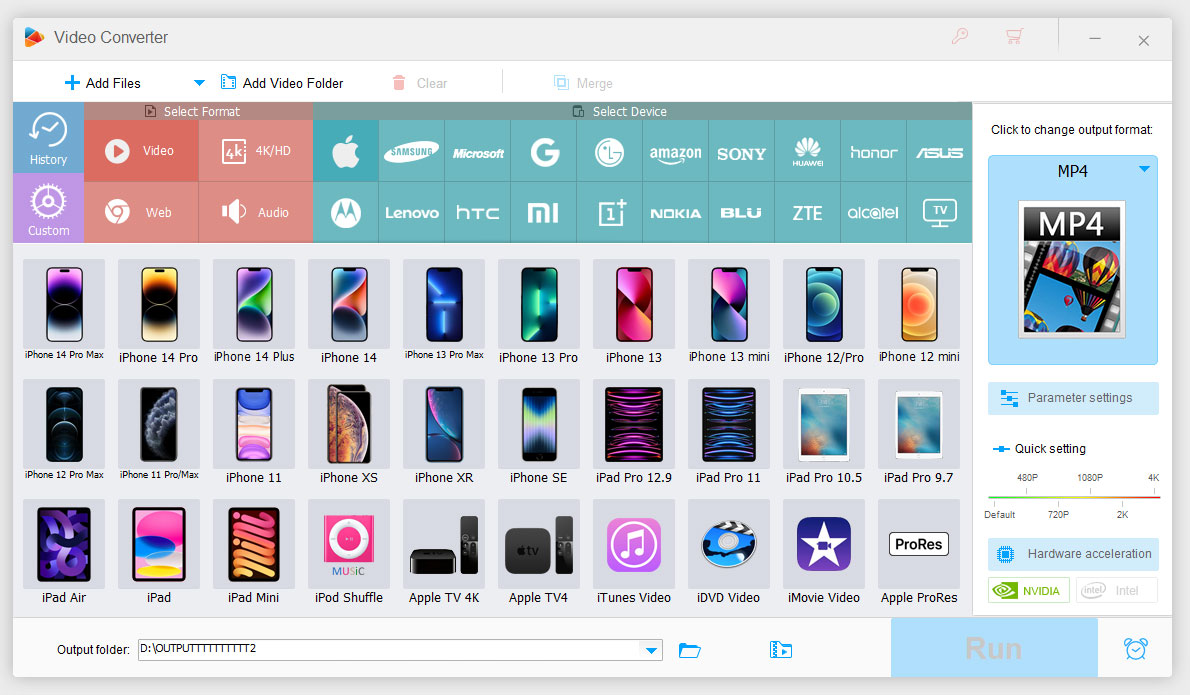
Step 3. Choose a desired output format from the right-side format library. Then, click "Run" to start exporting the trimmed video.
Using the Windows 10 Photos app is a simple and quick method that allows you to easily trim your recorded clips without installing another app. This post has detailed the steps of how to trim videos with the Windows 10 Photos app and shared the troubleshooting methods if you encounter any issues during the video trimming process. By the way, you can also directly try other video trimming tools like WonderFox HD Video Converter Factory Pro to trim videos without issue.
The above is all I want to share with you. Thanks for reading. Hope you can trim your video successfully. Have a nice day!
Yes. The Microsoft Photos app on Windows can manage and edit not only your photos but also videos. It is built-in with a video editor that you can use to trim, split, rotate, and do more edits with your videos.
Actually, Microsoft has removed the built-in Video Editor in the new version of the Photos app. If you upgraded your Photos app to the new version, you may still be able to use it to trim video. However, other editing features are removed and replaced with Clipchamp.
If you want to trim multiple clips from a video using the Photos app, you need to open the built-in video editor first.
1. Click "Select" to choose a video and select "New video" > "New video project". Then name the video project.
2. Click "Split" from the toolbar. Drag the slider to select the first section you want to trim and click "Done".
3. Select the second video part under the "Storyboard" to repeat the trim step to create two or more video clips.
4. Click "Finish video" > "Export" to create a new video that only contains the parts you trimmed.
However, if you have updated your Photos to the latest version, you will fail to open the Video Editor.
WonderFox
HD Video Converter Factory Pro
Terms and Conditions | Privacy Policy | License Agreement | Copyright © 2009-2025 WonderFox Soft, Inc. All Rights Reserved.