


Frame rate refers to the number of still images captured in a second on the screen. It is essential to the video quality as it can influence the smoothness, clarity, and detail of a video.
When editing videos in DaVinci Resolve, you may need to set different frame rates for various types of videos to achieve different effects. Moreover, selecting the correct frame rate settings is important to make your videos run smoothly and render without issue. If you don't know how to change the video frame rate in DaVinci Resolve or encounter issues when modifying the video frame rate, read this post to see the detailed steps for changing frame rates in DaVinci Resolve.
DaVinci Resolve allows you to set or change frame rates at three different levels:
The following will detail the guides to change the frame rate of the project, timeline, and specific clip in DaVinci Resolve.
Setting the project frame rate can ensure all timelines and clips within the project always running at the desired FPS. Note that it is crucial to set the correct project frame rate before uploading media to the timeline. Once media is uploaded to the timeline, the timeline frame rate setting becomes locked.
To set the project frame rate in DaVinci Resolve, follow these steps:
Step 1. In DaVinci Resolve, go to the top menu bar and select "File" > "Project Manager" > "New Project" to start a new project.
Step 2. Name the new project. Press the cog icon in the lower right of the interface to open the "Project Settings" window.
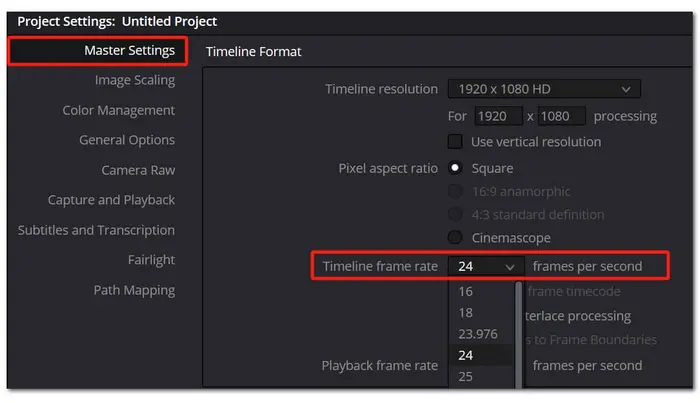
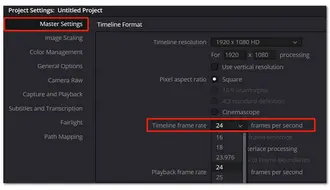
Step 3. Select "Master Settings" in the Project Settings panel. Then you will see the "Timeline frame rate" option under the "Timeline Format".
Step 4. Choose the desired frame rate from the drop-down list and click "Save". Remember to make sure the "Playback frame rate" matches the "Timeline frame rate" for a smoother visual experience.
What to Do If Your Project Gets Stuck at the Wrong Frame Rate Setting?
As mentioned previously, as soon as you upload media to the timeline, the timeline frame rate will be locked in, causing you to fail to alter the incorrect video frame rate. But don't worry. The following shares a method that can help you change the timeline frame rate.
If you want to change the timeline frame rate in DaVinci Resolve after setting the project frame rate, the best way is to make a new timeline with the timeline frame rate settings you desired. The following are the detailed steps.
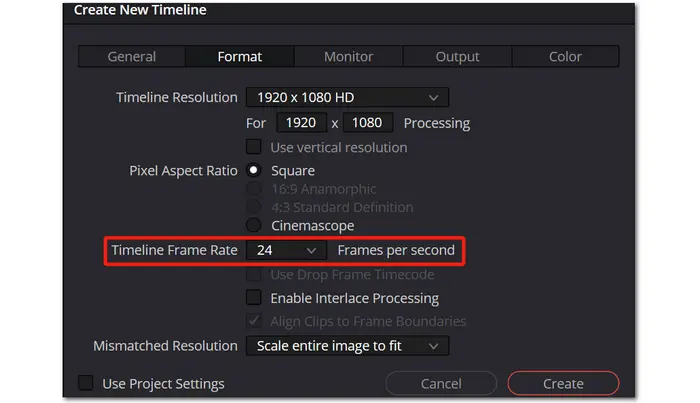
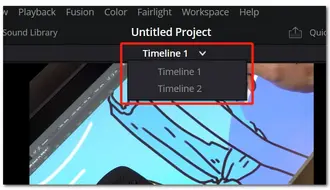
Step 1. Open the chosen project, then press "Ctrl + N" / "Cmd + N" or right-click in the "Media Pool" and select "Timelines" > "Create New Timeline" to start a new timeline.Step 2. Name the new timeline and uncheck the "Use Project Settings" option.
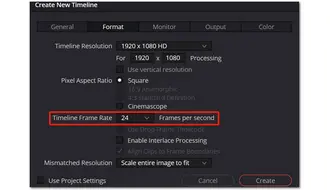
Step 3. Switch to the "Format" tab, and then you can choose a desired FPS from the "Timeline Frame Rate" drop-down list. Click "Create" to create the new timeline with the desired frame rate.
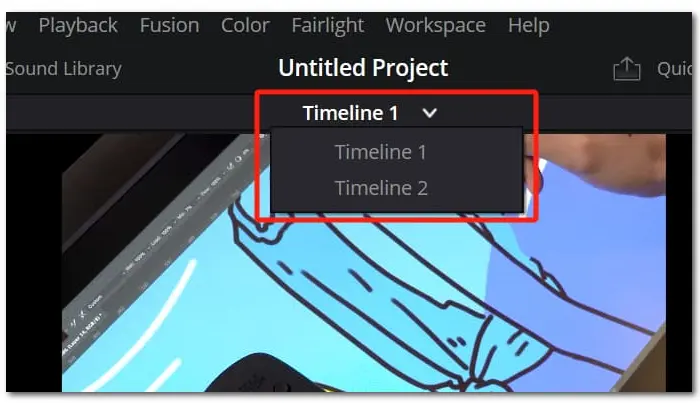
Step 4. Go to the top of the "Viewer" panel to switch back to your original timeline. Select all the clips on the timeline and press "Ctrl + C" / "Cmd + C" to copy these clips.
Now, all the clips on the first timeline will be copied to the new timeline with the new frame rate. However, it's important to note that the new frame rate only applies to the new timeline. The frame rate setting of the project is still grayed out and cannot be changed.
Besides changing the project frame rate and the timeline frame rate, DaVinci Resolve is also capable of changing the specific clip frame rate in a project. Let's see how to change the specific clip frame rate in DaVinci Resolve.
Step 1. Click the "Media Pool" in the "Edit" window. Select the clip you want to modify.
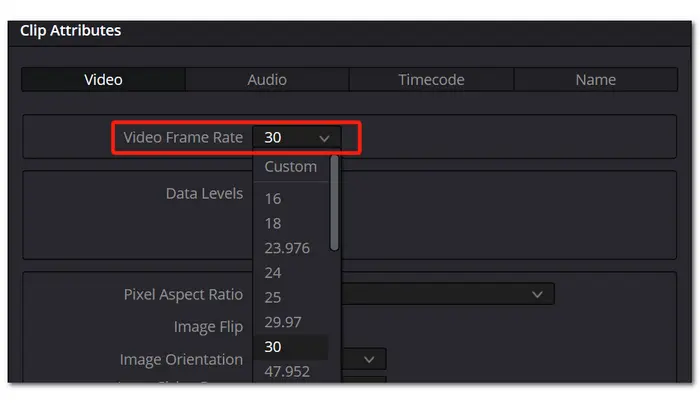
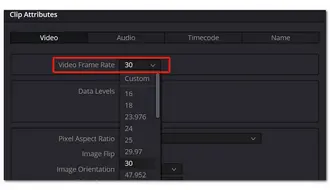
Step 2. Right-click on the selected clip and choose "Clip Attributes".
Step 3. In the "Clip Attributes" window, select the desired frame rate from the "Video Frame Rate" drop-down menu under the "Video" tab. Then, click "OK".
The clip will now be updated with the new frame rate.
Actually, if you import a video in which the frame rate doesn't match the project frame rate you set before, you will receive a warning message:
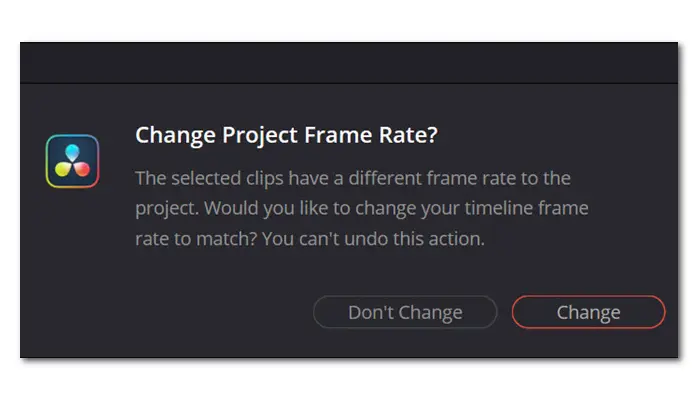
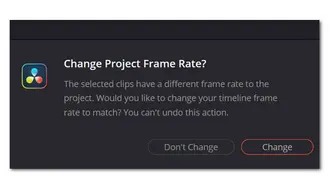
If you choose "Change", the project timeline's frame rate settings will be updated to match the frame rate of the first imported video. Any subsequent videos you import will also be changed to this frame rate.
If you select "Don't Change", the project timeline's frame rate will remain as it was originally set, and the frame rate of the imported video will not be altered.
In addition to changing the video frame rate in DaVinci Resolve, you can also try other video processing programs to change the video frame rate more easily for editing in DaVinci Resolve and other video editing software.
WonderFox HD Video Converter Factory Pro is a helpful tool that provides an easier way to modify the frame rate of various video files, such as changing from 60fps to 120fps or from 30fps to 24fps. With its batch mode and support for GPU acceleration, you can quickly convert the frame rate of multiple videos in one go. Additionally, as a video converter, it can also be used to change the video format and codec to resolve any compatibility issues with DaVinci Resolve.
Download this software here to give it a try now!
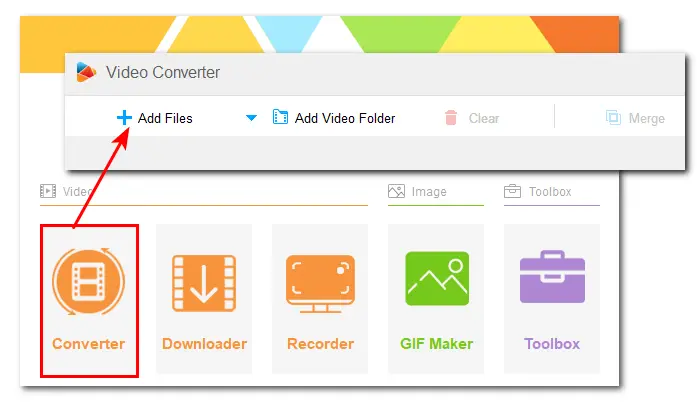
Step 1. Launch WonderFox HD Video Converter Factory Pro and enter the "Converter" module.
Step 2. Click "+ Add Files" to import videos or directly drag and drop them into the workplace.
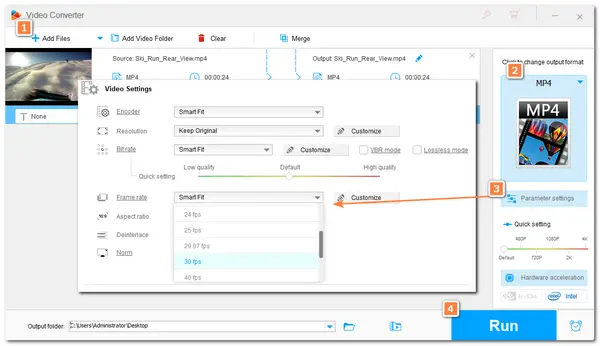
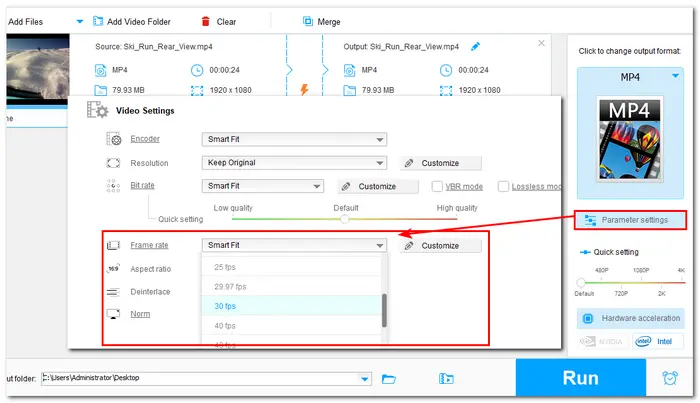
Step 3. Press the right-side format image to open the output format list and choose a desired output format under the "Video" tab.
Step 4. Open the "Parameter settings" window, and you can select a frame rate from the "Frame rate" drop-down presets or click "Customize" to input the desired value you need. Then, click "OK" to save the change.
* Besides changing the video frame rate, you can also adjust other settings like resolution, bitrate, codec, etc.

Step 5. Then click the ▼ icon to set an output folder and hit "Run" to start the conversion.
The above is all about how to change frame rates in DaVinci Resolve, including the project frame rate, timeline frame rate, and the specific clip frame rate. I hope this guide can be helpful for your condition. Also, you can try the alternative program -WonderFox HD Video Converter Factory Pro - to modify video FPS more simply.
To choose the right frame rate for the video, you need to consider the following factors:
Desired effect: The frame rate will affect how realistic the video is. If you want to make your video an authentic look, 24fps or 30fps is ideal.
Output file size and export time: A higher frame rate means more details, which will increase the file size and require more time to export. Better computer hardware and a stable internet connection are also needed for smooth playback if you choose a high frame rate.
Type of video: Different types of videos require different frame rates. For example, 24fps can create a cinematic look that is suitable for movies. 30fps is typically used for TV and online content, such as YouTube videos. A higher FPS is suitable for high-action content and slow-motion videos, such as sports or gaming videos.
DaVinci Resolve sets the default project framerate as 24fps.
If you want to change the project framerate, you can follow this post to modify the project framerate in the "Project Settings" panel and select "Don't Change" in the pop-up window when importing the media clip that doesn't match the frame rate you set.
The playback frame rate in DaVinci Resolve is determined by the computer's performance and the project settings which refers to the frame rate of the video on your external monitor when you play the video. It won't affect the frame rate of your final footage but will impact how smoothly the playback experience is on external monitors.
No. Variable frame rate (VFR) is usually used in recordings by smartphones or screen recording software. However, many professional video editors cannot work well with video with variable frame rates, neither does DaVinci Resolve. If you have some VFR videos and need to edit them, you can use WonderFox HD Video Converter Factory to convert VFR to CFR for smooth editing.
Terms and Conditions | Privacy Policy | License Agreement | Copyright © 2009-2025 WonderFox Soft, Inc. All Rights Reserved.