X (formerly Twitter) users have been able to start a Space as a host via an iOS or Android app, while desktop users can only log into ongoing Space discussions as listeners or speakers.
However, according to @XSpaces, the Create your Space feature was introduced to the web version recently. So, X users can now directly create Spaces as a host on PCs!

For hosts on both desktop and mobiles, X offers a built-in option to keep your Spaces recordings. However, if you are not a host but want to record the discussions you’re interested in, you’ll need to use a third-party recording tool.
In this ultimate guide, we’ll share some helpful recording options and break down the process of how to record Twitter Spaces as listeners or hosts on mobile and PC.
Let’s get started now!
X comes with a native Record Space option and you can see it when setting up a Space from a mobile app. Here is how to record X spaces as hosts on mobiles (Android and iOS) using the built-in feature:
Step 1. Start the X app on your phone.
Step 2. Long press on the post Compose button on your Home timeline and tap on the Spaces icon.
Step 3. Then on the pop-up window, set your target audience and name the topics. Toggle on the Record Space option.
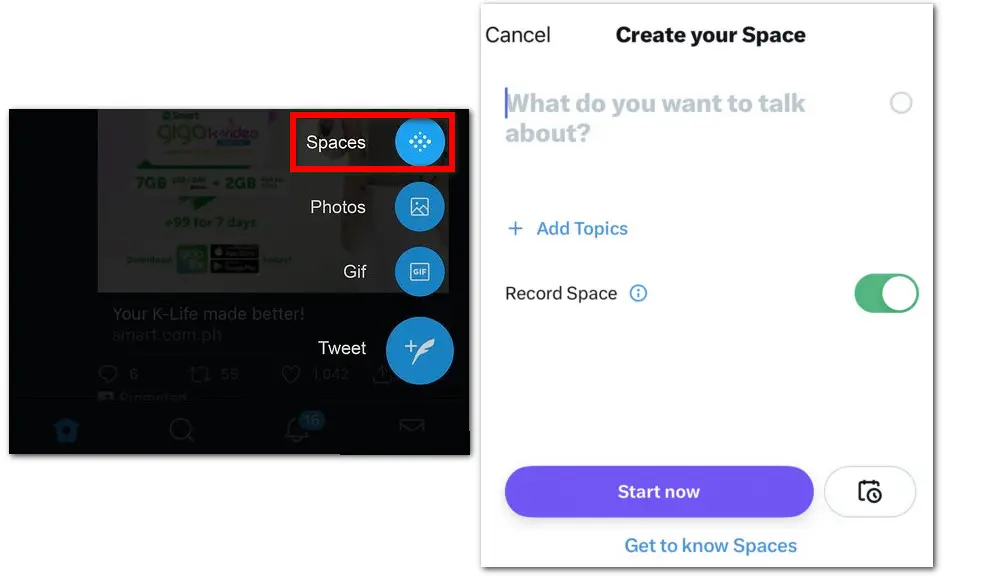
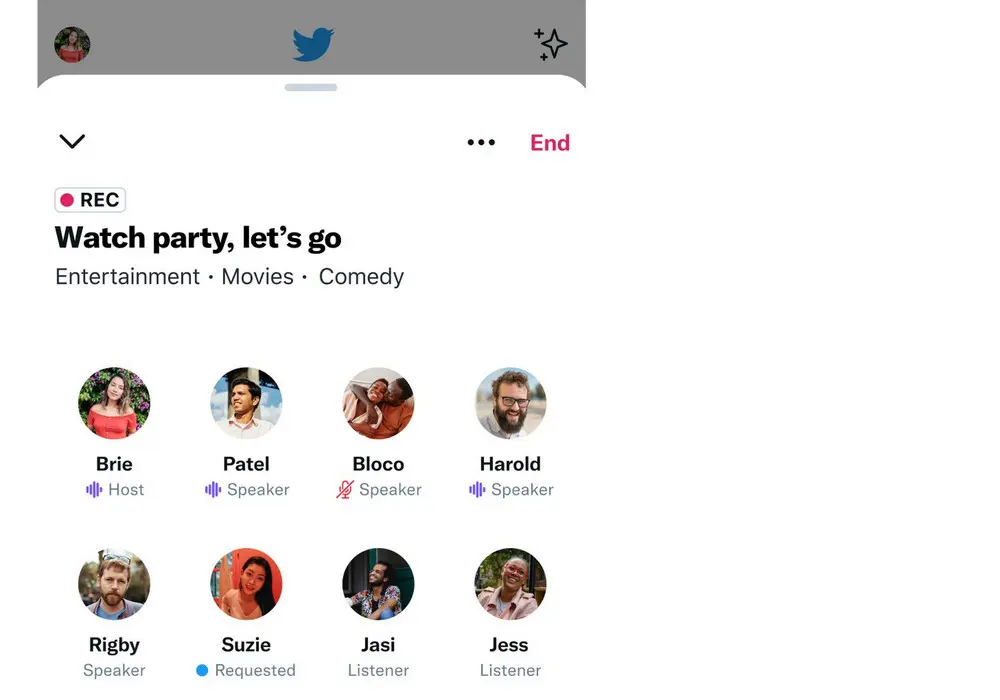
Step 4. Now, press Start your Space. While recording, everyone in the Space can see a red REC symbol appear on the top to indicate that the X Space is being recorded by the host. However, only the host, co-hosts, and speakers are visible in the final recording.
Step 5. Click the top right End button to finish it. Then you can directly tweet it as an X post or share the link with others absent from the live Space.
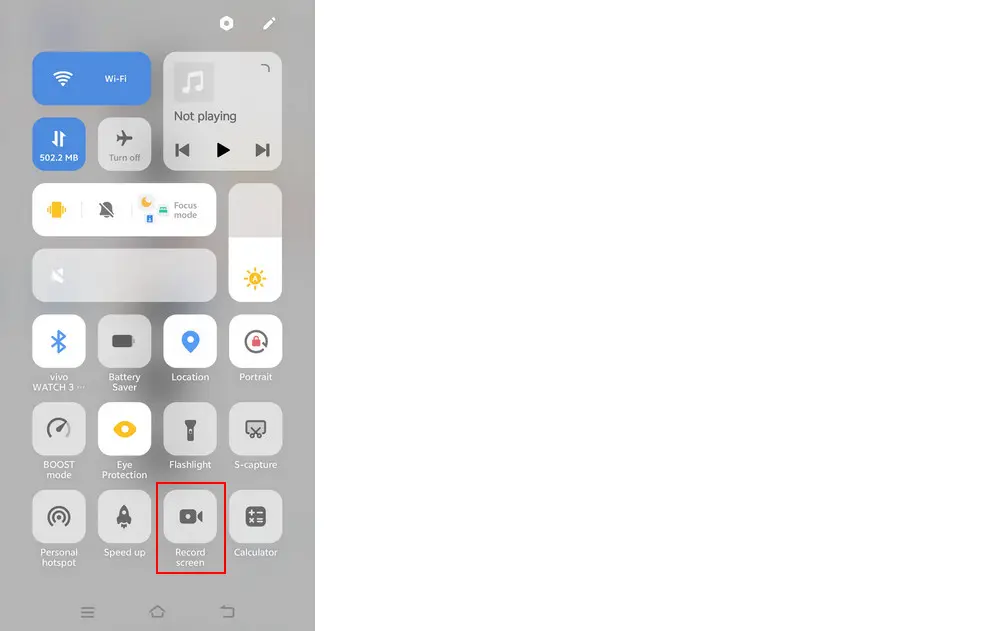
Thankfully, both Android and iOS phones come preloaded with a screen recording feature. This makes it simpler to record the live Space on the mobile app for non-hosts. Now, let’s get into it:
Thankfully, both Android and iOS phones come preloaded with a screen recording feature. This makes it simpler to record the live Space on the mobile app for non-hosts. Now, let’s get into it:
Step 1. After joining a live X Space, pull down the notification panel from the top of your Android device.
Step 2. Sometimes, you need to swipe the notification panel down once more to get the recording options in Quick Settings.
Step 3. Then, tap on the Record Screen icon to start recording the Twitter Space audio.
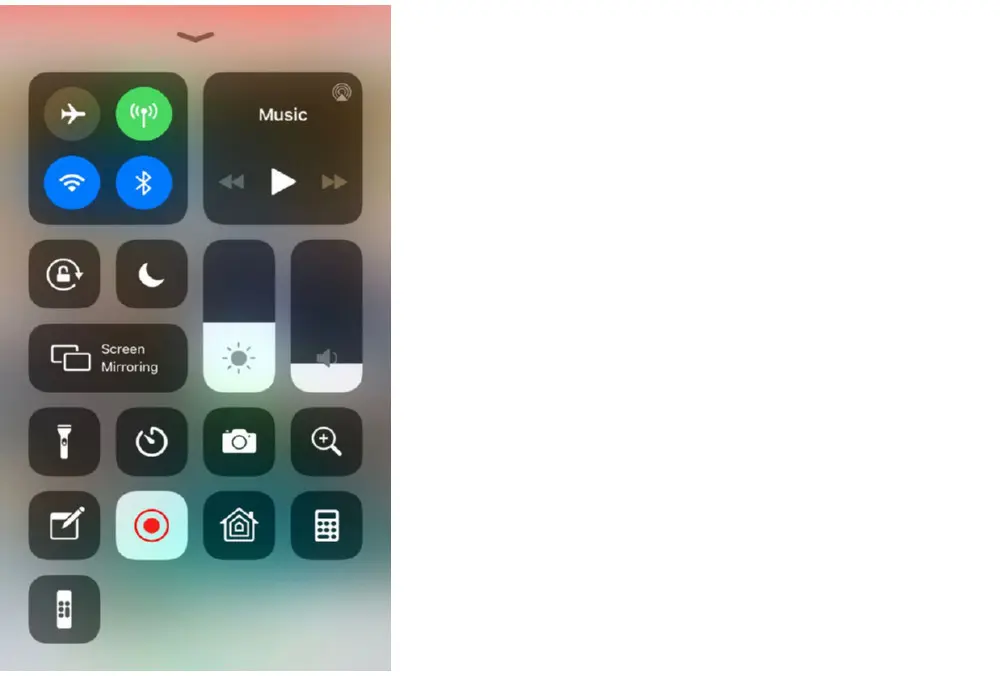
Step 1. To record Twitter Spaces as a listener on iPhones easily, you’ll first need to ensure that the default screen recorder is accessed within the Control Center.
Go to Settings > Control Center, then tap the Add button next to Screen Recording.
Step 2. Join the live Space you want to record. Swipe down from the top-right edge of your screen to open Control Center.
Step 3. Tap on the circular Screen Recording button and the recording will start after a 3-second countdown.
Step 4. To end it, tap the record button again.
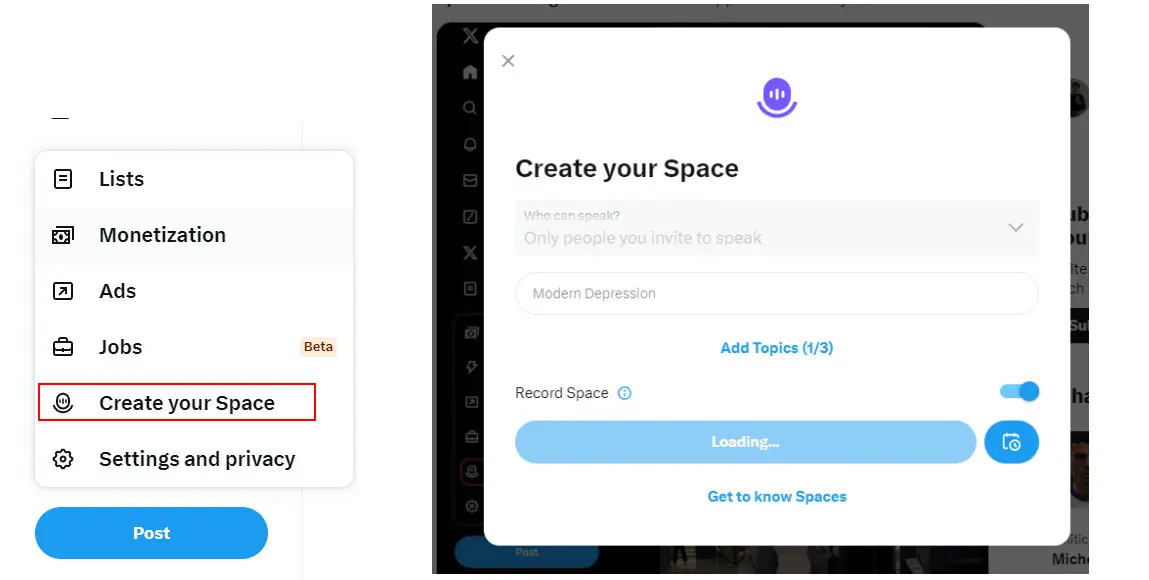
With the X’s latest update, users now can start Spaces and record them as hosts directly on PCs. Here are the instructions:
Step 1. Visit X website on your browser.
Step 2. Click on the More button above your profile and select Create your Space.
Step 3. Then, set Who can speak and the topics for your Space.
Step 4. Enable the Record Space option and click Start now.
Then a Space window along with a REC icon will pop up on the right side of your desktop. You can invite and manage your Space as you wish. Also, you can click the End button to finish it anytime you want.
If you’re a listener or speaker, you can use a dedicated audio recorder to capture the live Spaces you engage in. For Windows users, employing a versatile and strong recorder like WonderFox HD Video Converter Factory Pro, which can not only record audio but also capture videos along with rich features for post-production, is likely the most convenient option to record X Spaces. It lets you directly keep the Spaces audio recordings as .mp3, .wav, etc., files.
Follow these steps and learn how to record Twitter Spaces as listeners on Windows:
Step 1. Download and install WonderFox HD Video Converter Factory Pro on your Windows devices to get ready.
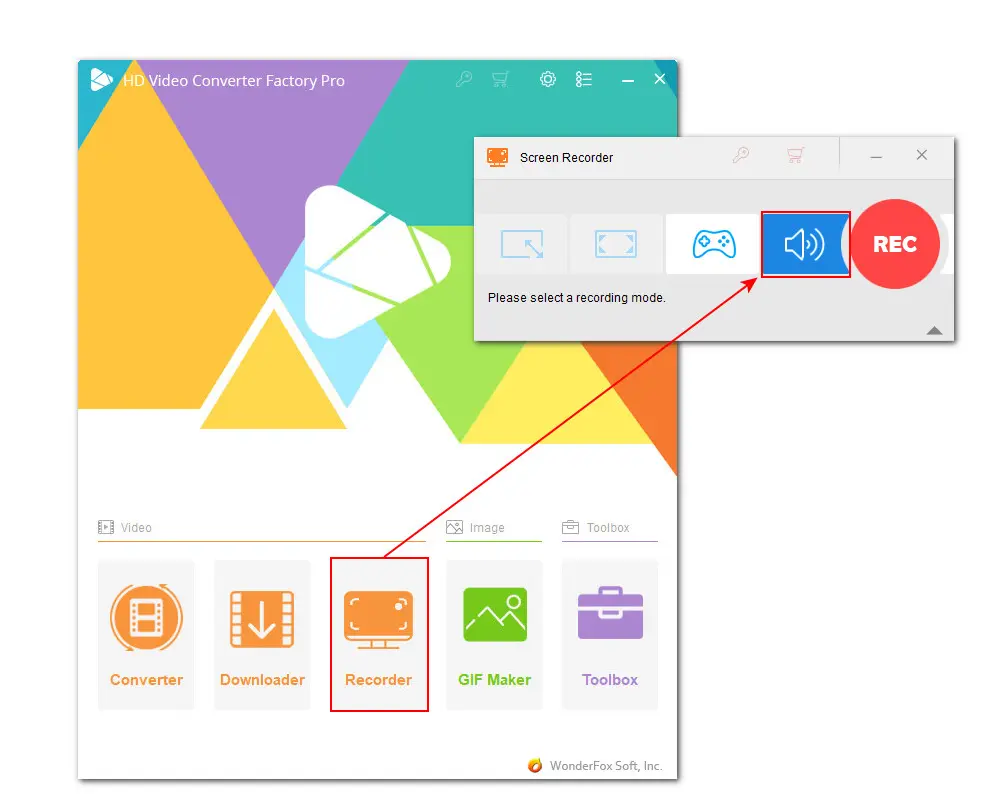
Step 2. Launch the program and enter the “Recorder” module from the home interface.
Step 3. Choose the fourth “Audio-only” option to activate the audio recorder.
Step 4. Next, choose an audio recording format from the “Format” drop-down list. Set the audio source you want to record.
Check “Desktop” if you just want to record other’s discussions in the live Space. Or, check both “Desktop” and “Microphone” if you’re a speaker and wish to include your voice as well.
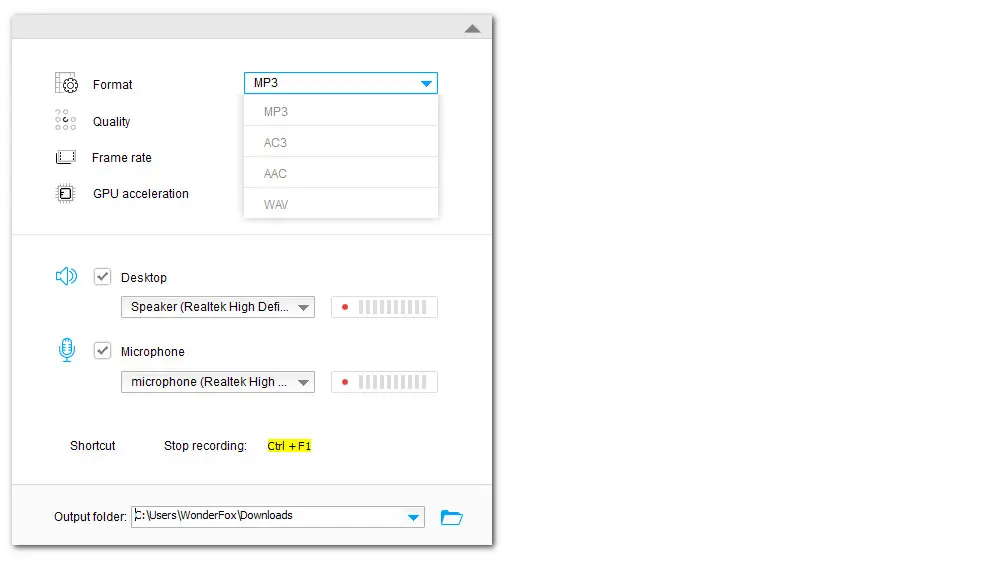
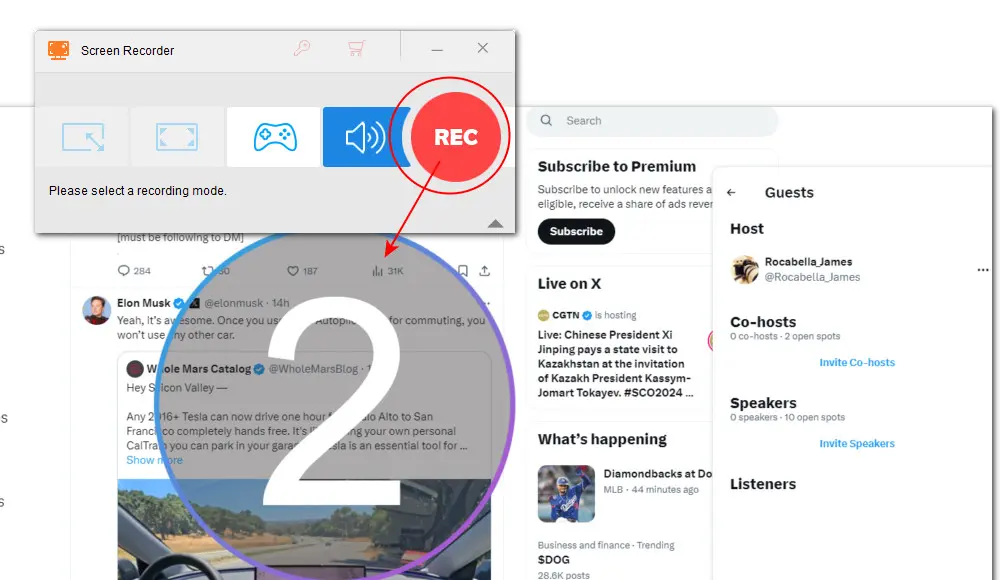
Step 5. Finally, click the ▼ button to set an output folder and hit the big red “REC” to start recording X Spaces after a five-second countdown.
When you’re done, press the hotkeys “Ctrl + F1” to stop it. The output folder will automatically pop up and you can check the recordings.
Yes. You can use its inbuilt recording option or choose a 3rd-party recorder to save the Twitter Spaces.
There are many recorders available to capture live Spaces on Twitter. For Windows users, we highly recommend WonderFox HD Video Converter Factory Pro. Also, you can try Audacity, Action!, or some browser-based audio recorders.
If you’re a host and enable the built-in recorder to save the Spaces audio, you can download the recording files by following these steps:
If the Space is being recorded, a recording icon will be visible throughout the entire session at the top-left of the screen for everyone in this Space.
WonderFox
HD Video Converter Factory Pro
This software is an all-in-one video converter for Windows. Besides recording screen activities, it can change the video formats, download, edit, and compress video/audio files, make GIFs and ringtones, extract subtitles… Get it now!
Terms and Conditions | Privacy Policy | License Agreement | Copyright © 2009-2025 WonderFox Soft, Inc. All Rights Reserved.