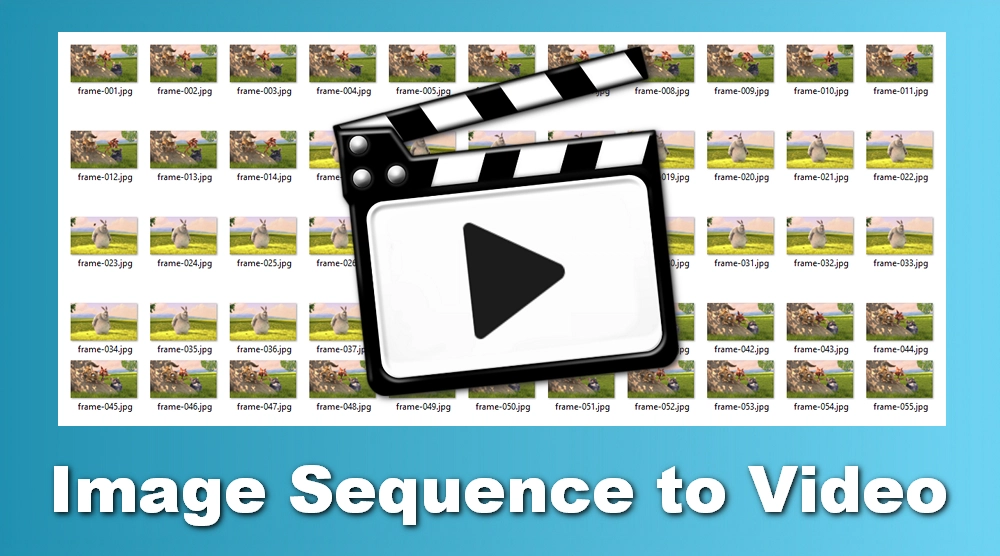
Today, there are many programs and tools that can help us edit videos to our liking. To turn image sequence to a video, I recommend you to try the following five options, which cover users of all skill levels. Just read and follow.
WonderFox HD Video Converter Factory Pro is a Windows application that focuses primarily on video and audio conversions. But it can handle image files as well.
Note that it cannot directly convert a series of images to a video, but instead requires GIF as an intermediate file to connect your images and your desired video file. In other words, this program needs to first convert your images to a GIF file, which is then converted to a video. That said, it is a simple process and you’ll be able to turn JPG, PNG, and other image files into MP4, MOV, MKV, and more hassle-free.
Step 1: Download Download the software on your PC and complete the installation. Then launch it.
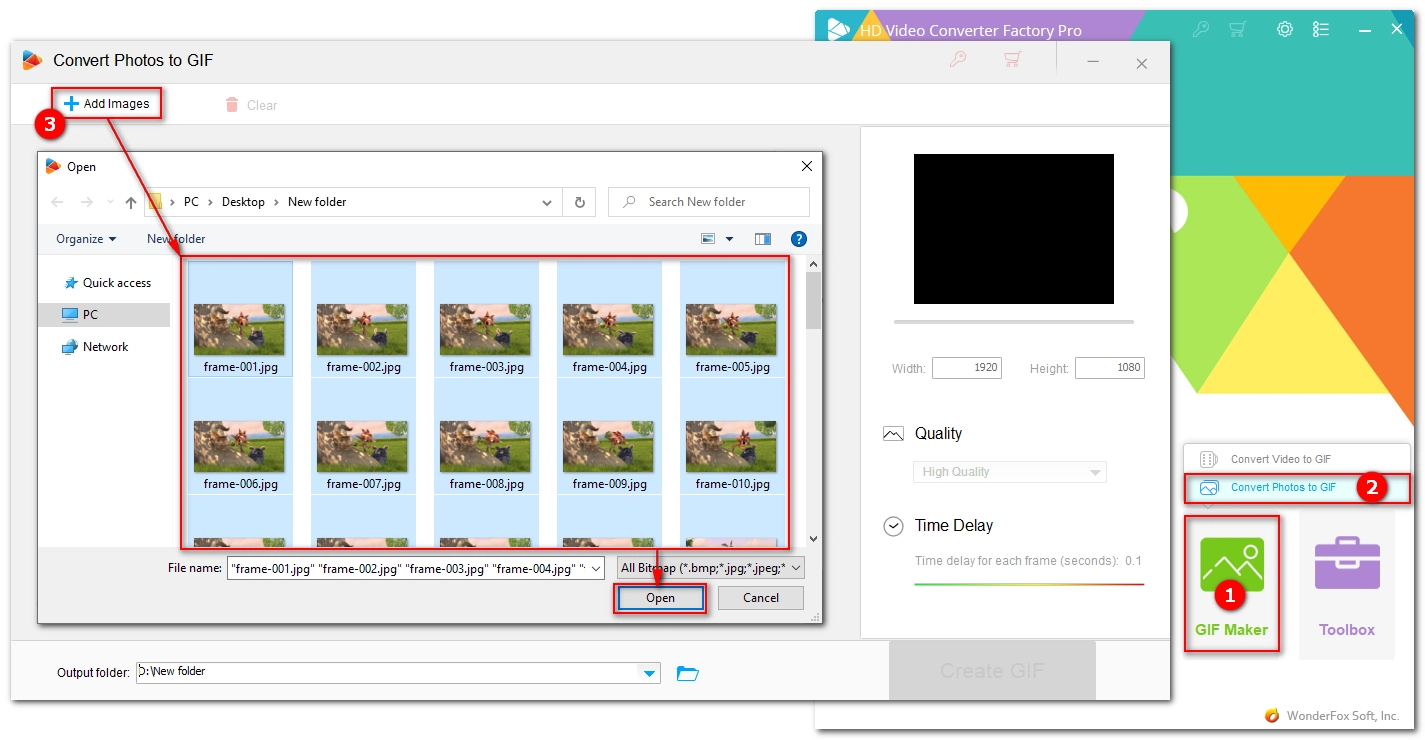
Step 2: Select GIF Maker > Convert Photos to GIF.
Step 3: In the GIF maker, click + Add Files in the upper left corner, locate and open the image sequence folder. Then press Ctrl + A to select all images and click Open to load the image sequence into the program.
Note: Make sure to name your images sequentially beforehand so that you can import them in the correct order. Once imported, the order cannot be changed.
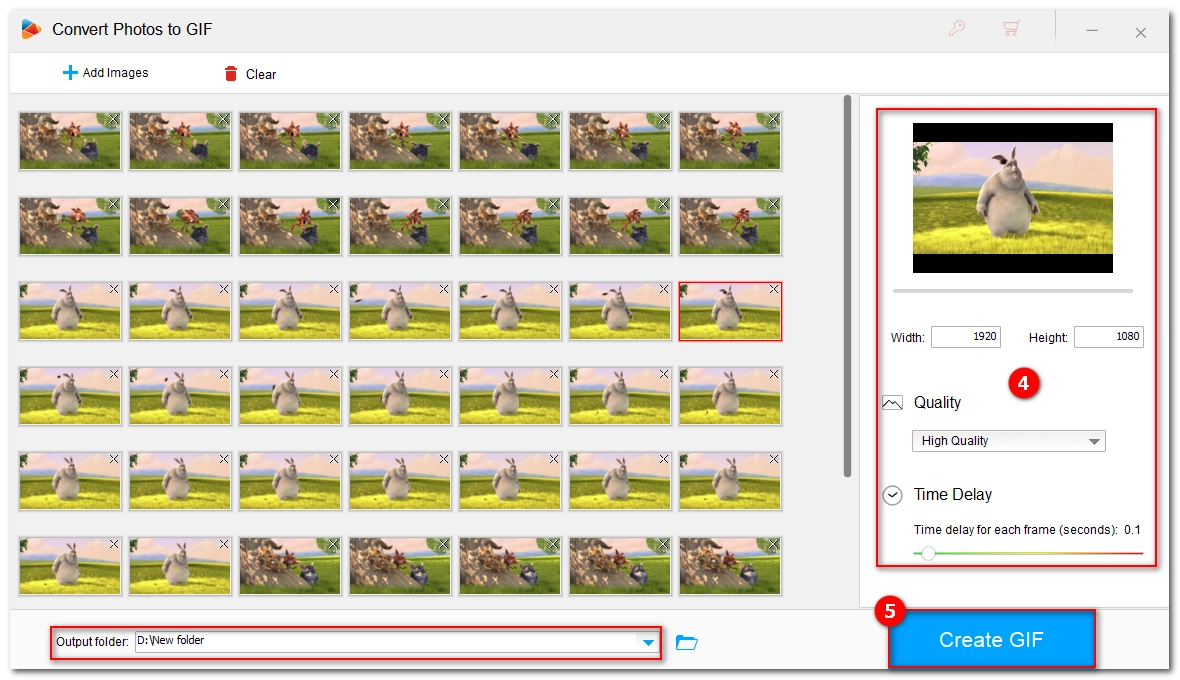
Step 4: Adjust the Width, Height, Quality, and Time Delay for the output file according to your needs. You can click the player window to preview the effect as you change these parameters.
Step 5: Specify an output folder at the bottom of the interface and click Create GIF to export the file.
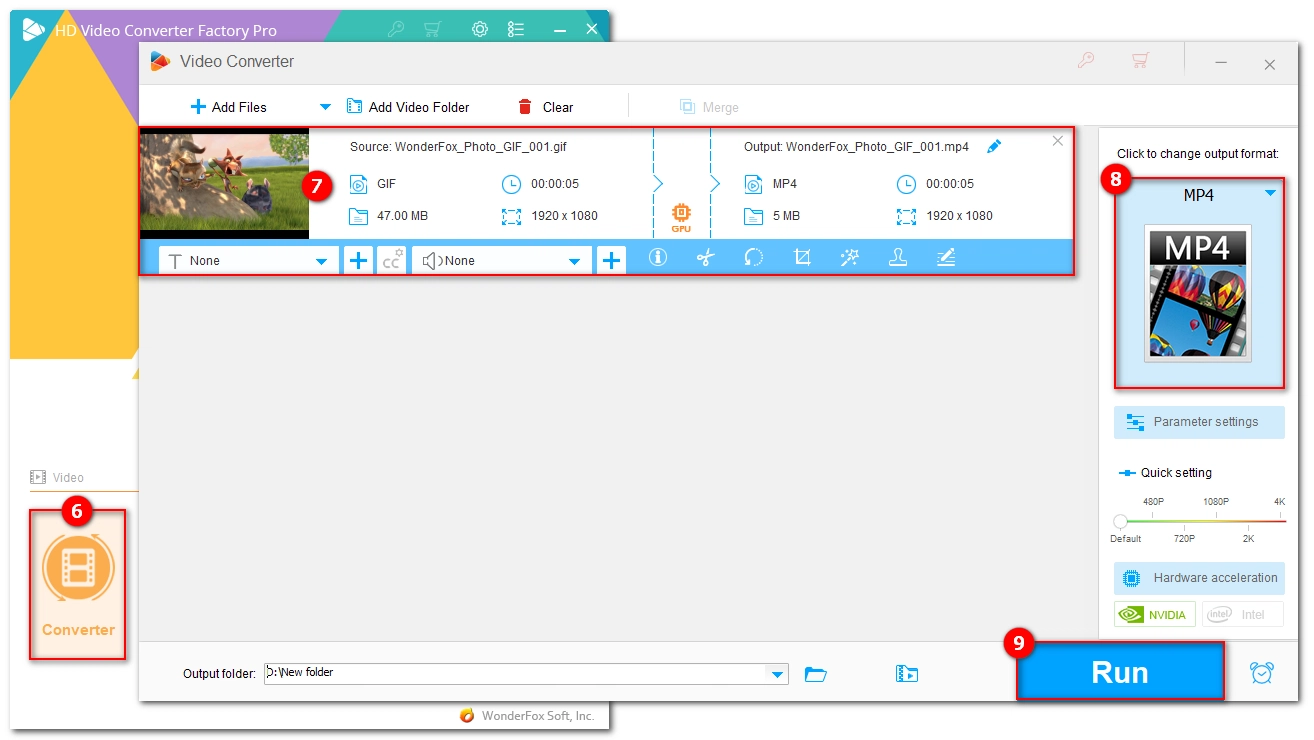
Step 6: Close the GIF maker program and open Converter.
Step 7: Drag the GIF file you just created into the interface.
Step 8: Click the format image on the right and select a desired video format.
Step 9: Click Run to finish the image-sequence-to-video conversion.
Mac users can take advantage of the built-in QuickTime Player app to convert PNG sequence to a video. This requires no in-depth knowledge and can be done in a couple of clicks.
Step 1: Start QuickTime Player on your Mac.
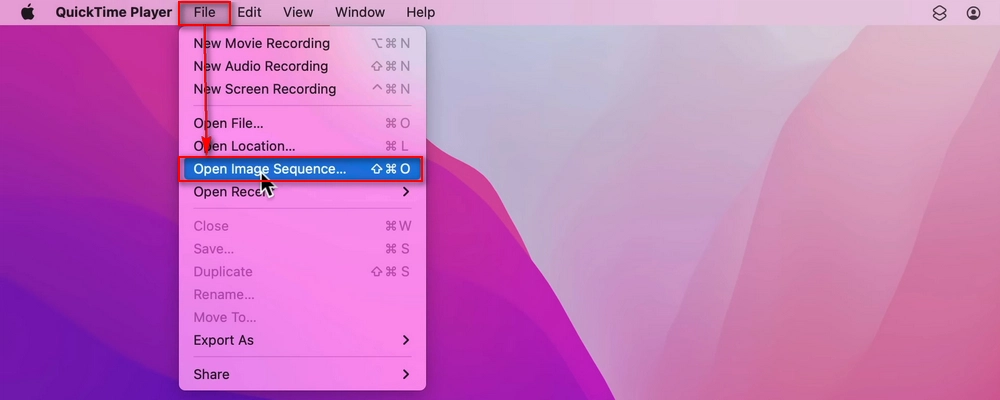
Step 2: Go to File > Open Image Sequence. Then open the folder where the images are saved and press the Command + A keys to select all items. Click Choose media.
Note: It is recommended that you place all images in order in a folder in advance.
Step 3: Modify the resolution, frame rate, and encoding method as needed. Then click Open. This will open the image sequence as a video.

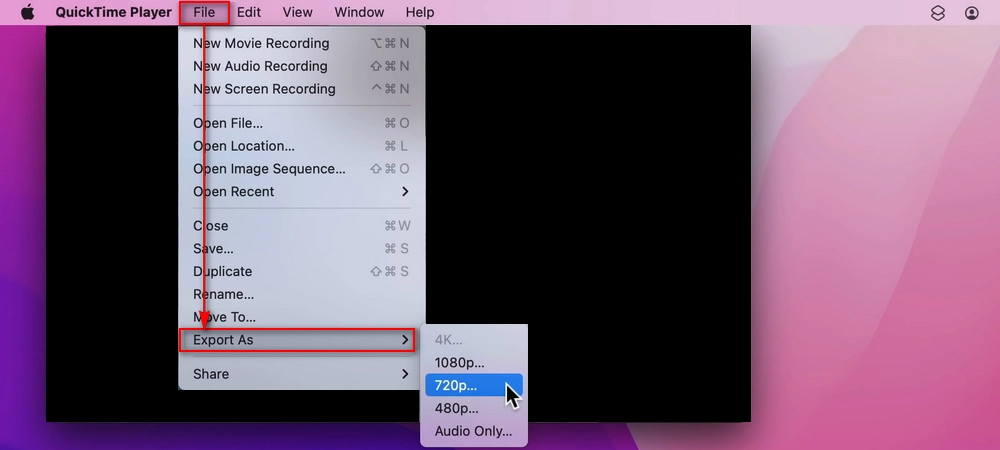
Step 4: Click File > Export As, then choose a quality.
Step 5: Change the save location and codec, and click Save to export the video file.
Blender is a free, cross-platform, and open-source 3D creation software that offers a wide array of visual-related features, including making animations, such as from image sequences. It supports common PNG, JPEG, WebP, BMP, and TIFF as well as some other less common formats. Additionally, it lets you import hundreds or thousands of images at a time for seamless conversion.
Blender is a bit challenging for beginners. But don't worry. With the steps below, you can turn frames into videos without any problem.
Step 1: Download the latest version of Blender from https://www.blender.org/ and install it on your computer.
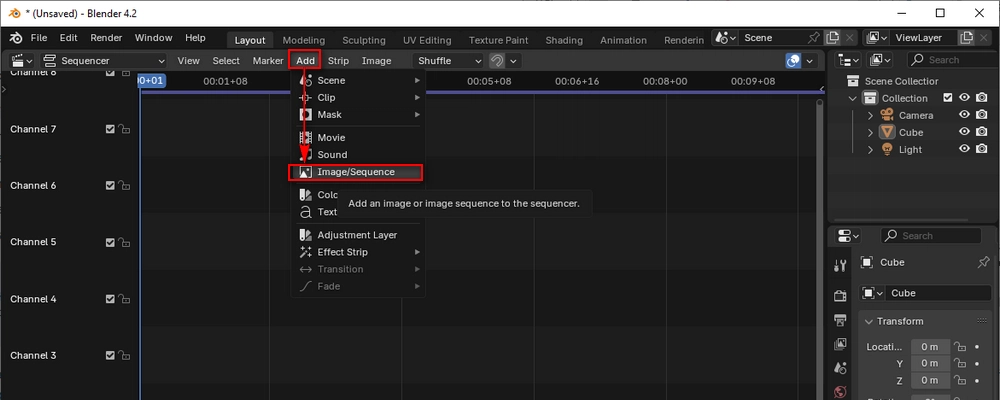
Step 2: Open Blender. Go to the Editor Type in the upper left corner and select Video Sequencer.

Step 3: Click Add on the top menu bar and select Image/Sequence.
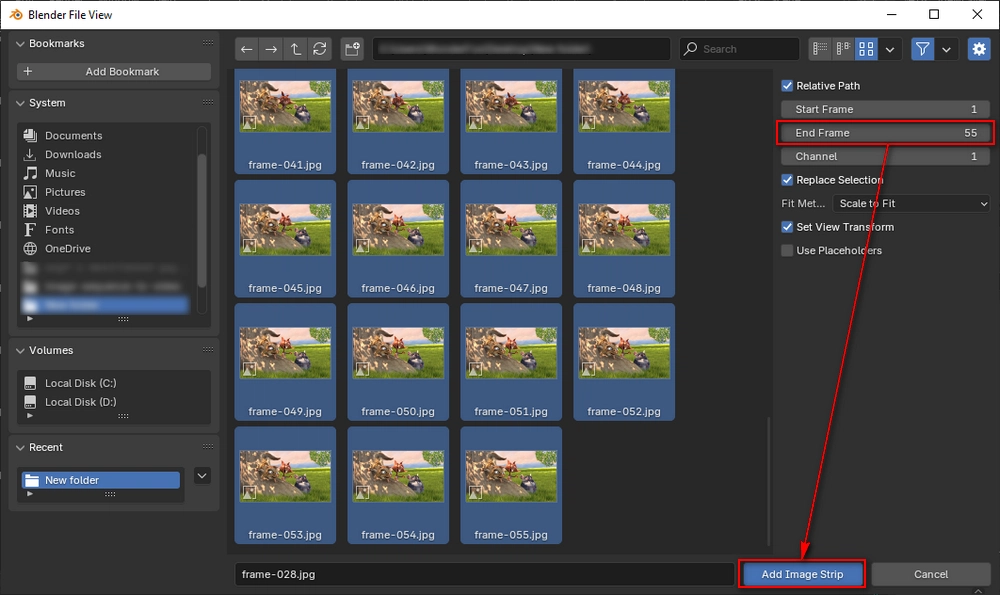
Step 4: In the window that opened, open the folder where the image sequence is saved. Then press A to select all items.
Next, type the total number of the images in the End Frame box and click Add Image Strip at the bottom.
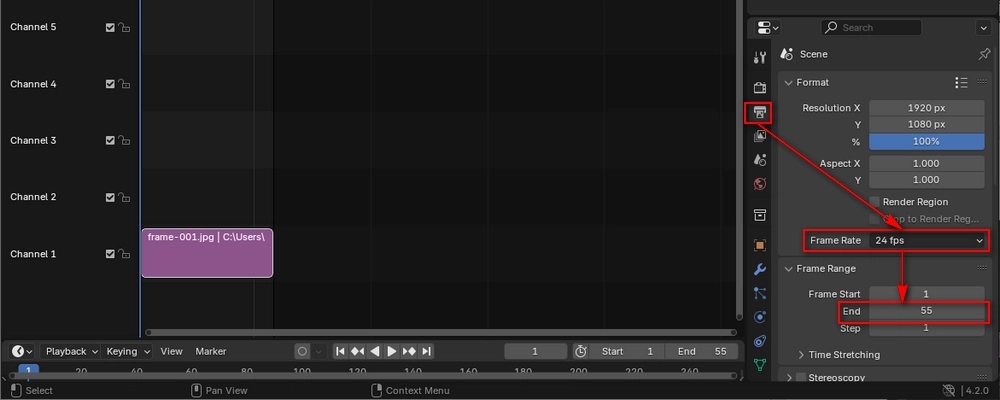
Step 5: Click the Output tab on the right-side panel. Adjust the resolution and frame rate according to your needs. Then in the Frame Range section, change the End value to the total number of images.
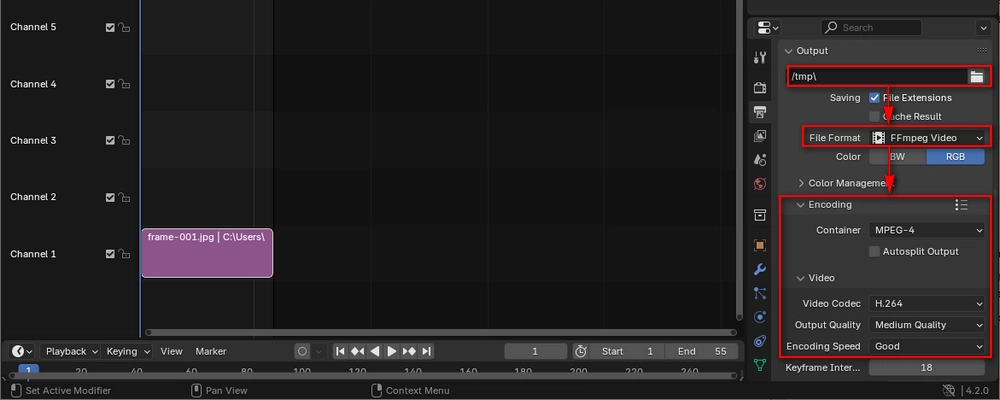
Step 6: Scroll down to the Output section, click the folder icon and select an output folder. Then expand the File Format drop-down list and select FFmpeg Video.
Step 7: Expand Encoding and choose a desired container. Then specify the video codec, output quality, encoding speed, etc. as you see fit.
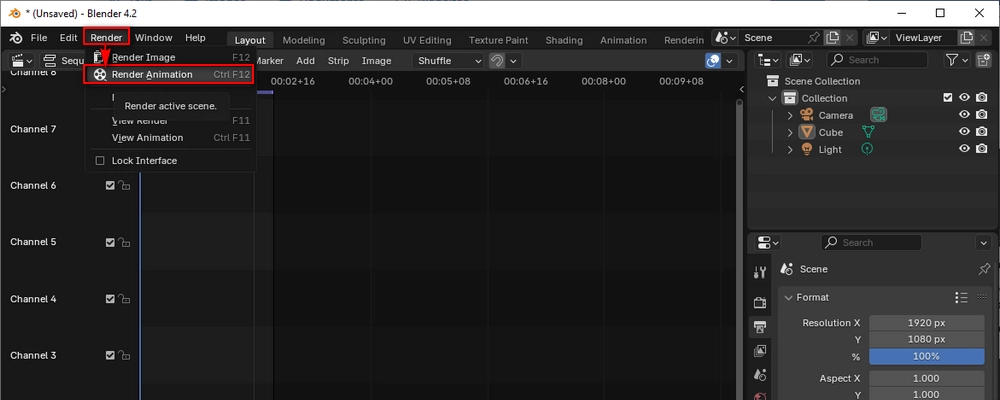
Step 8: On the top menu, click Render > Render Animation. This will convert your image sequence to a video automatically.
Step 9: Open the output folder and you can view the converted video file.
For those who are familiar with the command line, they can quickly use the command line tool FFmpeg to convert any image sequence to a video file. The program is very flexible and you can customize the encoding settings to your liking. But it requires a steep learning curve. For basic image to video conversion, follow the steps below.
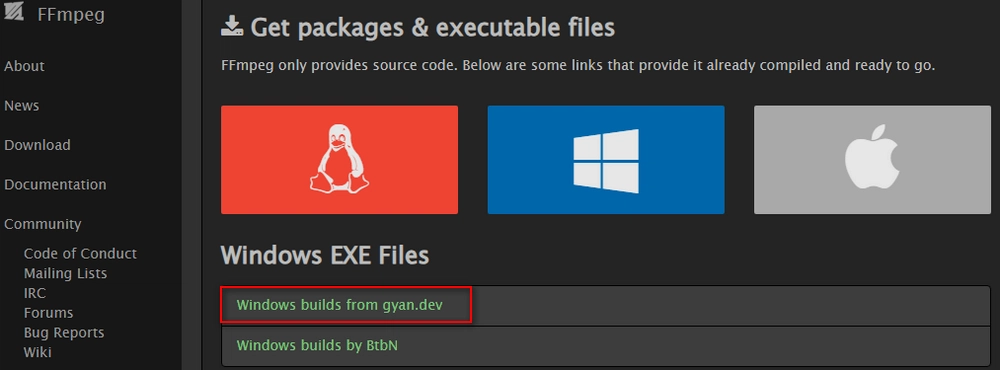
Step 1: Download FFmpeg from the official website https://www.ffmpeg.org/download.html. Here takes Windows builds from gyan.dev full version as an example.
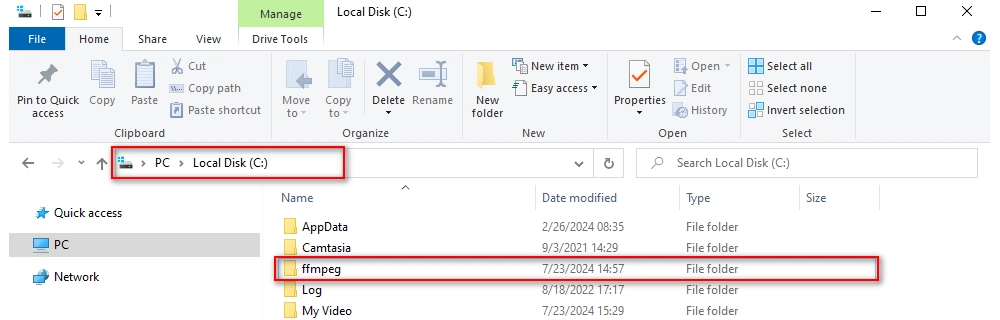
Step 2: Extract the zip file and rename the folder as ffmpeg.
Step 3: Cut the ffmpeg folder and paste it in the root directory of the C: drive.
Step 4: Type “environment” in your Windows search bar and open Edit the system environment variables.
Step 5: Click Environment Variables…
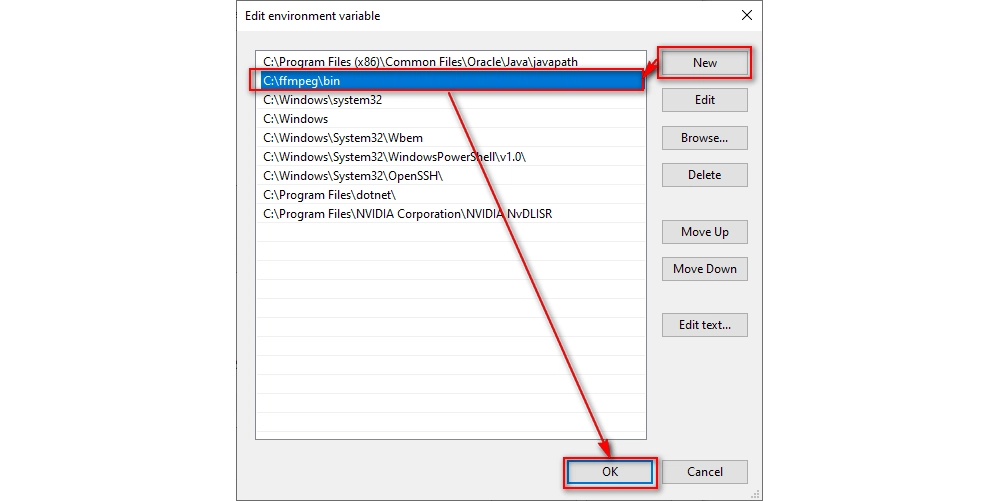
Step 6: In the System variables section, select the Path variable and click Edit…
Step 7: Click New and enter C:\ffmpeg\bin. Then click OK.
Step 8: Type “cmd” in the Windows search box and open Command Prompt. Then enter ffmpeg to see if ffmpeg is up and running.
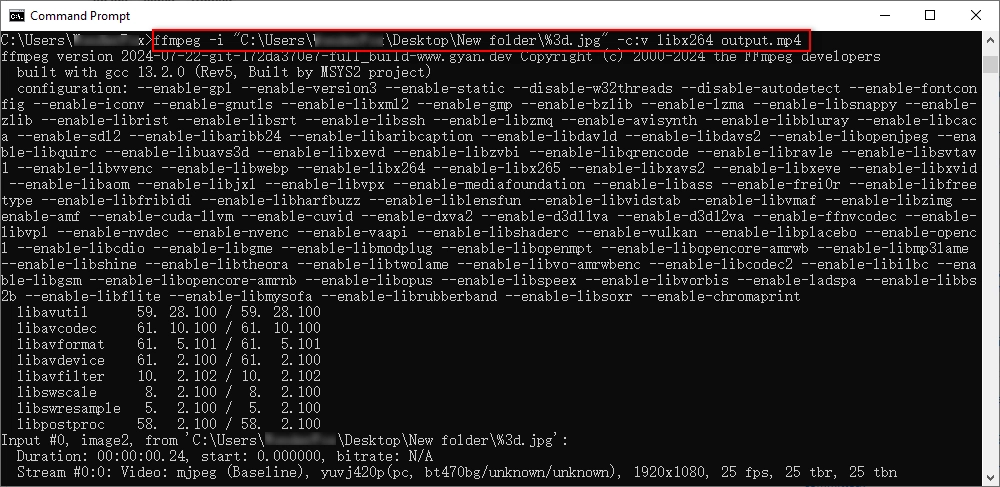
Step 9: Now, type the following command
ffmpeg -i "PATH\%3d.jpg" -c:v libx264 output.mp4

NOTE:
1. PATH should be replaced with the real path of your image sequence folder. You can open the folder in File Explorer, then click the path box and copy the full path.
2. %3d means a file name with 3 digits. You should first rename your image files as 001.jpg, 002.jpg, etc.
You can even convert an image into a video without software. The tool you’ll need is a web-based service like Clideo. This website provides the opportunity to convert image sequence to video online for free. Moreover, no sign in or payment is required.
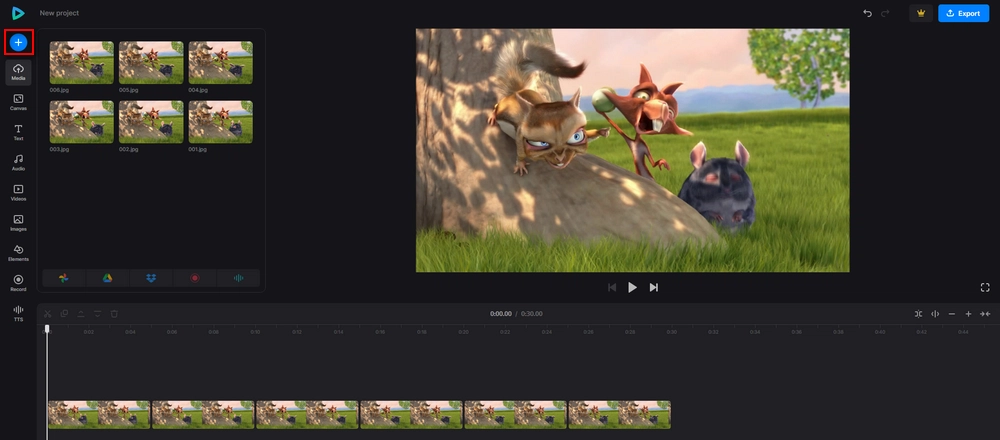
Step 1: Visit https://clideo.com/image-sequence-to-video and click Get started.
Step 2: Click the + button on the left and upload the image sequence to the site. The files will be imported onto the timeline at the same time.
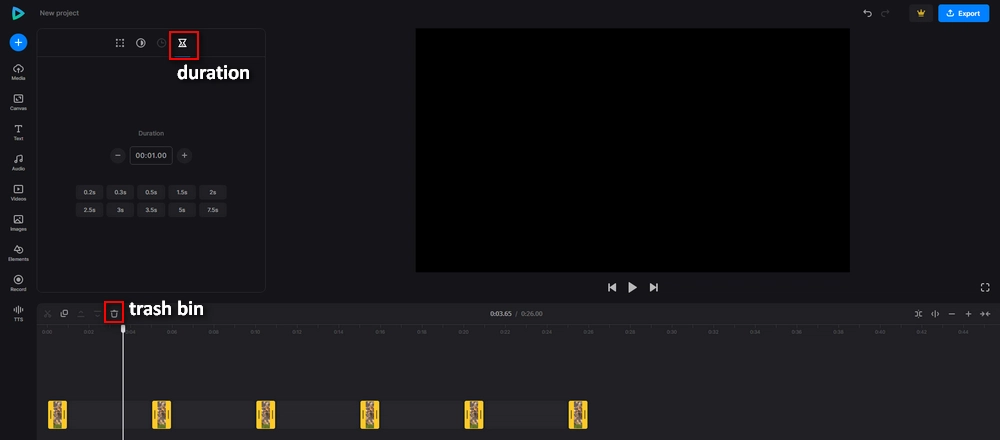
Step 3: Select all the frames on the timeline and then click the Duration button. Adjust the duration time as needed.
Step 4: Click the blank clips and then the trash bin to delete them.
Step 5: Click the Export button in the upper right corner, select a quality and click Continue. It will start exporting the image sequence to a video file.
Step 6: Click Download to save the final file to your device.
Converting image sequence to video is easy with the right tools and you'll find a method that works for you in this article, such as WonderFox HD Video Converter Factory Pro and QuickTime Player for beginners, Blender for intermediate users, and FFmpeg for advanced users. Alternatively, if you don't want to install any software, you can use an online service like Clideo.
That’s all I want to share in this article. I hope these methods are useful to you. Thanks for reading. Have a good day!
You can convert a sequence of images into a video using a number of different tools. For starters, WonderFox HD Video Converter Factory Pro is a good choice. It can convert the images into a GIF file first, and then convert that GIF into a video format like MP4. Alternatively, you can use QuickTime Player on Mac, which allows you to open an image sequence and export it as a video.
WonderFox
DVD Ripper Pro
Unleash the power of WonderFox DVD Ripper Pro, your go-to solution for converting DVDs—whether homemade or commercial—into popular formats like MP4, MKV, and MP3. Experience efficient editing and compression for top-notch results. Download now and transform your DVDs with ease!


Terms and Conditions | Privacy Policy | License Agreement | Copyright © 2009-2025 WonderFox Soft, Inc. All Rights Reserved.
