How to & Tips
![]() Convert Video
Convert Video

![]() Convert Video
Convert Video
![]() by Kevincy
by Kevincy
Updated on July 13, 2023
It is obvious that Kodi will get a little bloated and obtuse after a period of use over time. So the maintenance tools are necessary for people who want to clean and optimize Kodi, and Indigo is a recommended add-on to hit the mark. In the following article, I'll make an elaborate on how to install Kodi Indigo add-on with pictures.
Just as computers, tablets and smartphones need to be cleaned up and optimized on a regular basis, Kodi needs to be fairly treated as well, otherwise it will inevitably result in a series of annoying problems, such as slow, jammed, stuck issues, etc. However, Kodi haven't officially provided a feature to solve them in every respect so far. So you may turn to some third-party add-ons.
Indigo is a superior maintenance kit for Kodi, which offers a range of practical features to fixes frustrating errors, crashes, freezes and improve your Kodi performance. But there is a prerequisite that you're supposed to have Fusion Repository installed on Kodi. Now I'll compile how to install Kodi Indigo add-on in the following part.
Tips: The following demonstration is based on Kodi Leia. If you're using an old version, to keep in step with the tutorial, please update your Kodi.
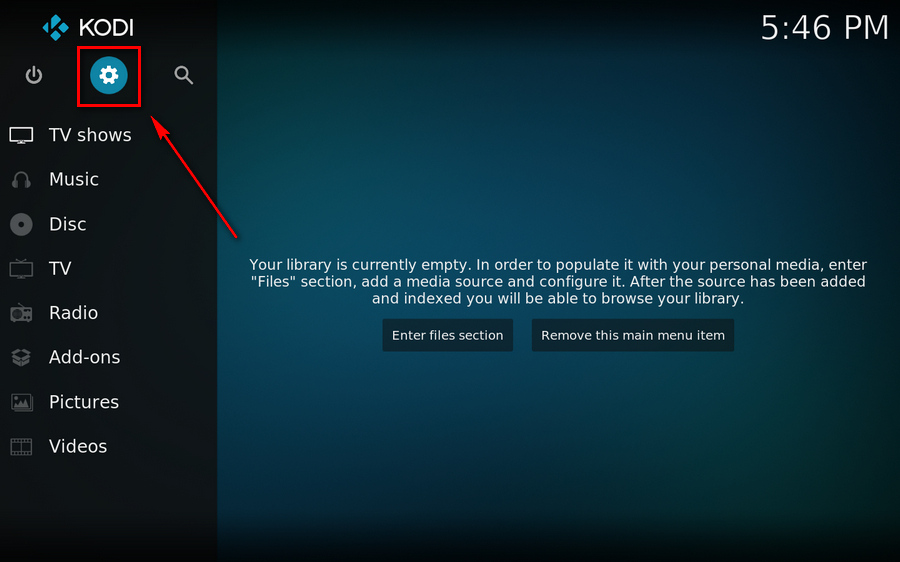
Step 1. Launch Kodi, click on or tap gear icon in the upper left corner of the Home screen.
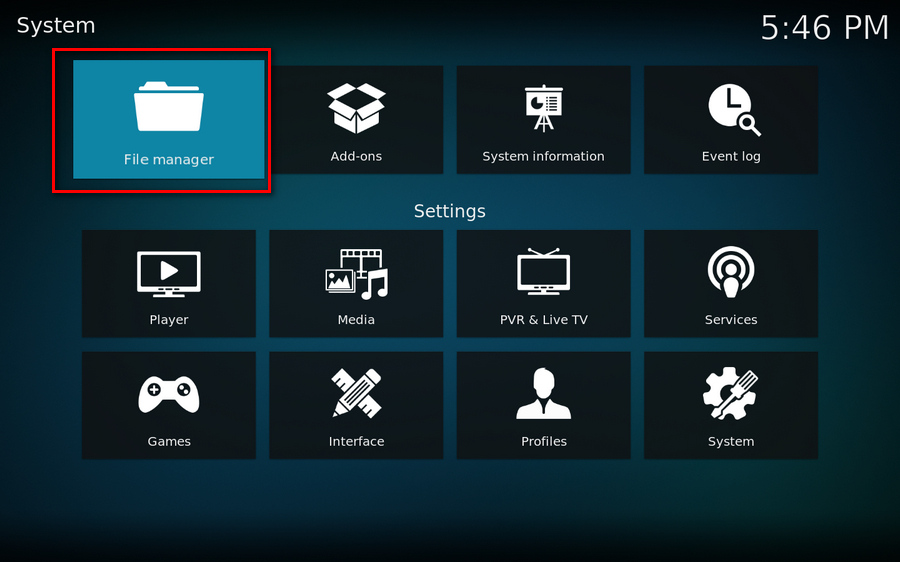
Step 2. On the System window, go to "File manager" category.
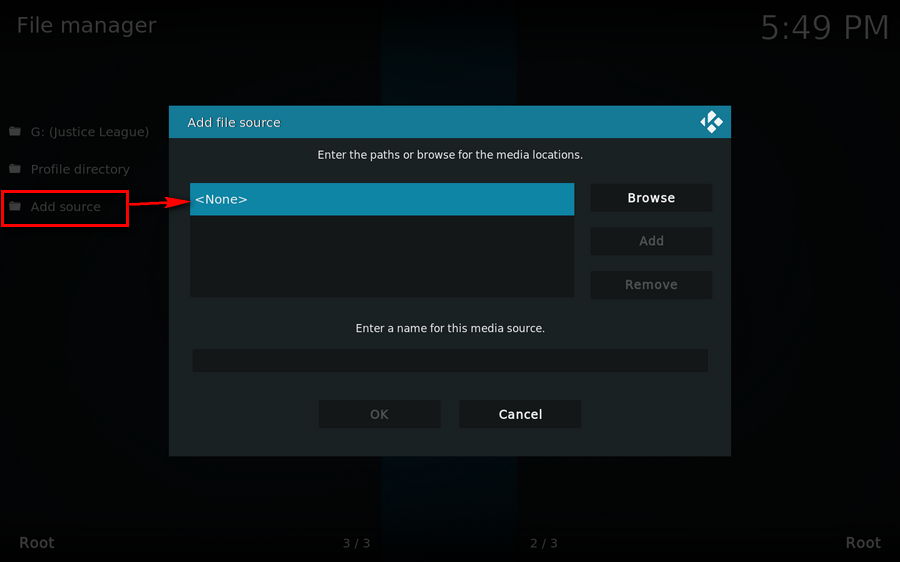
Step 3. Select "Add source" and double click on
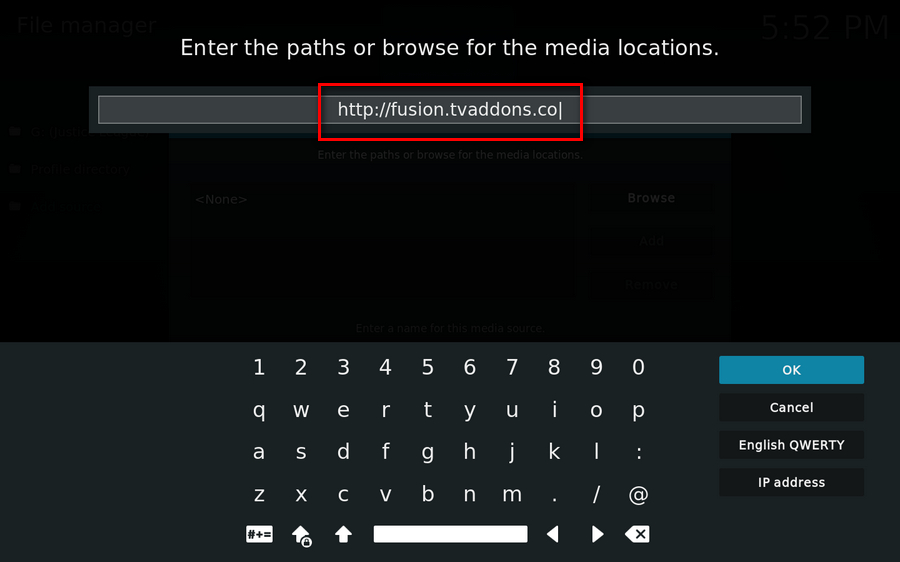
Step 4. Input "http://fusion.tvaddons.co" using the pop-up keyboard, or just copy and paste it into the location box. Then click OK.
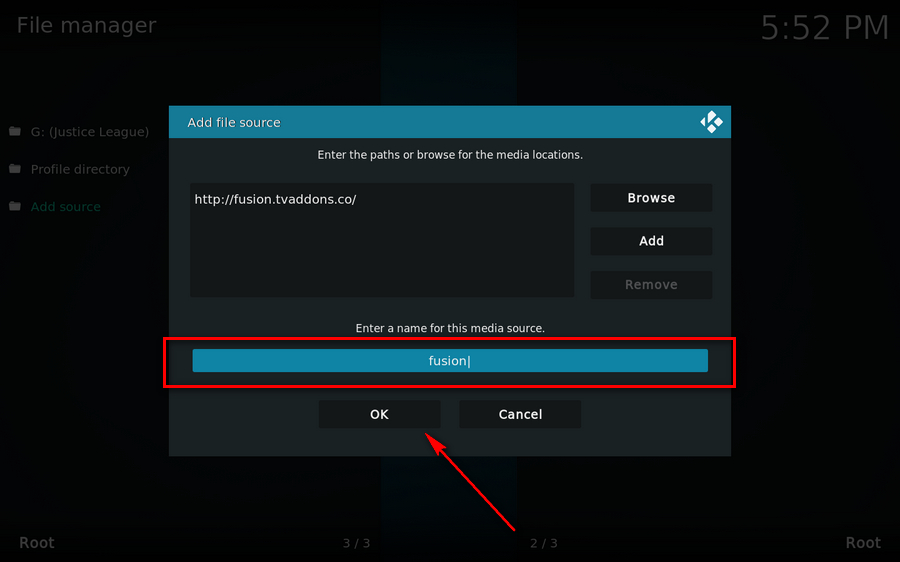
Step 5. Likewise, input a name for this media source and press OK. You'll find there is a new folder listed afterwards.
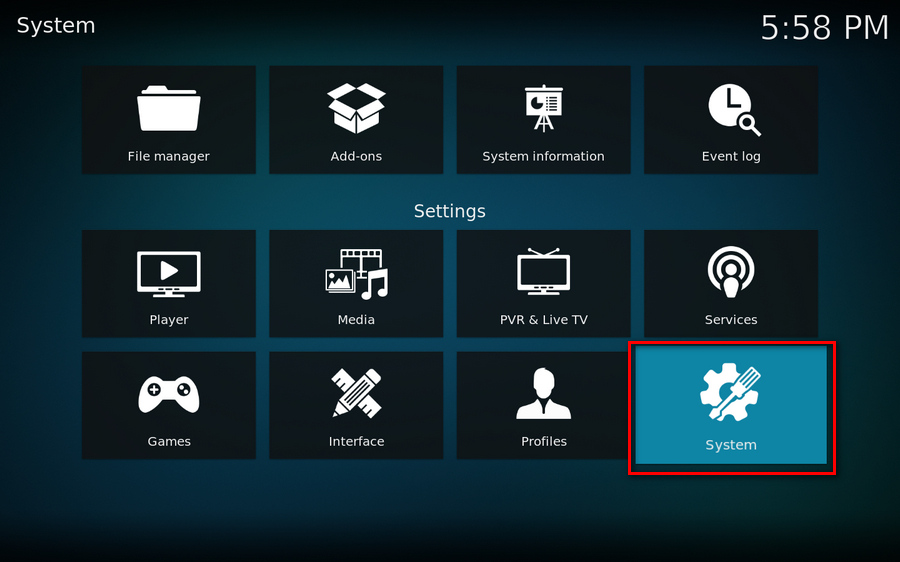
Step 6. Go back to Settings interface and select "System" category.
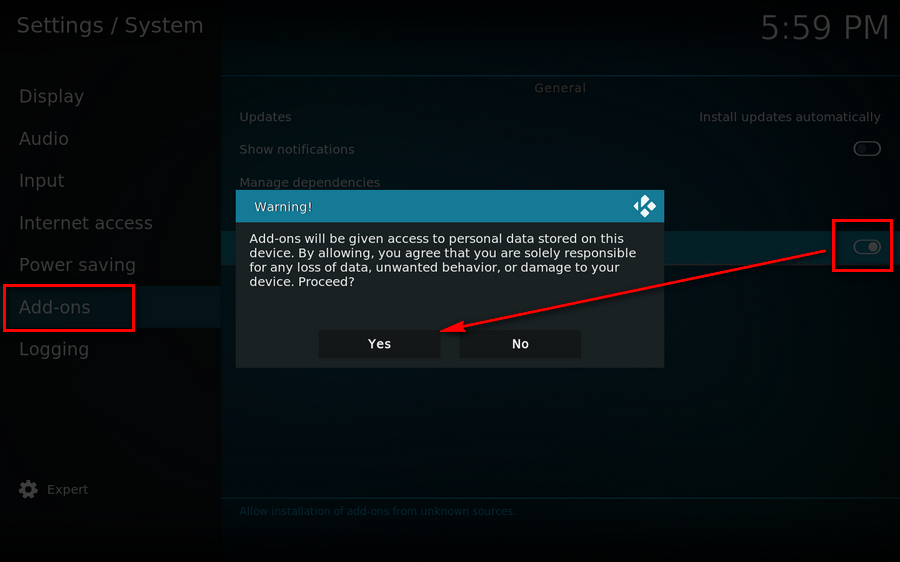
Step 7. Hover your mouse over "Add-ons" on the left sidebar, and switch on "Unknown sources" option.
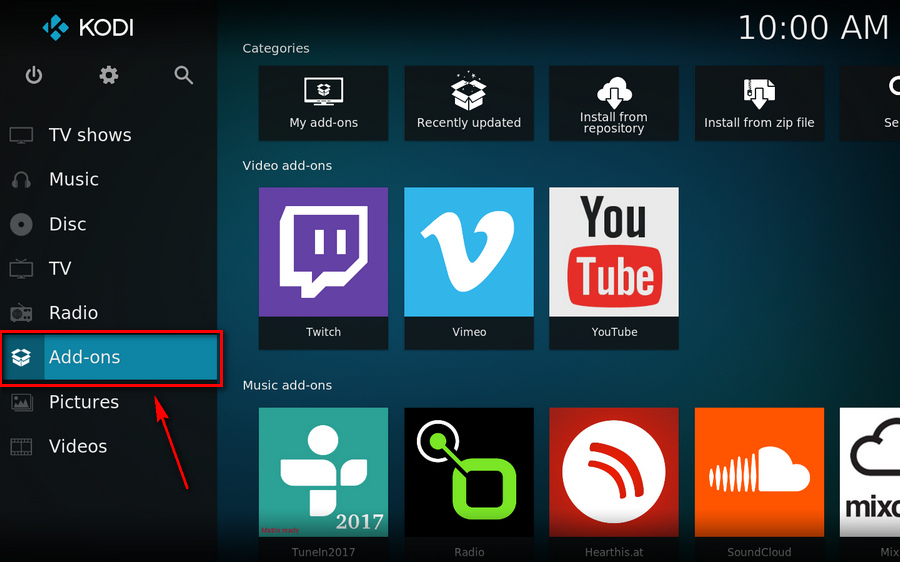
Step 8. Return Home screen and press Add-ons on the left sidebar.
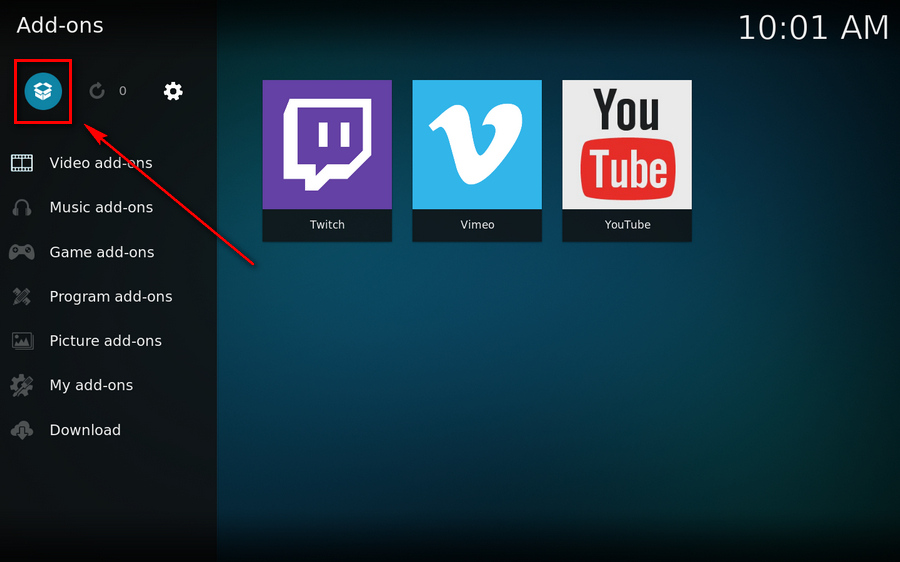
Step 9. Click on the opened box icon and get into the "Add-on browser"
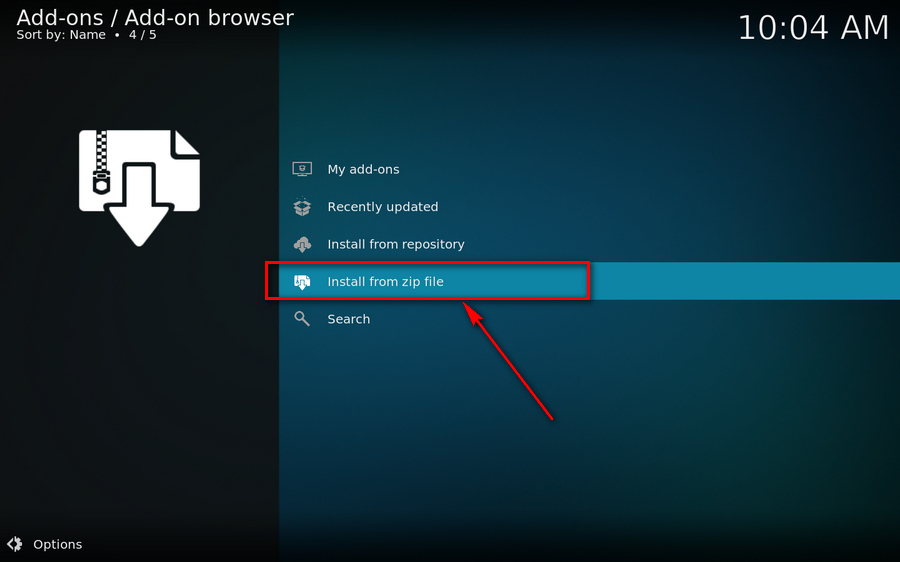
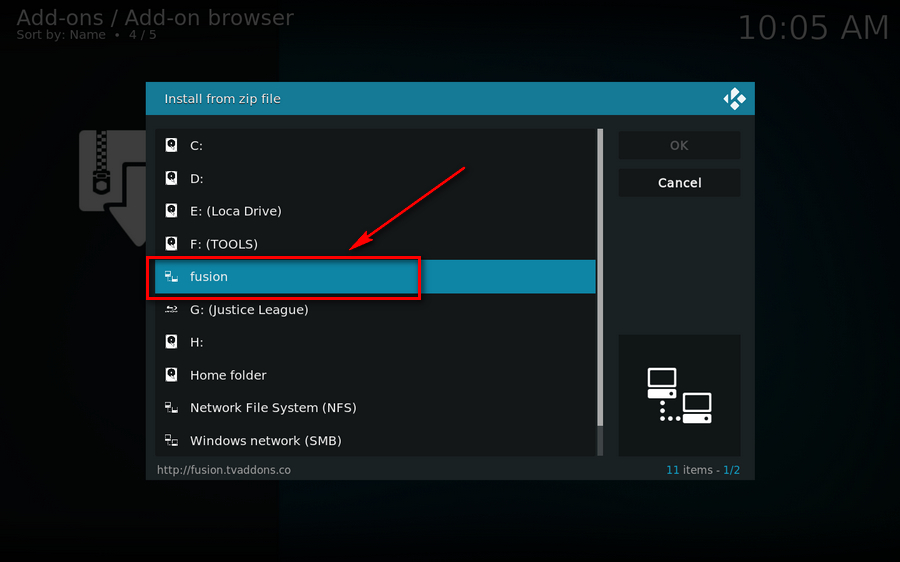
Step 10. Select "Install from zip file" option.
Step 11. Double click on "fusion" media source, then go to "begin-here" folder.
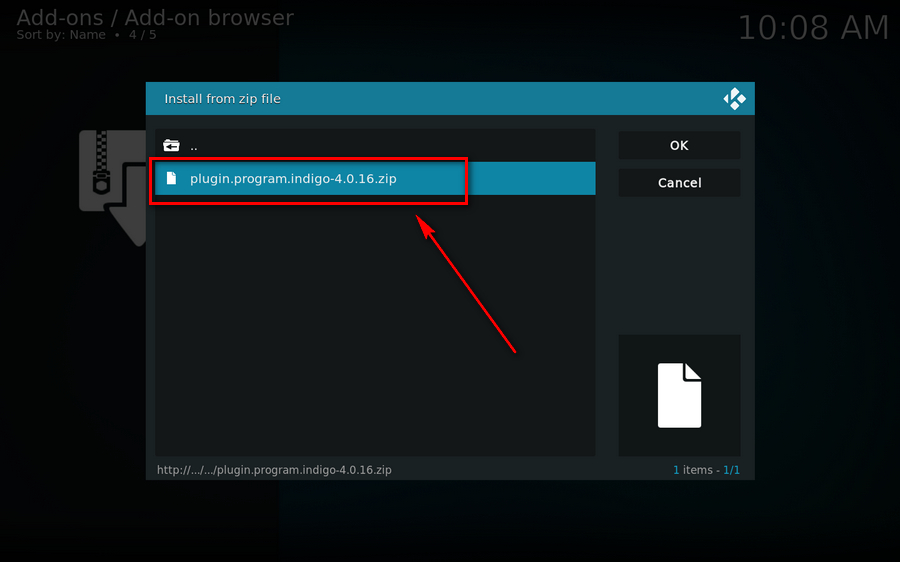
Step 12. Then you'll see the "plugin.program.indigo-x.x.xx.zip" file right there, select it and press OK. Kodi will download and install Indigo add-on automatically. Alternatively, you can download Indigo ZIP file beforehand via http://fusion.tvaddons.co/begin-here/, so that you can directly install the add-on from this ZIP file.
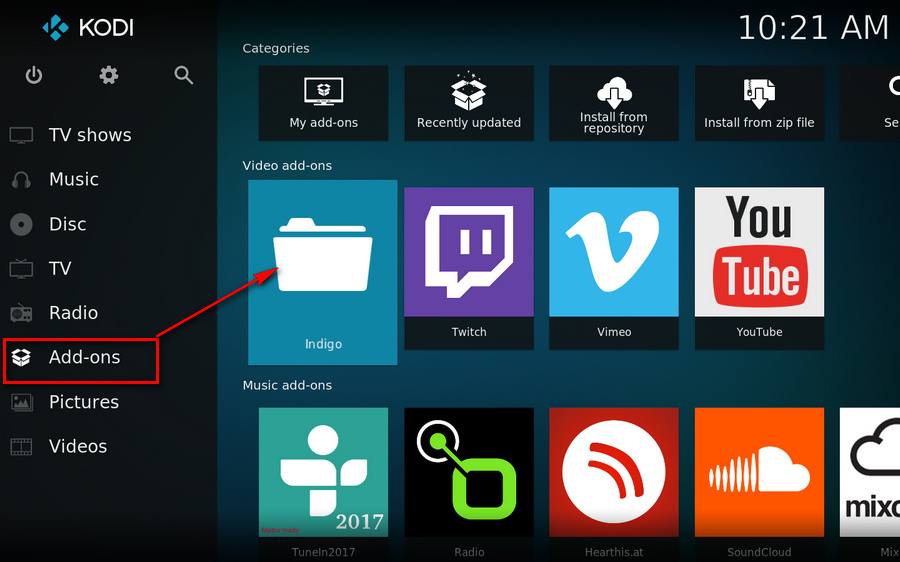
Step 13. You'll be prompted that Indigo has been installed after that. Go back to Home screen, hover your mouse over Add-ons, you'll find Indigo on the right side under "Video add-ons" category.
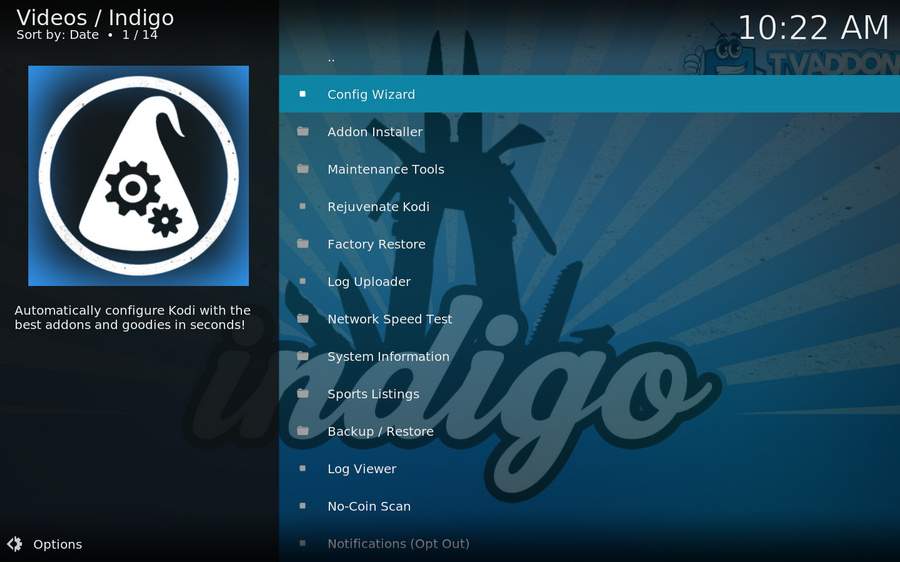
Step 14. Run Indigo, it will download icons and initialize settings for the first time. Then it will list all features: Config Wizard, Addon Installer, Maintenance Tools, Rejuvenate Kodi, Factory Restore, Log Uploader, Network Speed Test, System Information, Sports Listings, Backup / Restore, Log Viewer, No-Coin Scan, Notifications (Opt Out), Show Notification. That's all about installing Indigo for Kodi. Now enjoy Indigo and keep your Kodi running smoothly.